
The Netcat utility program supports a wide range of commands to manage networks and monitor the flow of traffic data between systems. Computer networks, including the world wide web, are built on the backbone of the Transmission Control Protocol (TCP) and User Datagram Protocol (UDP). Think of it as a free and easy companion tool to use alongside Wireshark, which specializes in the analysis of network packets. The original version of Netcat was released back in 1995 and has received a number of iterative updates in the decades since.
Download the full Netcat cheatsheet
- Shell Scripting with Netcat
- Launching Reverse (Backdoor) Shells
- Printable Netcat Cheat Sheet
- Additional Netcat Resources
What is Netcat Used For?
Netcat can be a useful tool for any IT team, though the growth of internally managed network services and cloud computing make that particular environment a natural fit. Network and system administrators need to be able to quickly identify how their network is performing and what type of activity is occurring.
Netcat functions as a back-end tool that allows for port scanning and port listening. In addition, you can actually transfer files directly through Netcat or use it as a backdoor into other networked systems. Partnered with a tool like Varonis Edge, you would receive an alert of any unusual activity and could then use Netcat to investigate. Lastly, Netcat is a flexible tool because of how it can be scripted for larger tasks.

Basic Netcat Commands
Once you have a Netcat application set up on your Windows or Linux server, you can start running basic commands to test its functionality. Here are a few to get started with:
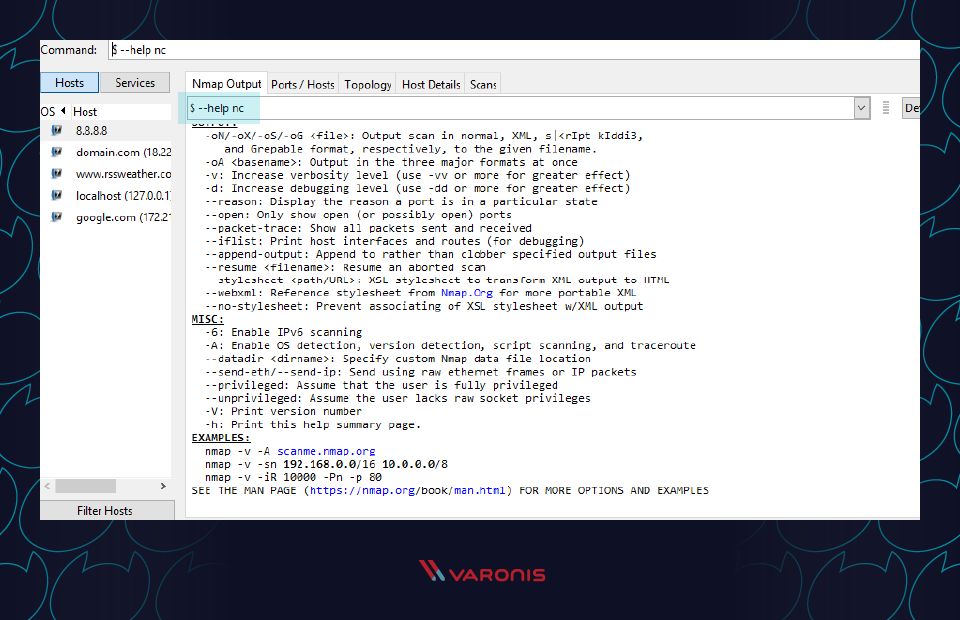
nc -help – This command will print a list of all of the available commands you can use in Netcat. It will come in handy if you run into any errors while writing a script or are unsure of how to proceed.
nc -z -v site.com – This will run a basic port scan of the specified website or server. Netcat will return verbose results with lists of ports and statuses. Keep in mind that you can use an IP address in place of the site domain.
nc -l – This command will instruct the local system to begin listening for TCP connections and UDP activity on a specific port number.
nc site.com 1234 (less than) file_name – This command will initiate the transfer of a file based on the specified port number.
Printf – Netcat can actually operate as a simplified web host. This command will let you save HTML code and publish it through your local server.
Netcat Command Syntax
All Netcat commands must start with the “netcat” identifier or “nc” as a shorter option. By default, the Netcat tool will assume you want to perform a port scan unless you indicate otherwise.
Different option parameters can be used that include: “-u” for UDP traffic instead of TCP, “-v” for verbose output, “-p” to specify a specific port, and “-D” to turn on full debugging mode. Individual attributes within a Netcat command must be separated with a space. The command prompt will inform you if you have a typo or unrecognized term in your script.
Port Scanning with Netcat Commands
When trying to diagnose a network issue or performance problem, executing a port scan with Netcat is a smart first step to take. The scan will check the status of all ports on the given domain or IP address so that you can determine whether a firewall or other blocking mechanism is in place.
A basic port scan command for an IP ncat address looks like this:
nc -v -n 8.8.8.8 1-1000
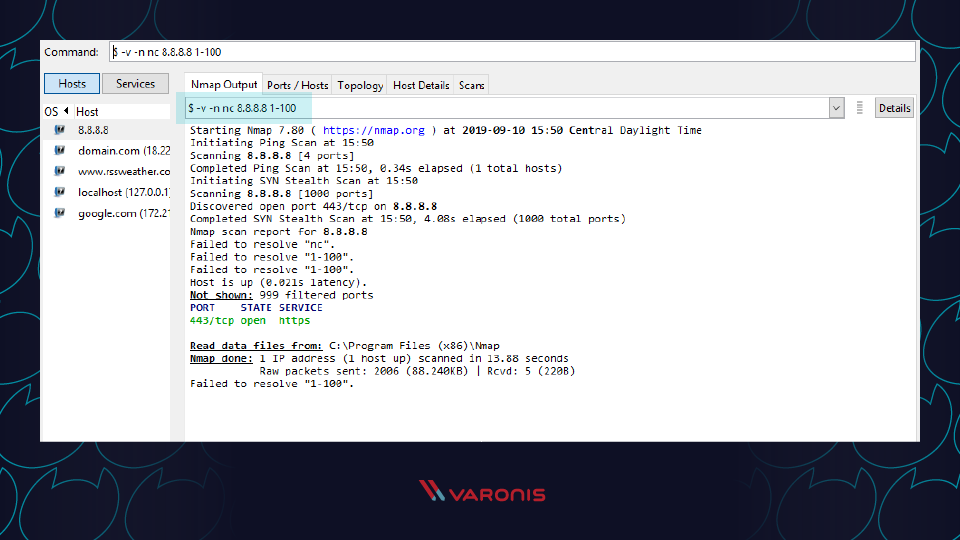
Note that the numbers at the end of the command tell Netcat to only scan for ports between numbers 1 and 1000.
If you don’t know the IP address of a server or website, then you can look it up via a ping terminal command or just insert the domain into the Netcat command:
nc -v -n google.com 1-1000
You should always perform port scans when connected to your local enterprise network. If not, you can configure your router with a VPN service to create a secure tunnel into the network.
Create a Chat or Web Server
Chat programs are on the rise. From open-source solutions to those that seemed to suddenly gain massive popularity, there are a wide range of chat and communication tools available to enterprise organizations. The reality is that some IT experts and system administrators would prefer a simple text-only solution. Windows Netcat can actually fill that need and allow for the transmission of messages across a local network.
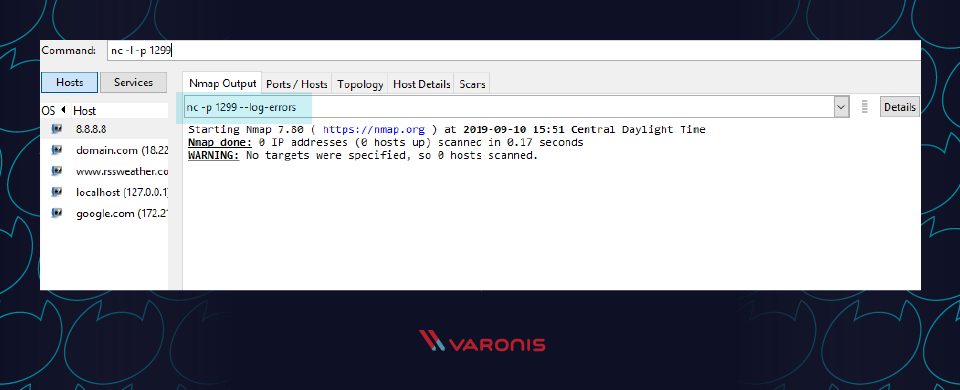
To get started, you first need Netcat to start listening on a port number. Make sure not to choose a port that is already in use by another application or service.
nc -l -p 1299
Then all you need to do is launch the chat session with a new TCP connection:
nc localhost 1299
This process can also be used to spin up a basic web server from your local machine. Netcat will function as the web host and allow you to store HTML content which can then be viewed through a web browser.
First, create a new text document on your local system and make sure to use valid HTML tags. Then save the file as “index.html” and store it in the root of your Netcat directory. Now switch back to the Netcat tool and run this command:
printf ‘HTTP/1.1 200 OK\n\n%s’ “$(cat index.html)” | netcat -l 8999
To see the HTML in action, simply open any web browser and navigate to your local IP address with: 8999 at the end to specify the port of the host.
Verbose Scan with Netcat Commands
Every command you run in Netcat will include certain output text to indicate whether it was successful or not. For troubleshooting and debugging purposes, you’ll want to gather as much information and logs as possible while also investing in solutions like Varonis Datalert to detect threats and respond quickly. Netcat can help thanks to the verbose parameter which can be added to any basic Netcat command. Simply include “-v” to your command and run it again.
Even with this setting turned on, Netcat will not reveal any of your credentials or authentication data.
HTTP Requests with Netcat Commands
We’ve covered how you can use Netcat to host HTML pages on your local system. But the utility program can also be used to make web requests to outside servers. In this way, Netcat will essentially function as a web browser by obtaining raw HTML code.
Along with a tool like Varonis Edge, Netcat can be helpful for IT professionals who are looking into internet traffic issues or proxies. Here’s an example of how to obtain the HTML content from Google’s homepage:
printf “GET / HTTP/1.0\r\n\r\n” | nc google.com 80
Note that the port number 80 is required for this type of command since the world wide web uses it as a default for TCP over IP connections.
TCP Server and TCP Client Commands
Although the TCP protocol is primarily used for transferring web traffic around the world, it can actually be implemented at a local level for file transfers. To accomplish this, you need to run Netcat from two locations: one that will act as a server to send the file and one that will act as the client to receive it.
Run this Netcat command on the server instance to send the file over port 1499:
nc -l 1499 > filename.out
Then run this command on the client to accept, receive, and close the connection:
nc server.com 1499 (less than) filename.in
Make sure to replace “server.com” with the full hostname or IP address of the sending server.
ITEM with Netcat Commands
Newer versions of Netcat allow you to use ITEM format for transferring data instead of the standard TCP or UDP protocols. To accomplish this, you must follow this syntax:
file_path (pipe) device_path (pipe) network host
Prevent DNS Lookup with Netcat Commands
Netcat commands run fastest when they are operating purely on IP addresses. This because no time is wasted talking to domain name servers (DNS) to translate server names into IP addresses. If you find that your Netcat commands are still running slow, make sure to add the “-n” operator so that the utility knows that DNS lookups are not required.
Shell Scripting with Netcat
As mentioned earlier, one of the benefits of using Netcat is that it can be included as part of a larger script that performs an automated function. As part of your security procedures, you might want to run a full port scan on all of your servers to detect new malicious applications that are listening for a connection.
You could write a script that:
1. Imports a text file of server names or IP addresses
2. Calls Netcat to run a port scan on each server
3. Writes the output to a new text file for analysis
Multiple Netcat commands can be grouped together in a single script and be run through either a Linux or Windows shell. In some cases, it may be worthwhile to have the scripts on a regular timetable.
Launching Reverse (Backdoor) Shells
To get started, you need to enable the shell tool over a Netcat command by using Netcat reverse shell:
nc -n -v -l -p 5555 -e /bin/bash
Then from any other system on the network, you can test how to run commands on host after successful Netcat connection in bash.
nc -nv 127.0.0.1 5555
A reverse shell is a remote access approach where you run administrative commands from one terminal while connecting to another server on the network. To get started, you need to enable the shell tool over a Netcat command by using Netcat reverse shell:
nc -n -v -l -p 5555 -e /bin/bash
Then from any other system on the network, you can test how to run commands on the selected host after successful Netcat connection in bash:
nc -nv 127.0.0.1 5555
Netcat Cheat Sheet
Until you start using Netcat on a regular basis, you might get confused about the command syntax or forget what some of the parameters do. Don’t worry! We’ve included a cheat sheet below to help you find what you need quickly to run a working Netcat command.
Netcat Fundamentals
nc [options] [host] [port] – by default this will execute a port scan
nc -l [host] [port] – initiates a listener on the given port
Netcat Command Flags
nc -4 – use IPv4 only
nc -6 – use IPv6
nc -u – use UDP instead of TCP
nc -k -l – continue listening after disconnection
nc -n – skip DNS lookups
nc -v – provide verbose output
Netcat Relays on Windows
nc [host] [port] > relay.bat – open a relay connection
nc -l -p [port] -e relay.bat – connect to relay
Netcat Relays on Linux
nc -l -p [port] 0 (less than) backpipe (pipe) nc [client IP] [port] (pipe) tee backpipe
Netcat File Transfer
nc [host] [port] (greater than) file_name.out– send a file
nc [host] [port] (less than) file_name.in – receive a file
Netcat Port Scanner
nc -zv site.com 80 – scan a single port
nc -zv hostname.com 80 84 – scan a set of individual ports
nc -zv site.com 80-84 – scan a range of ports
Netcat Banners
echo “” | nc -zv -wl [host] [port range] – obtain the TCP banners for a range of ports
Netcat Backdoor Shells
nc -l -p [port] -e /bin/bash – run a shell on Linux
nc -l -p [port] -e cmd.exe – run a shell on Netcat for Windows
Additional Netcat Resources
- Using Netcat with RedHat
- Introduction to Netcat on Youtube
- Netcat for Security
- Fun lessons with Netcat
In today’s fast-changing world of technology and increasingly complex networks, companies need to be proactive when it comes to cybersecurity. That means hiring experts who know what threats to look for and how to combat them. Otherwise, a single instance of a cyberattack like ransomware could lead to lasting damage for the entire organization. Pairing solutions from Varonis with tools like Netcat will help to keep your internal network safer.


-1.png)