
In my previous article “How to Revert a Commit in Git” (a PowerShell Git tutorial), I showed how you can use a local PowerShell Git repository and utilize the benefits of local source control. Using Git, you can create commits or snapshots of your code and revert to previous versions. Typically when working with Git and code repositories, you create the remote one first, then download it to your local system.
However, if you start a project on your local system first and need to then connect to a remote repository, you will need a way to merge the repositories. In this post, I will show how to merge in Git, meaning how you can take a local Git repository and merge it into a remote repository in your GitHub account.
Get a Free Data Risk Assessment
To follow along with this PowerShell Git tutorial on how to merge in Git, you will need:
- The PowerShell Git client installed on your system (download and installation guide)
- A free GitHub account
- Connect to GitHub with SSH
- Project files
1. Create the Local GitRepository
First, you will need to create a local repository for your project. I will be using PowerShell for this tutorial, but you can use any other terminal available to you. However, you will need to use equivalent commands for creating folders and navigating the directory structure so that you understand how to merge in Git.
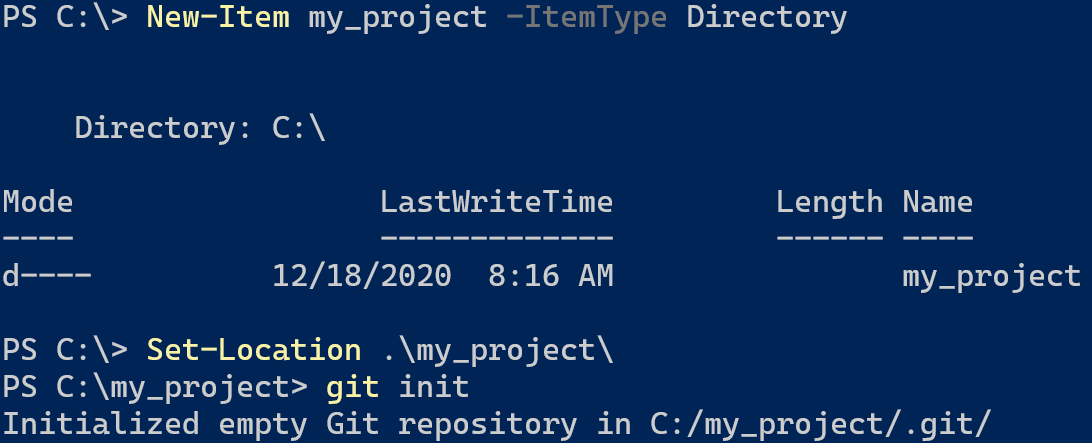
Start by creating a folder for storing your project files, followed by changing the console to that directory. You then initialize the folder as a Git repository using the git init command.
- New-Item my_project -ItemType Directory
- Set-Location .\my_project\
- git init
2. Create the First Git Commit
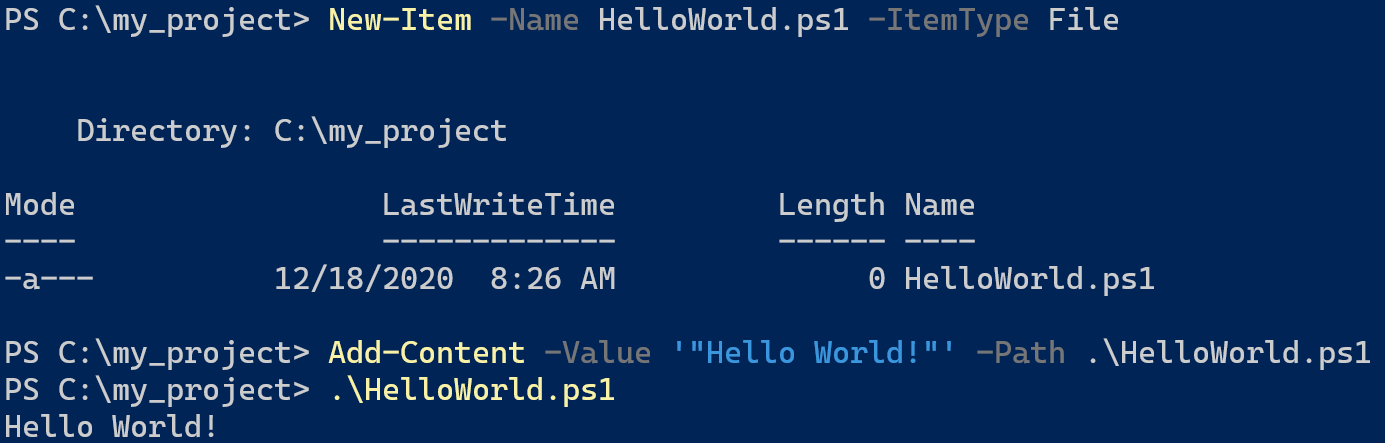
Once you have created the local Git repository, you need to add some files to the project. I will create a PowerShell script that outputs “Hello World!” to the console and then verify the script’s output.
- New-Item -Name HelloWorld.ps1 -ItemType File
- Add-Content -Value ‘“Hello World!”’ -Path .\HelloWorld.ps1
- .\HelloWorld.ps1
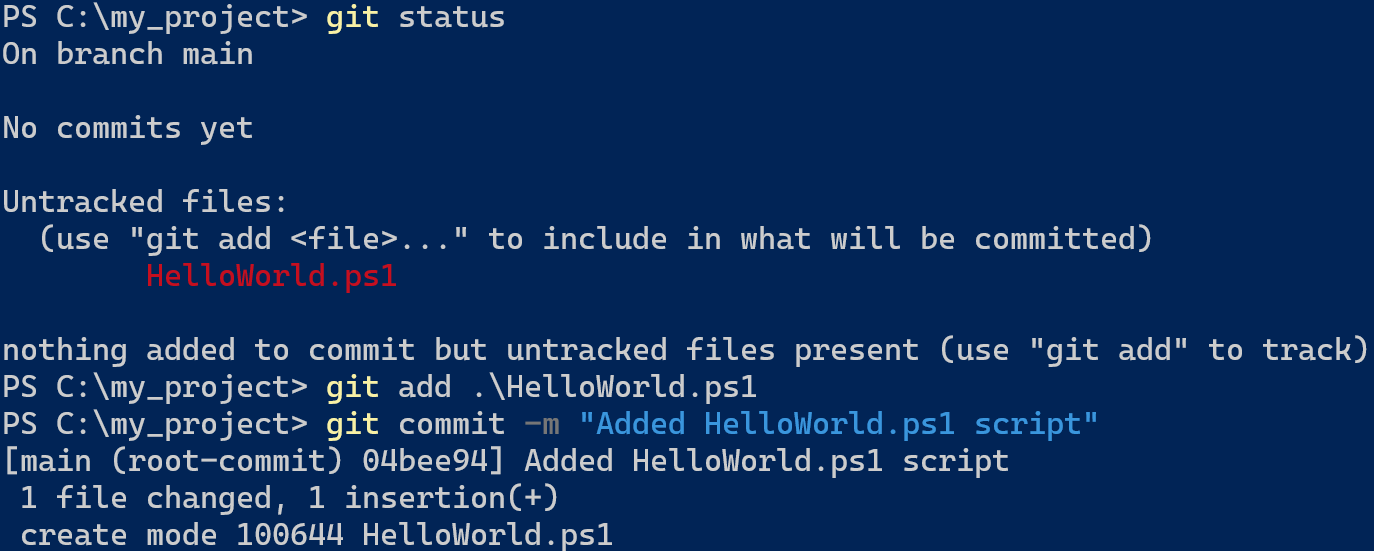
The repository has an untracked file to use to create the first commit. You can view untracked files by running the git status command. You can add the file to the staging area using the git add command and specifying the file name. Next, create a commit using the git commit with the –m switch to add a message to the commit.
- git status
- git add .\HelloWorld.ps1
- git commit -m “<commit message>”
3. Create the GitHub Repository
While working with a local Git repository is helpful, source control’s primary purpose is to collaborate on projects with other people. Now you need to take the local Git repository and put it into a remote, centrally-located repository so others can collaborate on the project. By storing the project code into a central, remote repository, other collaborators can copy the code to their system for modification.
There are many ways to have a central Git repository, but an easy option is storing it in GitHub. GitHub is a popular implementation of Git that has a free tier for hosting repositories.
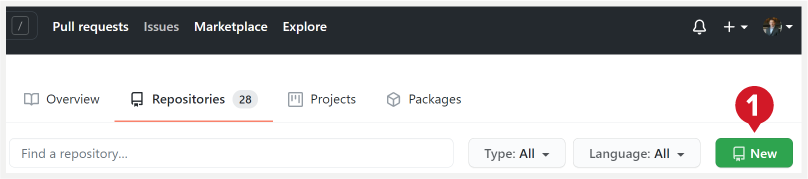
On your GitHub profile page, select Repositories at the top, then click New.
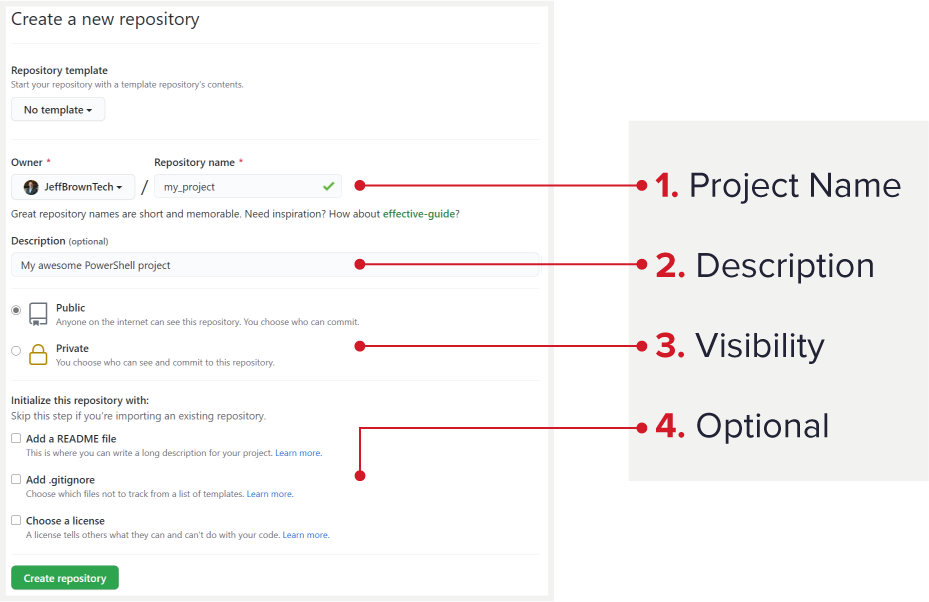
In the Create a new repository screen, enter a unique repository name that doesn’t exist in your account. I recommend giving it the same name as the project on your local system, in this case, my_project. Follow this by entering a description of the project, whether the project is Public or Private, and choose any of the options to initialize additional project files. Since you are importing an existing repository, you should not need to select any of the additional files as they should exist in the local repository (if you create them). Once you configured all the settings, select Create repository.
4. Push Existing Local Git Repository
Once created, GitHub presents several options for getting started with the new Git repository. You can copy it to your local system, create a new repository on your system and link to it, or import code from another repository.
In our case, we want to push an existing Git repository from the command line. We already have a local Git repository that we want to link with our new remote GitHub repository and push our code into it. Select the copy icon to save this code snippet to run back in our PowerShell terminal.

Before I run the code in my PowerShell terminal, let’s understand the purpose of each command — each of which is essential to understanding how to merge in Git.
Git Remote Add Origin
- git remote add origin https://github.com/JeffBrownTech/my_project.git
This command will configure the new GitHub repository as the remote repository and make it the source moving forward. As other collaborators make changes to the repository hosted in GitHub, you can then pull those updates down to your local system. You can verify the changed setting by running git remote -v to verify the origin’s URL matches the remote repository.
- git remote -v

The “origin” name here can be anything you want; however, the industry standard is to call the repository’s remote connection “origin.”
Git Branch
- git branch -M main
This command will force rename the local branch to main to ensure it matches the GitHub repository’s main branch name. This step may not be necessary, but it is good to run it to verify the branch names match.
Finally, we need to push our local repository to the remote GitHub repository using the git push command.
Git Push
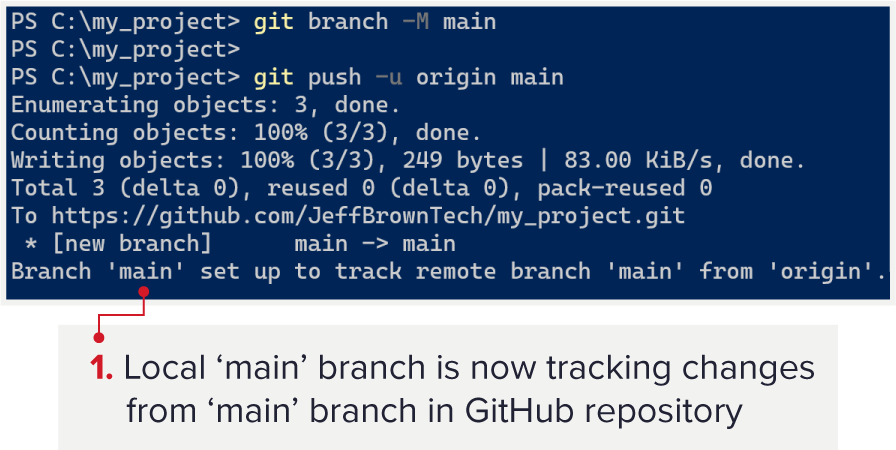
- git push -u origin main
Here, origin refers to the remote repository we configured earlier, and main refers to the branch from the local repository to copy to the remote repository.
Since this is the first time we are pushing code into the remote GitHub repository for the main branch, we need to specify the -u parameter, which is an alias for —set-upstream. Setting the upstream branch will configure the default remote branch for the current local branch. We can see this relationship configured in the output of the push command.
5. View Updated GitHub Repository
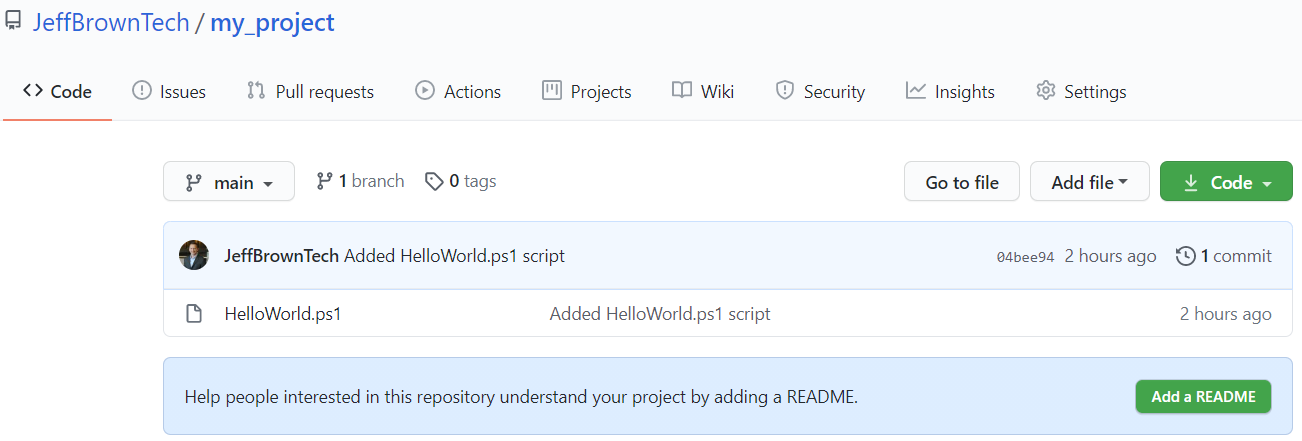
Back in GitHub, refresh the repository’s page currently display the code examples, and you should see your local files now available in the repository. For my project, I can see the HelloWorld.ps1 script with my commit message.
6. Merge Unrelated Histories
When creating the GitHub repository, there is an option to initialize the repository with several files, like a README.md file. This file is written in markdown and displays its content in the repository page. It is often used to explain the project or provide documentation on how to use it.
Since I was going to import an existing repository from my local system, there was no need to initialize the repository with this file. However, let’s examine a scenario where I create the remote repository with files and need to sync it with my local repository.
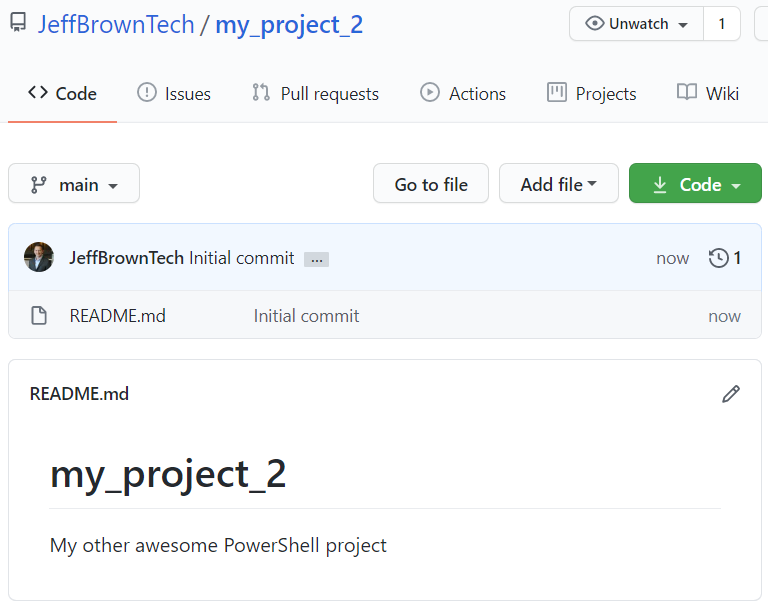
Back in GitHub, I’ve created a new repository named my_project_2 for storing my second PowerShell project. I checked the box to include a README.md file during the repository configuration. Here’s is what this new project repository looks like (note the contents of the README file displayed):
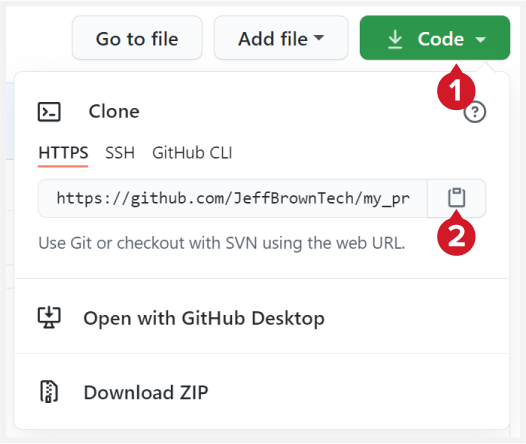
Before switching back to my terminal, I need the URL for this repository so I can add it as my origin in my local repository. You can find this by selecting the Code button and copying the HTTPS URL.
Now let’s switch back to my PowerShell window where I have already created the local repository and made the first commit. First, I need to add the URL I just copied as the source repository named origin:
- git remote add origin https://github.com/JeffBrownTech/my_project_2.git
- git remote -v
Next, I want to pull down the contents of the GitHub remote repository to my local system, which is just the README.md file. I can accomplish using the git pull command and specifying the origin remote repository and the local main branch:
- git pull origin main
However, this command will result in a fatal error:
Fatal: refusing to merge unrelated histories
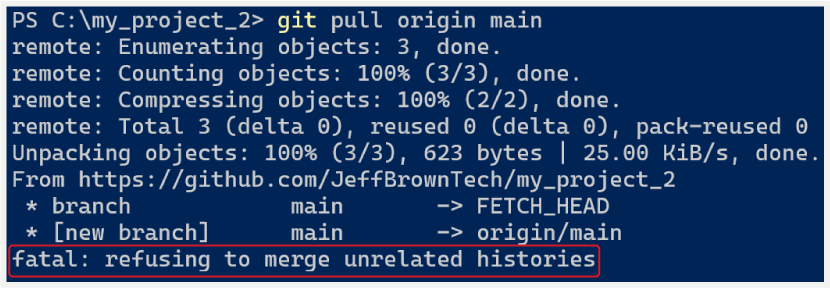
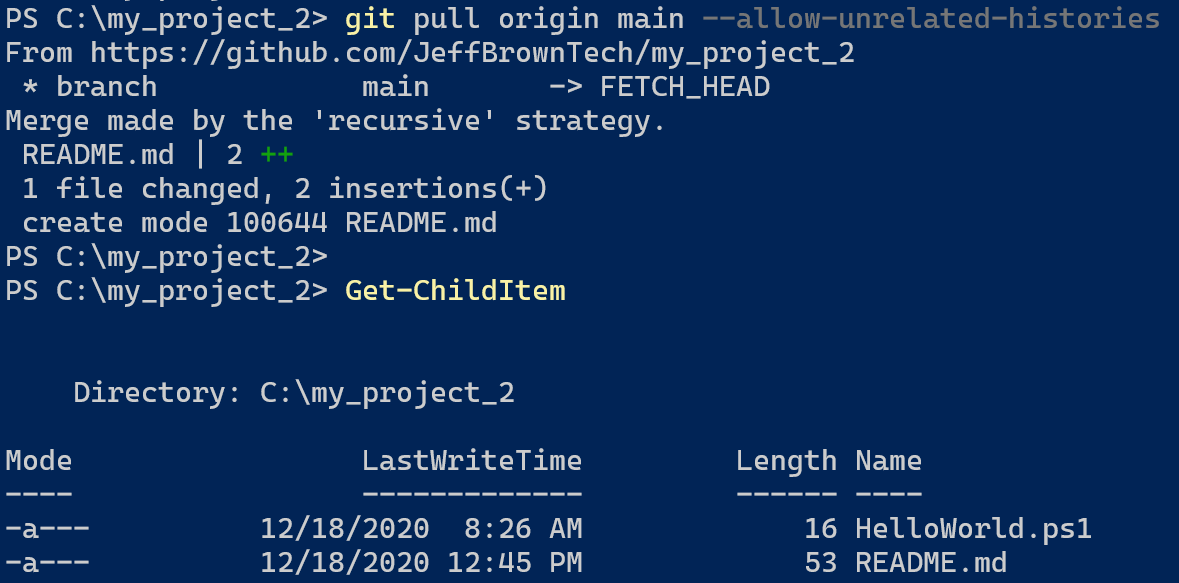
Since we have two unrelated projects with different histories, Git is refusing to merge the two. Each project has its own set of commit histories that are not compatible with each other. Luckily, we can force Git to merge the two despite the unrelated histories with the —allow-unrelated-histories parameter, like this:
- git pull origin main --allow-unrelated-histories
Now the README.md file from the remote GitHub repository is available in my local project. From here, I can make modifications to the README.nd file locally, commit the changes, and push them back to GitHub.
In this post, I covered how to merge in Git by taking a local code repository and connecting it to a remote GitHub repository. By putting your code in a remote-hosted repository, other people can collaborate with you by pushing their changes to the project code. Working with Git and repositories is an essential skill for any developer or administrator who needs to collaborate on or share a coding project.


-1.png)