
Whether you write scripts in isolation or work with a team, the ability to track versions of code is essential. You may add code that ends up not working out, and the ability to reverse these changes (without manually deleting code) can save your project. In this post, I will cover how to use a Git reset command to revert to a previous commit of your code in the Git source control system, as well as the following topics:
Discover your weak points and strengthen your resilience: Run a Free Ransomware Readiness Test
- How to Use Git
- What Is Git and What Are Git Commits
- Configuring a Local Git Repository
- Tracking and Committing Files in Git
- Committing Additional Changes in Git
- Managing Git Commits
- Git Command Glossary
Prerequisites: How To Use Git
You will need the Git client installed on your system. You can download the client here, and an installation guide is available here. The Git client allows running Git commands from the terminal. You will also need a file to modify and to track changes. In this post, I am using a PowerShell script, but you can use anything you like.
What Is Git and What Are Git Commits

Git is a common source control tool that keeps track of changes using commits. Creating a commit is like saving a version of a file or group of files. The commit keeps track of the file versions by associating a unique ID (or SHA or hash) with the commit. This unique ID allows for reverting to previously committed versions of files in the repository.
In a typical workflow, you would:
-
- Pull files from the remote repository.
- Make changes to the local files.
- Commit the changes.
- Push the new files up to the repository.
However, if you don’t have a centralized remote repository or pushing/pulling/merging code makes you nervous, you can still take advantage of Git by using it on your local system. You can commit changes to your code and revert those changes to familiarize yourself with commits.
1. Configuring a Local Git Repository
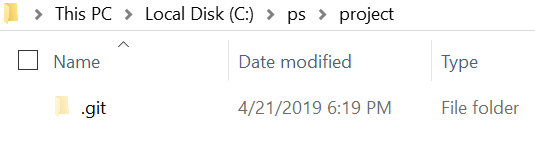
The first command to start with is Git init. This command initializes the current folder as a Git repository. In this example, I am initializing the project folder a Git repository.
- Git init

The command adds a hidden folder named “.Git”, which keeps track of the current active branch, config files, aliases, and other data.
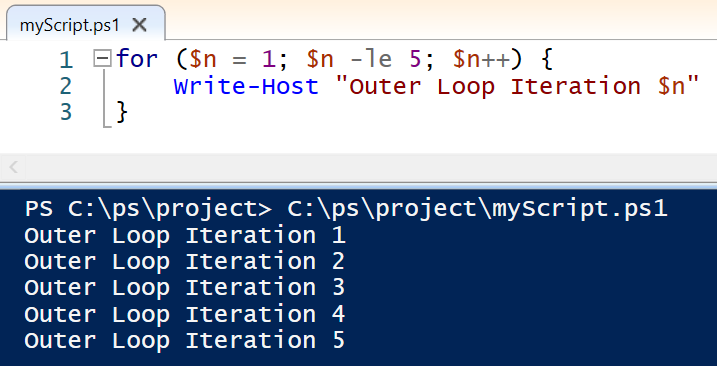
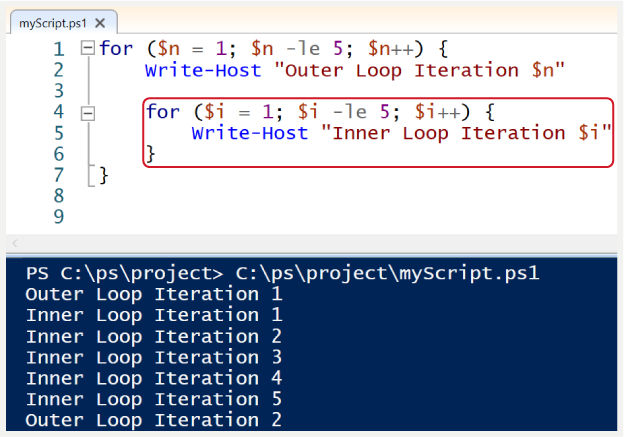
Next, I need a file to work with to track changes. I have a PowerShell script file named “myScript.ps1”. The script contains a for loop that iterates five times and outputs to the screen. I’ll refer to this first loop as my outer loop. What the code is doing is not important, but I wanted to show code modifications for a simple script.
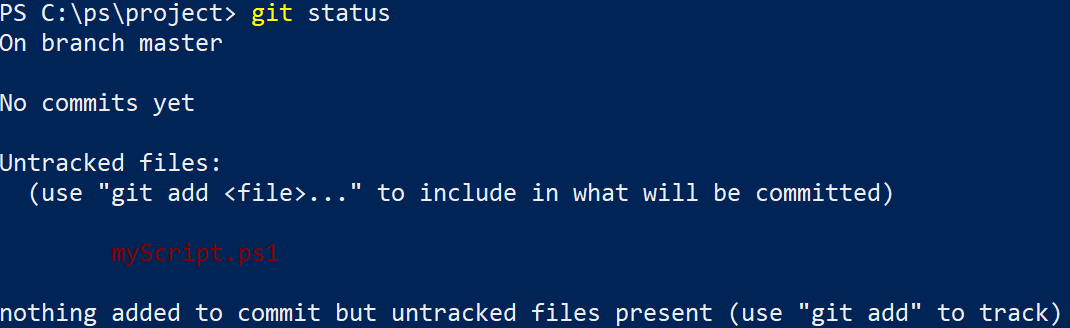
The next step is to view the status of the repository by running Git status. The status will show which branch I am on (for now, just know I am on the “master” branch). It will also show any new or changes files since the last commit by displaying them in red.
2. Tracking and Committing Files in Git
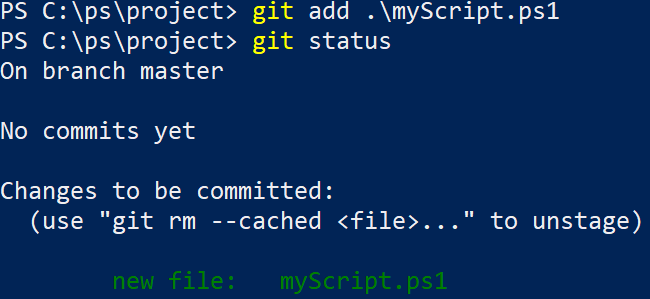
If I want to track files to commit their changes, I need to add them to the staging area using the Git add command. The Git add command can specify one or multiple files to add to the staging area. In my case, I only have one file, so I add it by specifying the file name. I then check the repository status to view the script in the staging area.
- Git add myScript.ps1
- Git status
Now that I am tracking the file in the staging area, I need to create a commit of the state of the repository. I use the Git commit command with the -m parameter to assign a message to the commit. The commit message should be short but descriptive to indicate what changes I made to the code. Once I complete the commit, I run another Git status to see that no other files are in the staging area or have been modified since the last commit.
- Git commit -m “first version of script - outer loop only”
- Git status

3. Committing Additional Changes
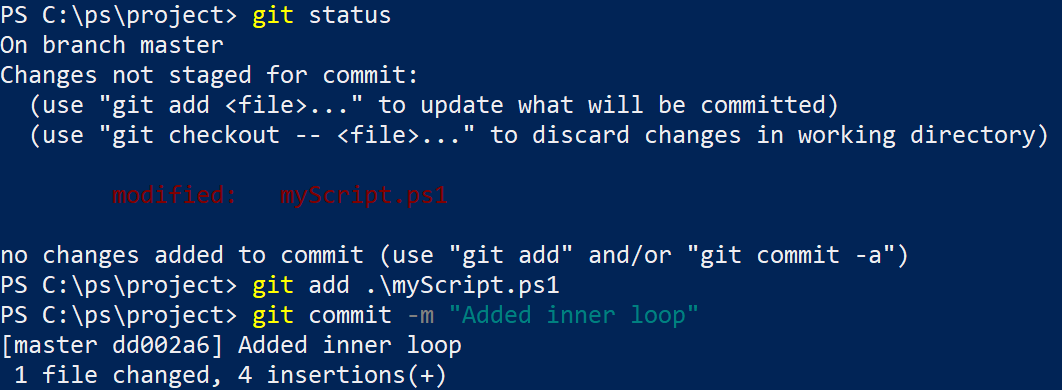
Now that I have my first commit message in my repository, I need to add an enhancement to my code. I add another for loop within the outer loop, which I’ll refer to add the inner loop.
If I run Git status again, I’ll see the same results as I did earlier. It will show the file as being untracked as the script file has changed since the last commit. I will repeat the workflow of commands to add the file and commit it. My commit message will show I added the inner loop.
- Git status
- Git add myScript.ps1
- Git commit -m “Added inner loop”
4. Managing Git Commits
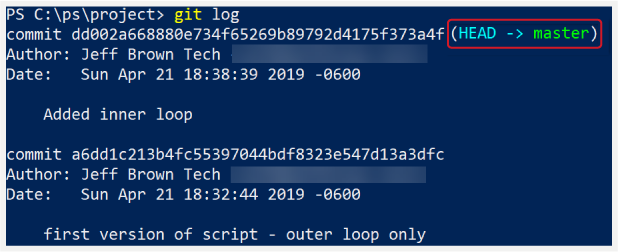
Now that I have a few commits in the repository, I can turn to the Git log command. This command will show the previous commits along with commit messages. Each commit has a unique hash value to identify it. In this example, the latest commit is where I added the inner loop and is indicated by the HEAD pointer.
Now let’s say I don’t want my last change and want to revert to an earlier version of the script. I could manually delete the inner loop as this script is small enough to do that. However, larger coding projects could pose a problem. I might end up removing too much or not enough code and introduce new problems.
Instead, I can use the first seven characters of the commit log hash value to a previous version of the repository. To perform this reversion, I use the Git reset command while referencing the commit log hash:
- Git reset a6dd1c2

This command resets HEAD to a specific commit. The screenshot shows that myScript.ps1 is back to the staging area with the changes since the a6dd1c2 commit. If I run Git log again, HEAD is now back to the previous commit, and the commit for adding the inner loop is removed.

To switch back to the file, I need to check out the file from the commit using Git checkout. Once I check out the file, I can view the file contents, which reveals just the outer loop is present. I then run Git status to show that the current tree does not have any changes to track.

Git Command Glossary
Here is a summary of each PowerShell Git command I used and its purpose:

If you’re new to version control but don’t have the confidence to work with remote repositories, you can still work with a local repository and have the same benefits. You can use these fundamental Git commands to familiarize yourself with the process of how to use Git for version control.