
Ever wanted to automate the process of creation of virtual machines in Azure based on the service now request or request from any other digital workflows that the enterprise uses? There could also be instances where you would want to automate the process of updating and patching the virtual machines in Azure in an IaaS deployment and also maintain its desired state configuration. Well, Azure Automation is the answer for you.
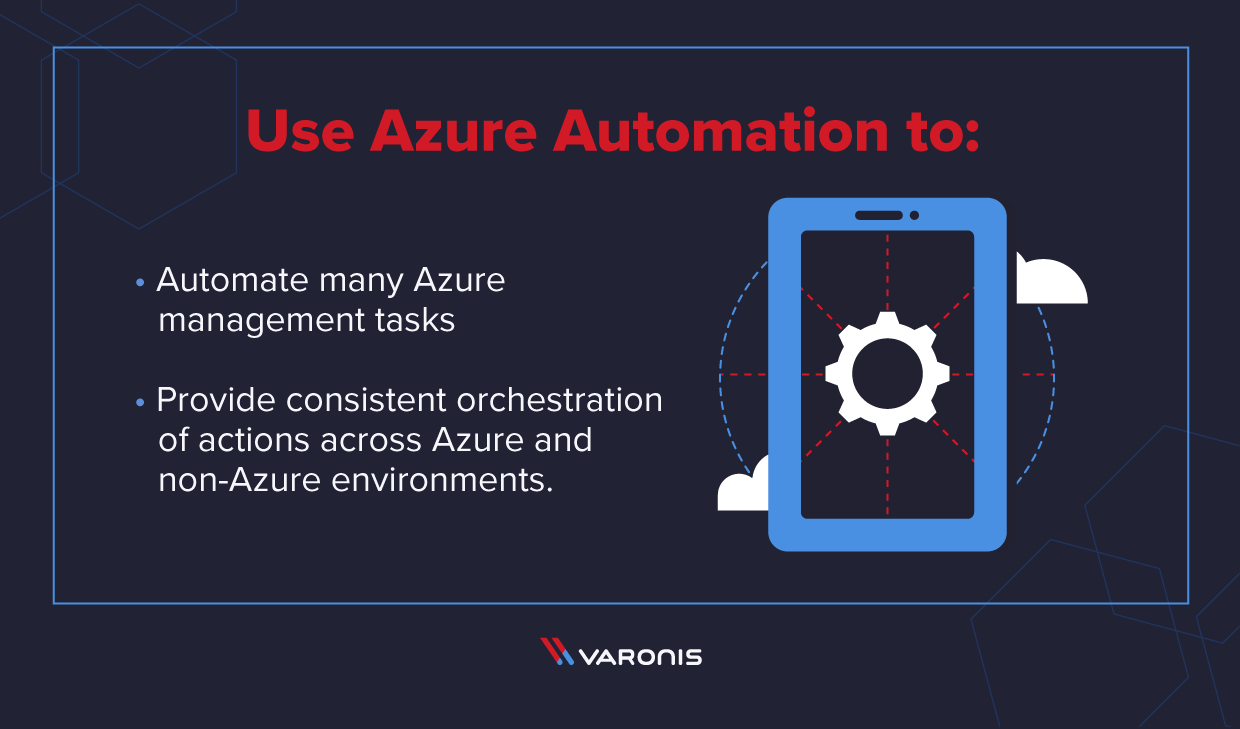
Azure Automation service allows automation of many Azure management tasks and activities, and also helps in the orchestration of actions across both, external as well as internal systems right from inside Azure.
Get the Free PowerShell and Active Directory Essentials Video Course
What is Azure Automation?
As mentioned above, Azure Automation is an automation and configuration service from Azure that provides uniform and consistent management and orchestration of actions across Azure, non-Azure, and on-premises environments. It gives you complete control during the deployment, operations, and decommissioning of workloads and resources.
Azure Automation is an expansive automation service while still remaining cost-effective as the relative cost of deployment is low and is based on the pay as you go (PAYG) model. It also brings down the overhead of the IT and service desk personnel tasks, thereby saving a lot of their time and effort. It is built using PowerShell, providing a robust platform having a vast reach and integration opportunities.
Azure Automation Capabilities and Features
Azure automation comprises a set of capabilities and features to provide consistent management of resources across Azure, non-azure, and on-premises. It gives you complete control during the deployment, operations, and decommissioning of workloads and other resources. It also provides insights into updated compliance of the workloads for actions to be triggered.
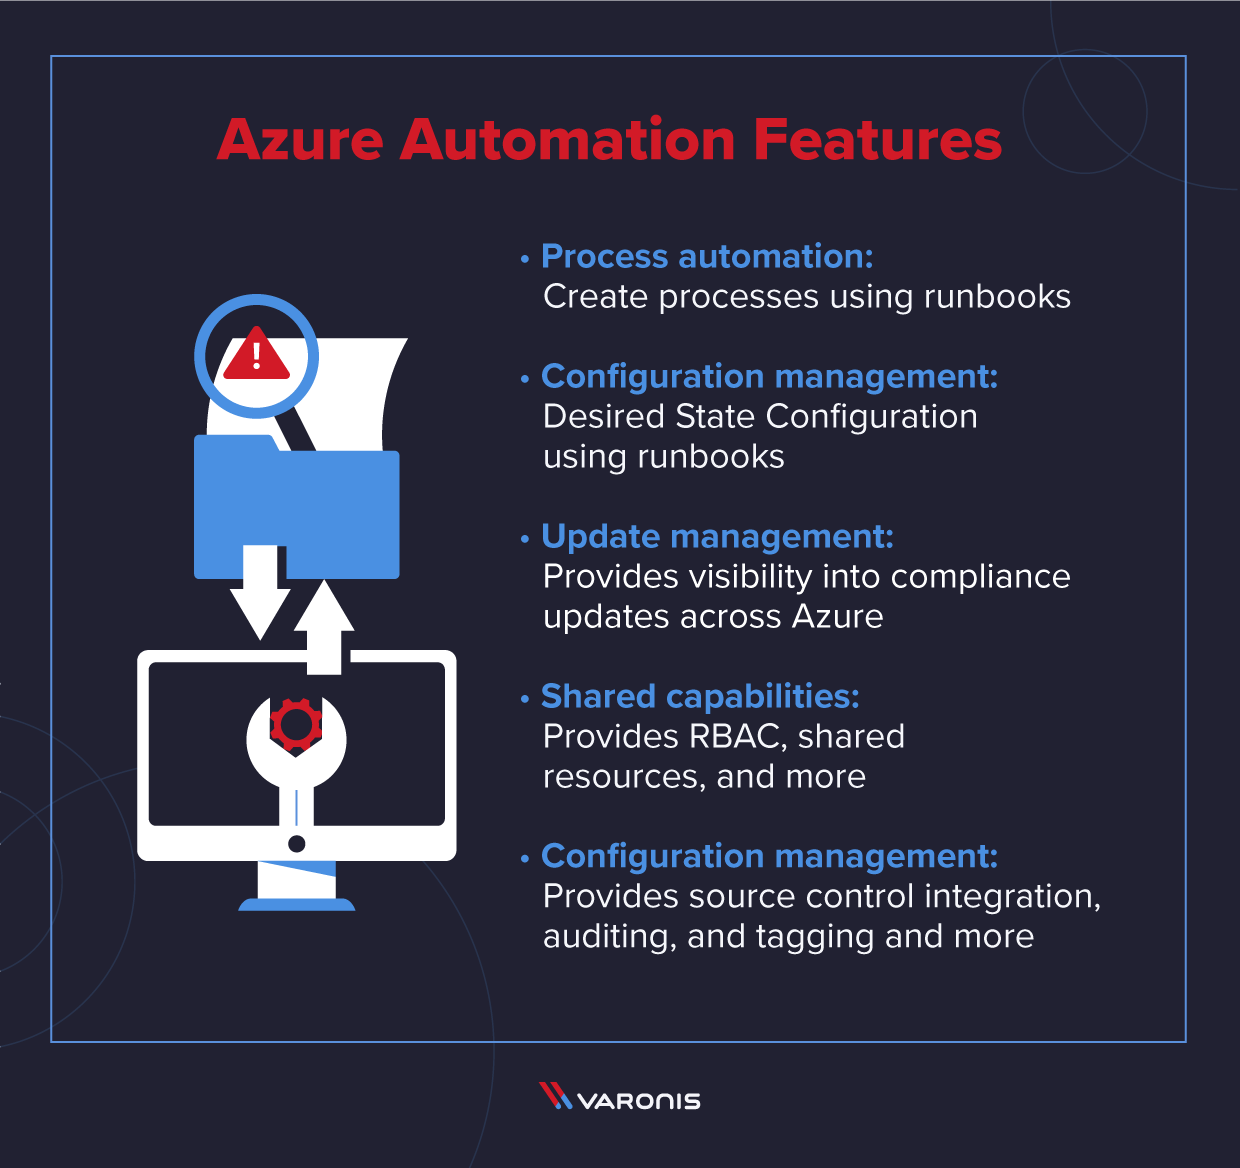
Process Automation
Process Automation brings the benefit of automating repeated, time-consuming, and error-prone end-to-end processes and management tasks. It lets the IT and service desk teams focus on the actual work, thereby adding more business value. It, therefore, boosts the efficiency of the teams and reduces operational costs.
It allows the creation of runbooks in a variety of ways, such as graphical runbooks, PowerShell runbooks, Python runbooks, etc. We will see more about this in action below when we configure the PowerShell Runbooks. Additionally, it has webhooks that enable event-driven reactive programming ensuring seamless operations.
Configuration Management
Azure Automation configuration management can be classified as having two features:
- Desired State Configuration (DSC) – Azure Automation State Configuration (AASC) is a management platform on PowerShell and is also known as Desired State Configuration. It enables you to manage the IT and development infrastructure with configuration as a code.
- Change Tracking and Inventory – Change tracking and inventory allow management and tracking of any configuration or infrastructure changes. It tracks for changes not just on the virtual machines, but also across other services, software, and registries as well, thereby helping in monitoring and diagnosing unwanted changes and send notifications.
Update Management
One of the most sought-after features of Azure automation is Update Management. This feature gives you the ability to have insights into the update compliance of the workloads not just in Azure, but also non-Azure and on-premises environments so that action can be triggered accordingly if needed.
Shared Capabilities
Azure Automation provides a number of shared capabilities. Some of the key capabilities include shared resources, role-based access control, and source control integration.
- Shared Resources – Shared resources provide capabilities that make the automation and configuration management tasks easier and that too at scale. This includes
- Schedules
- Modules and Modules Gallery
- Credentials
- Variables
- Certificates
- Connections
- Python 2 Packages
- Role-Based Access Control (RBAC) – Azure automation provides role-based access control to automation resources for fine-grained regulated access.
- Source Control Integration – The source control integration feature of Azure automation provides configuration as a code, where you can use source control to check-in runbooks and configurations.
Heterogeneous
Azure automation is designed to provide a consistent way to support a hybrid scenario that includes Azure, non-Azure, and on-premises workloads and operating systems (Windows and Linux).
Create and Configure Azure Automation with PowerShell Runbooks for Automated deployments of Virtual Machine
Before we begin with the lab, let us try to understand the end-objective and how the system should behave post-implementation. In this article, we will try to configure a real-world scenario. We will follow the below process flow, where the requests are raised by the end-users in ServiceNow for a new virtual machine.
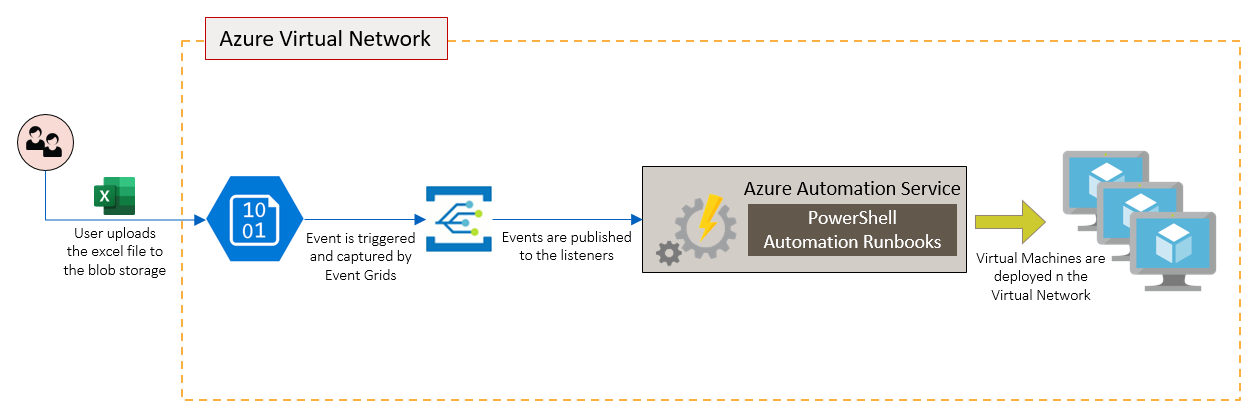
All the requests are consolidated by the service desk personnel, which is uploaded to the Azure Storage account.
After the file has been uploaded to the storage blob container, an event is triggered and the associated event grid publishes a notification to the subscribers of the event. Here Azure Automation listens to the event from the storage account and kicks off the first runbook, which initiates the process of reading the excel sheet, one record at a time. This record is then sent to the second PowerShell runbook, which does the actual provisioning of the virtual machine(s).
The second runbook also checks if the IP addresses are available to be assigned to the virtual machine. In case the subnet has already exhausted all the IP addresses, a new subnet is created and used for the VM creation. Also, a predefined network security group (NSG) is assigned to the VM to confirm the security requirements of the organization.
The reason for creating the two runbooks is to keep the PowerShell runbook code more modular and easier to understand. We will discuss further the requirements in the prerequisite section.
Also, we will make use of the shared resources, like credentials, modules, and variables for centralized management of the automation service.
Prerequisites
To complete the lab, you will need PowerShell code to create the service principal and the runbooks. You can visit GitHub (https://gist.github.com/neerajks77) to download the code.
- Create Service Principal
CreateServicePrincipal.ps1 - Create a runbook to initiate the VM creation process
InitiateWatcherProcess.ps1 - Create a runbook to deploy the VM (to be called by the InitiateWatcherProcess.ps1 runbook)
CreateVirtualMachineActionRunbook.ps1
Create and Configure Azure Automation with PowerShell Runbook
We will follow the below steps to create and configure Azure Automation cloud-based service with the runbooks to automate the process of creation of the virtual machine based on the service now request raised by the user.
- Create an Excel file
- Create a Resource Group
- Create a Storage Account
- Create Virtual Network
- Create Network Security Group
- Create and Configure Azure Automation Service
- Create Azure Automation Service
- Create a Service Principal
- Create Credentials within Automation service
- Create Variables within the Automation service
- Import required modules
- Create PowerShell Runbooks
- Create PowerShell Runbooks
- Assign permission to the service principal at the subscription level
- Create and Configure Event Grid
- Create Webhook for listening to the events in Storage Account
- Create Subscription to the Events over the Webhook
Create an Excel File
The first step is to create an excel file that will be used as an input. The name of the excel file is CreateVM.xlsx having the following structure.
- Name – Name that was given to the Virtual Machine
- Location – Location where the virtual machine will be deployed
- RGName – Name of the resource group inside which all the resources are created
- SKU – SKU of the virtual machine needed that is the OS version. Here we have chosen 2012-R2-Datacenter and 2019-DataCenter
- Size – Size of the virtual machine depending upon the performance and price
- LocalAdminUser – Administrative user name for the virtual machine for logging in
- Password – Password for the administrative user name
- PublisherName – Name of the operating system publisher
- OfferName – Type of operating system. Here we will use Windows Server
- Computername – Name given to the computer once configured
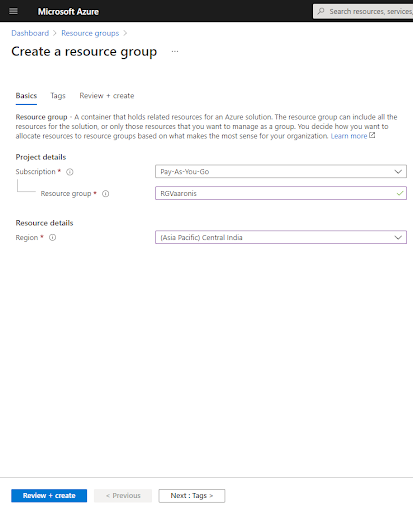
Create a Resource Group
The second step in the creation of any resource within Azure is to create the resource group. These resource groups are created within the subscription and are mapped to a location.
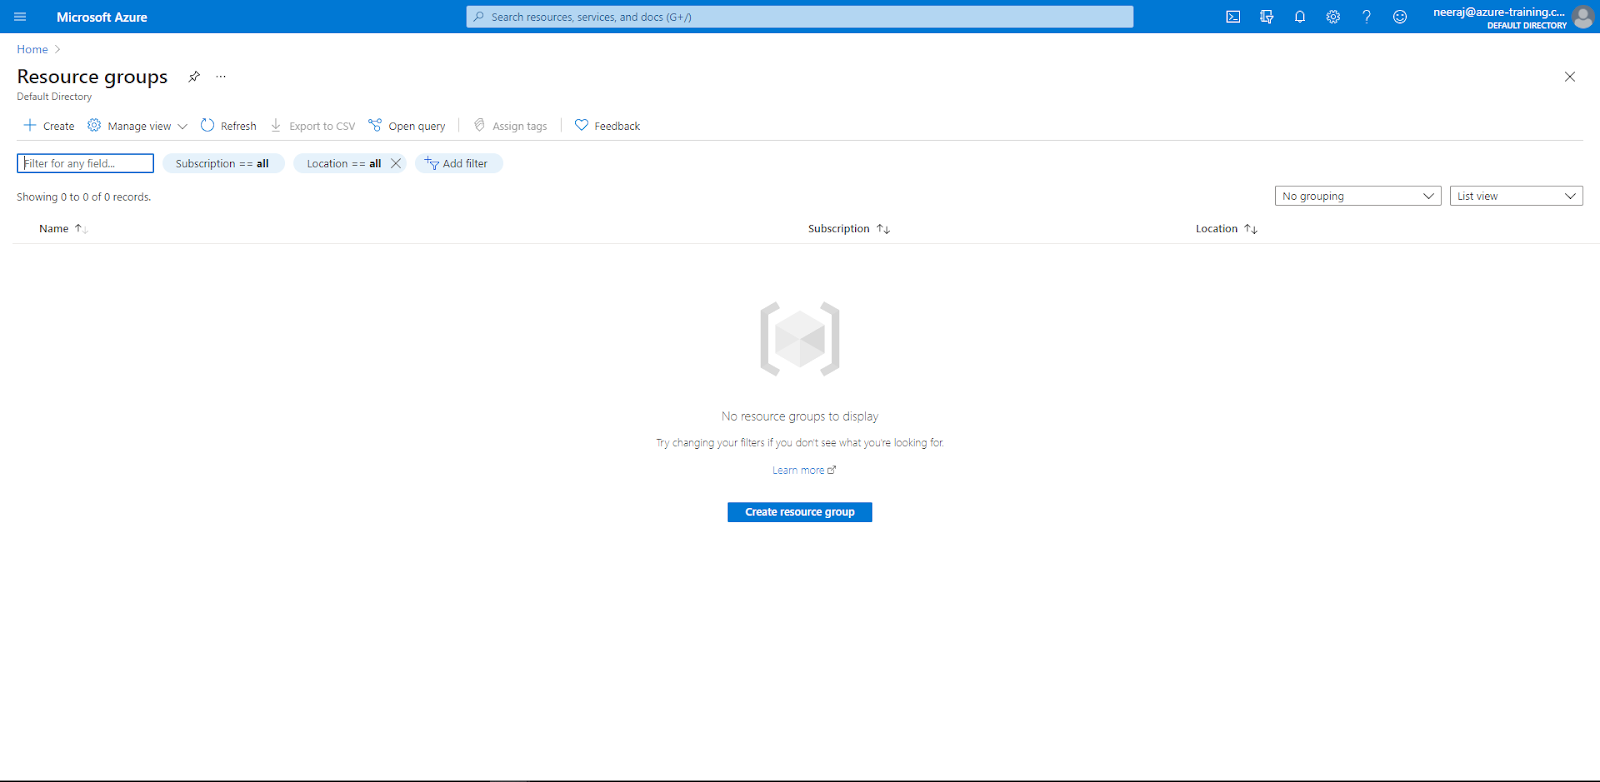
- Login to Azure Portal and go to “Resource Group” and click the “Add” button.
- On the “Create Resource Group” Page, choose Subscription, enter the Resource Group Name and select a region based on your location.


- Click on Review + Create and after the validation is complete, click on the Create button.
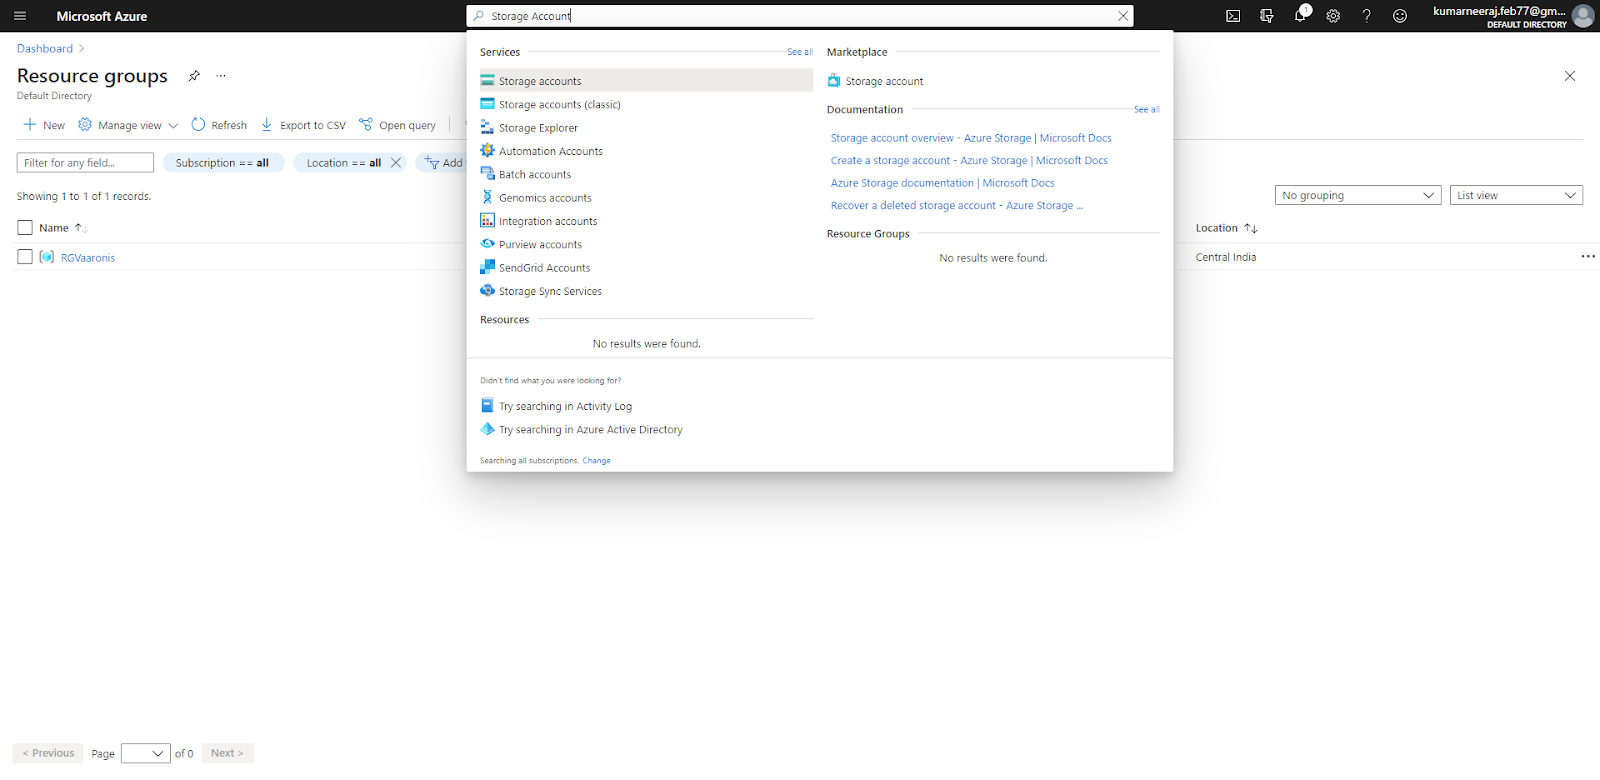
Create a Storage Account
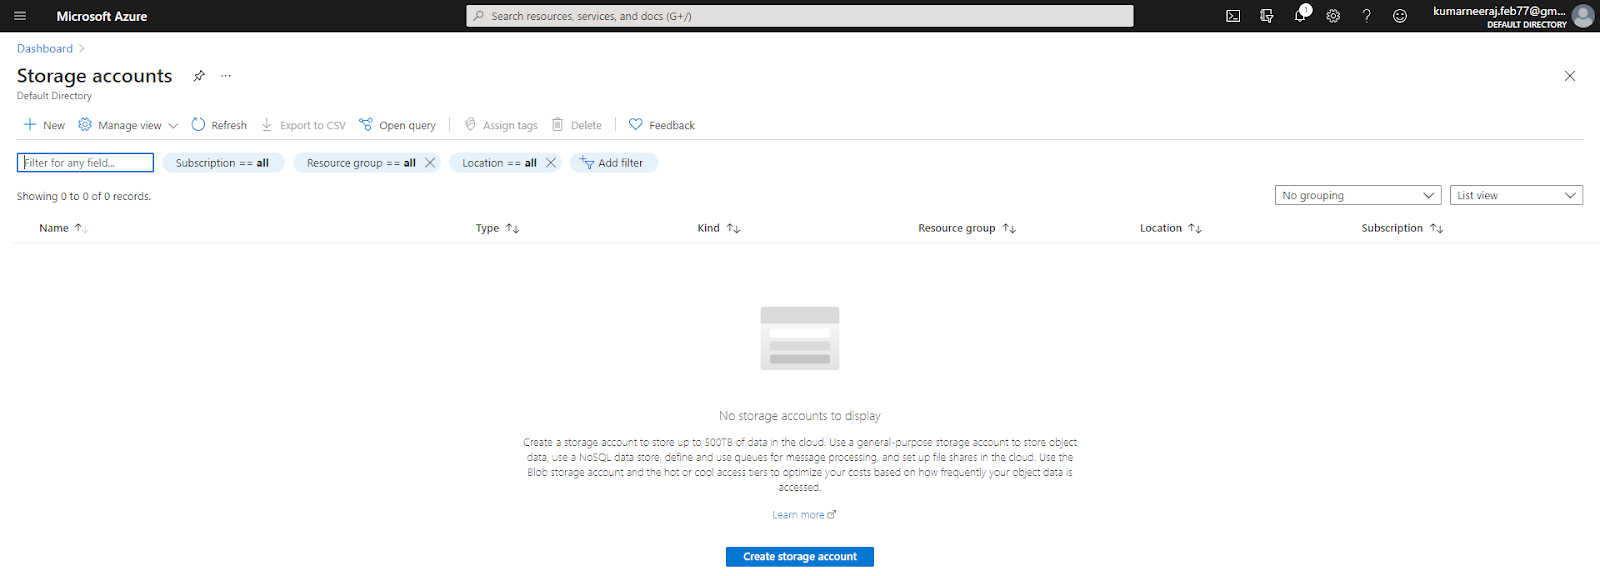
- On the search bar, type to search for Storage Account, and then select Storage Account.

- Once on the storage account page, click on the New button.

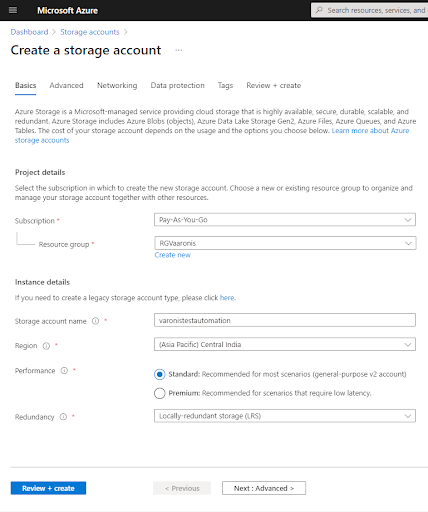
- On the ‘Create a storage account’ page, select the resource group, give the storage account a name, select region, choose the performance tier as Standard, and for redundancy, select LRS
- Leave all other options to their default settings. There is also no need to change or configure settings on any other page. Leave it to their defaults
- Once done, click on ‘Review + Create’ and post validation, click on ‘Create’

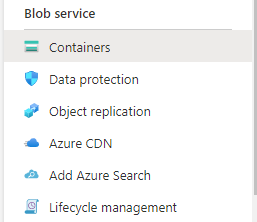
- After the storage account has been created, go to the storage account and click on the Containers link under Blob Service

- On the Containers page, click on the ‘Container’ button to create a new container.
- Give file container a name as ‘createvm’ and let remain all other options as-is.
- Finally, click on the create button

- You will finally see a container created for you.

Create a Virtual Network
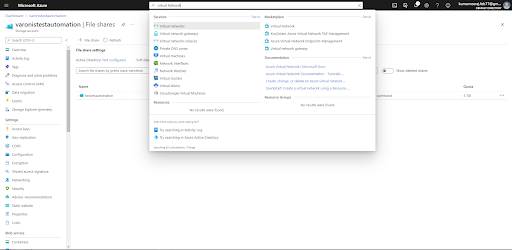
- On the search bar type Virtual Network and select the first option

- Click on the New button to create a virtual network
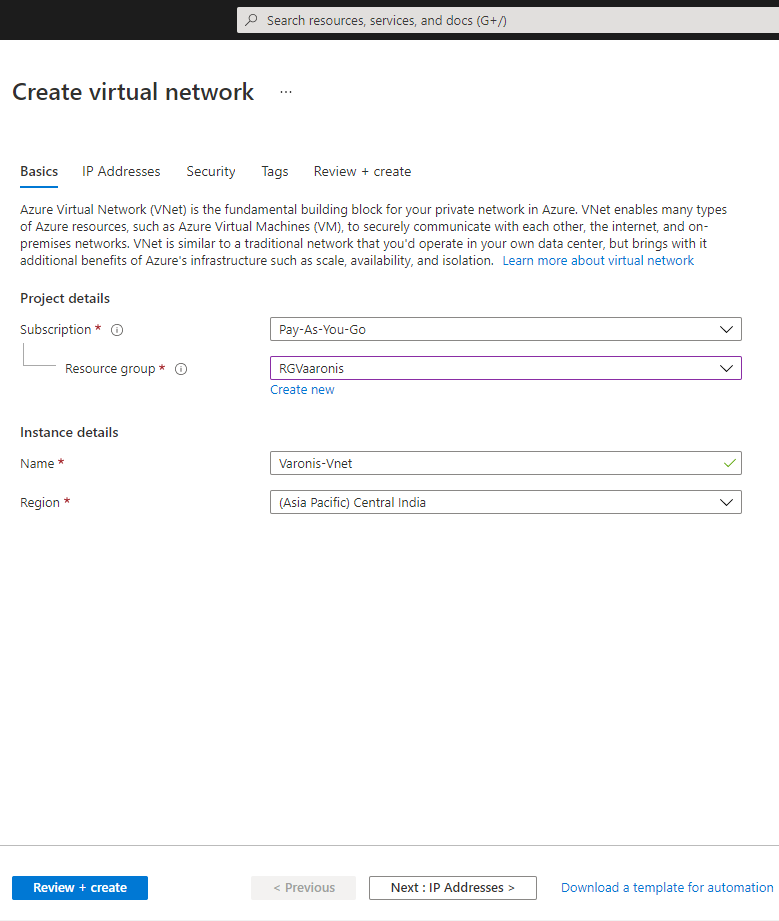
- On the ‘Create virtual network’ page, select resource group, provide a name for the VNet, select the region and then click on ‘Review + Create’After validation, click on the ‘Create’ button.

- There is no need to change and configure any other setting during the creation of the virtual network.
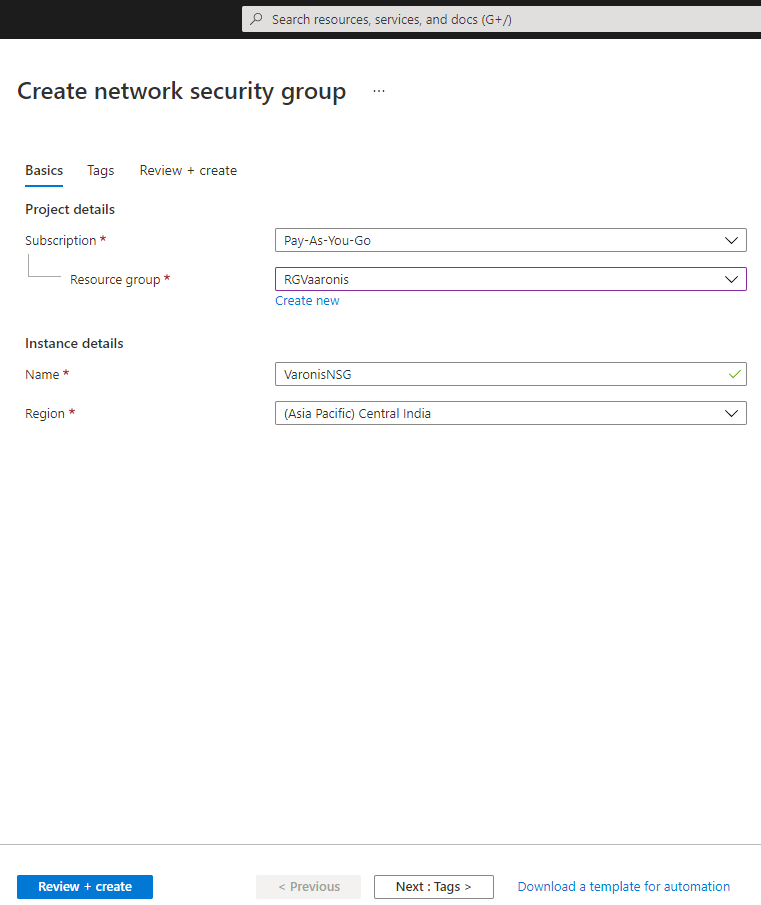
Create Network Security Group
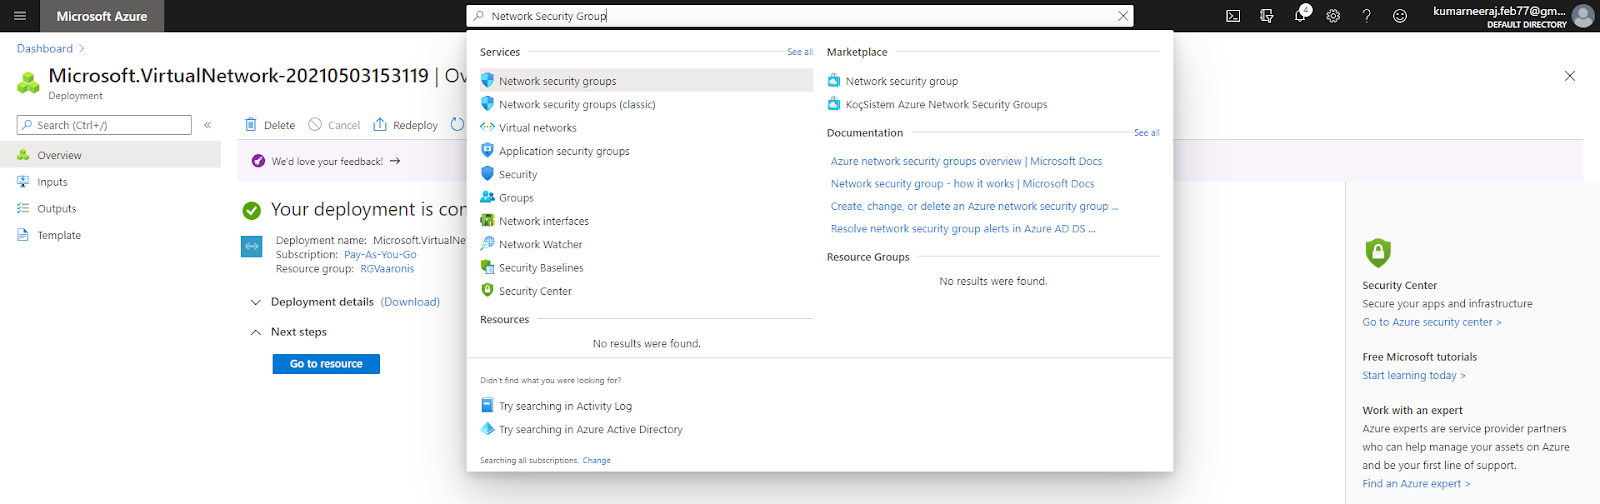
- Repeat the step to search for the Network Security Group and click on the first option.

- On the Network security groups page, click on the ‘New’ button
- Once you are on the ‘Create network security group’ page, select the resource group, and provide a name. The region will be populated based on the resource group selection.

- Click on the ‘Review + create’ button and then click on the ‘Create’ button post validation.
Create and Configure Azure Automation Service
We now have all the necessary components ready before the creation of the Automation account. We will now proceed with the creation and configuration of Azure Automation
Create Azure Automation Service
We will click on the search bar, search for Automation Accounts and click on the first option that says ‘Automation Accounts’
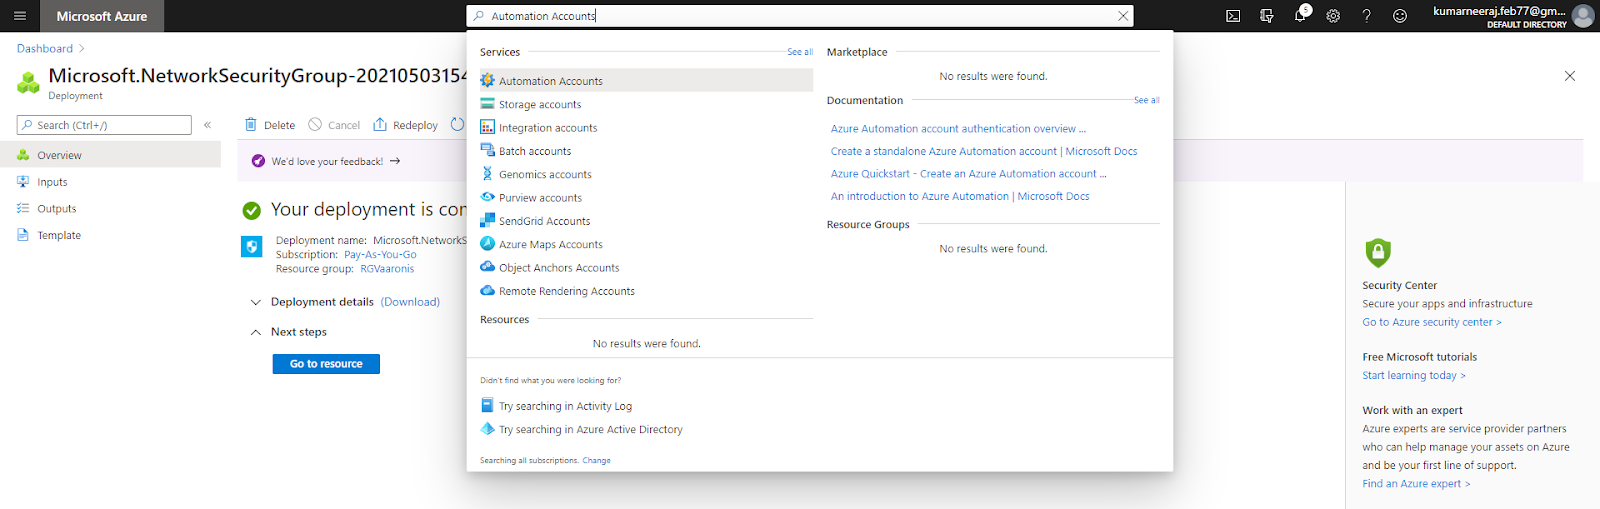
- On the Automation Accounts page, click on the ‘New’ button
- On the Add Automation Account page, give a name to the automation service, and select the resource group
- The region will be auto-populated based on your resource group selection
- For ‘Create Azure Run As Account’, select ‘No’. We will separately create a service principal
- Click on Create to create the automation service.
Create a Service Principal
After the Automation Account has been provisioned, we need to first provision a service principal. This account will be used by the automation runbooks to access other Azure services, such as the storage account.
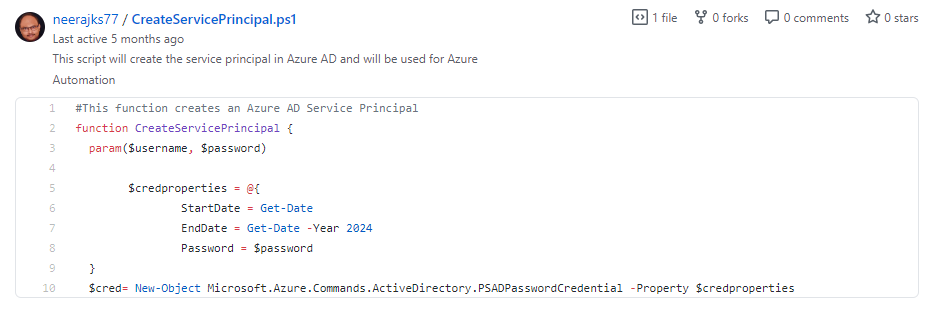
- Open a new browser tab and go to the link https://gist.github.com/neerajks77
- On the page that opens, scroll down to find the PS code to create the service principal

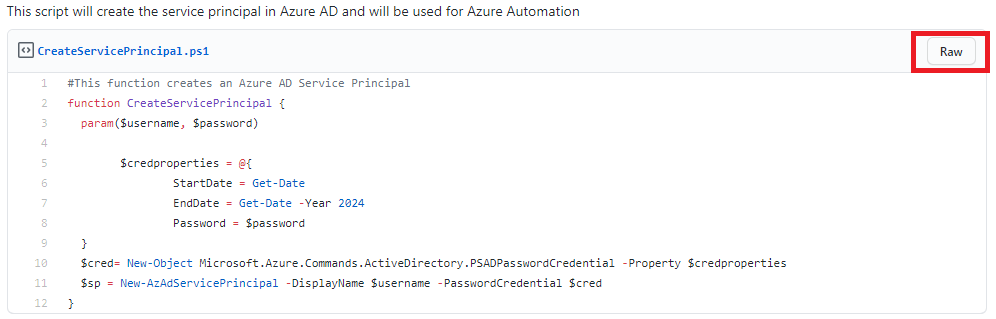
- Click on the name (CreateServicePrincipal.ps1) and then click on the ‘Raw’ button’ on the top left corner

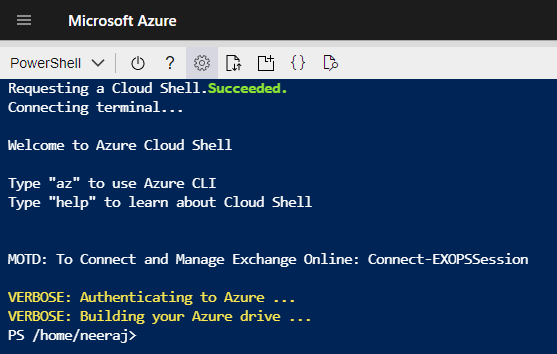
- Copy the code and go back to the Azure Portal. You can run the code from the cloud shell from within the Azure Portal or open a new shell window by typing shell.azure.com. It will open the shell associated with your tenant.
- Once on the shell, you might have to create another storage account for running the shell commands. Once the blue screen appears, make sure PowerShell is chosen for you.

- Paste the code copied from the gist and press enter. This will create a function that can be called with the username and password as parameters to create the service principal.
- On the command prompt type, the function name and pass the parameters for username and password. Make a note of the password as this will be needed during the creation of the credentials inside the automation service


Create Credentials within Automation service
-
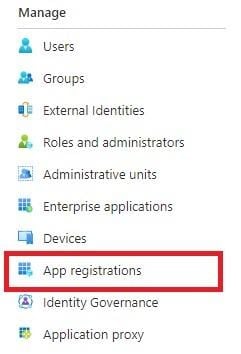
- Go back to the Azure Portal and open Azure Active Directory
- Click on the App registrations under Manage

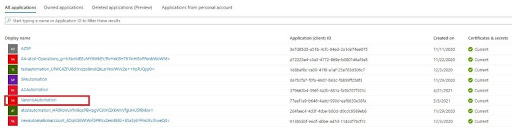
- Once you are on the App registrations page, click on All applications. Here you will see the Service Principal created

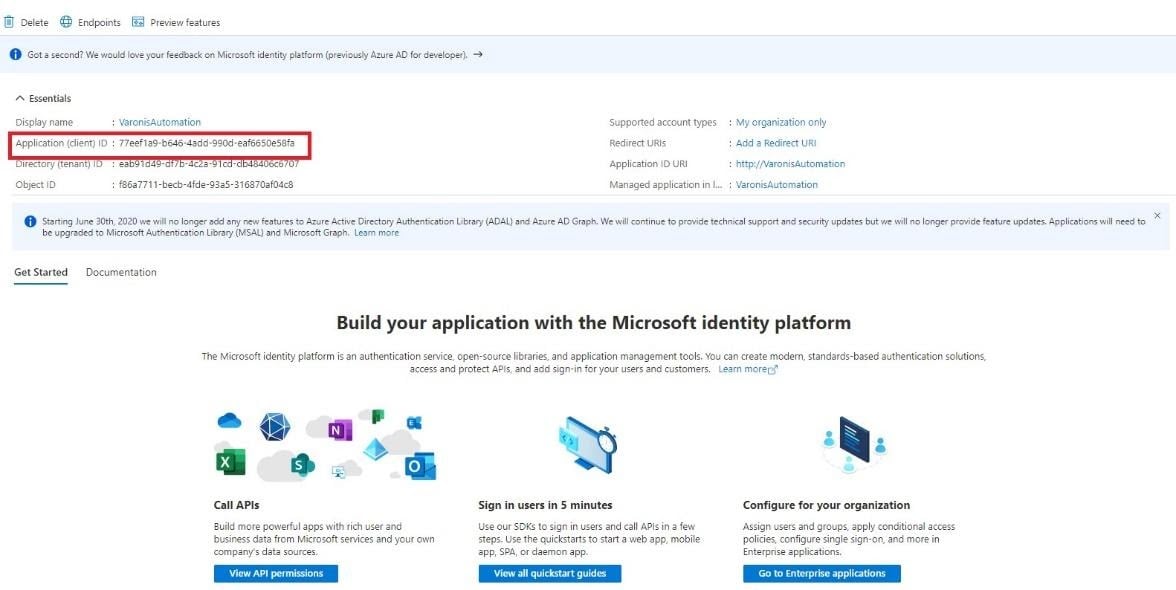
- Click on the Service Principal you created earlier. From the page that opens, copy the Application (client) ID. This will work as the username in the credential section of the Automation account.

- Go back to the Automation Account created above
- From the left menu, scroll down and click on ‘Credentials’ under ‘Shared Resources’ section

- Once on the credentials page, click on ‘Add a credential’
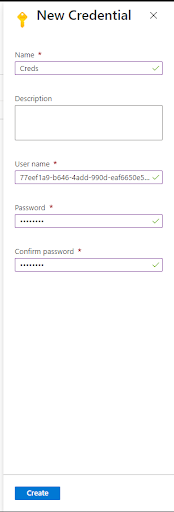
- In the ‘New Credential’ popup, enter a name (it can be any name). For now, enter ‘Creds’ as that is referenced in the PowerShell runbook
- For the User name, enter the application id copied from Azure AD
- Password will be the same that was used while creating the service principal.
- Click on Create


Create Variables within the Automation service
Now we need to create variables. These variables will be used by PowerShell runbooks for processing.
- From the left menu, click on ‘Variables’ under ‘Shared Resources’
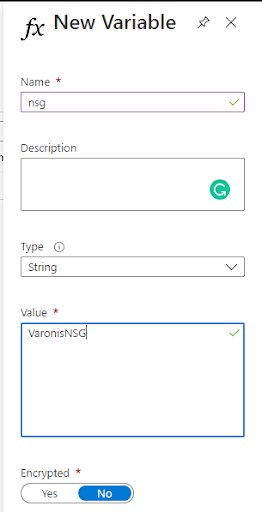
- We need to create 4 variables, each of type string. We will start with ‘nsg’
- Click on ‘Add a variable’ button
- In the name section, type ‘nsg’
- In the value box, type the name of the network security group created earlier.
- Once done, click on create

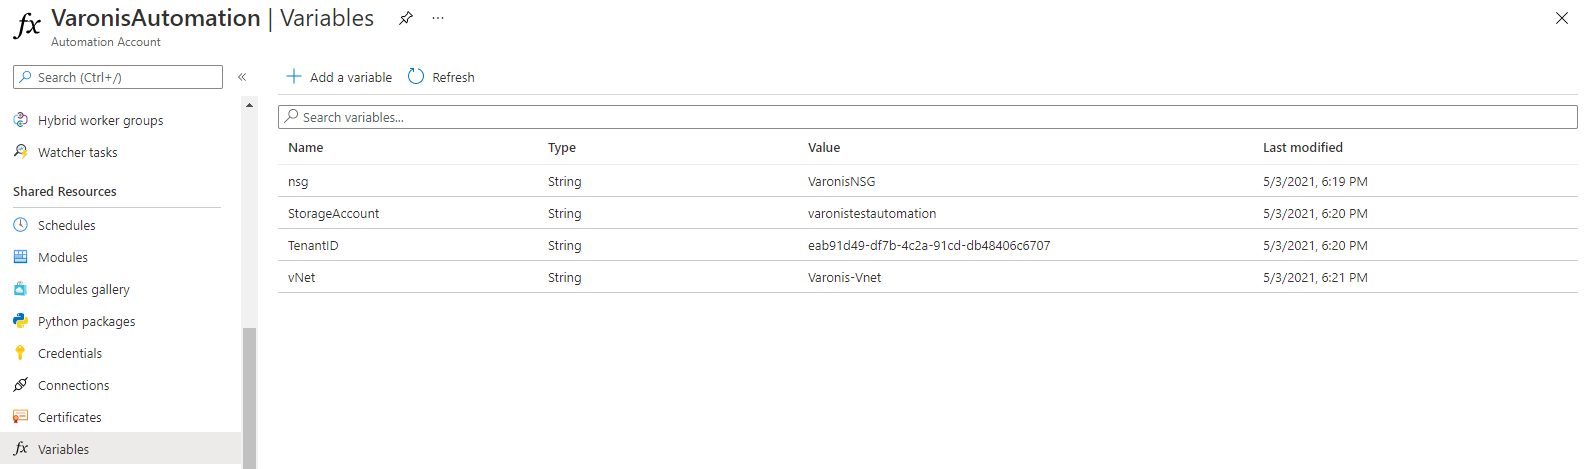
- Repeat the steps c through f to add three more variables, which are – ‘StorageAccount’, ‘TenantID and vNet.
- For the TenanID variable, you can run the Get-AzSubscription command in PowerShell to retrieve the Tenant ID value.
- Your final variable screen should look like the screen below

Import required modules
Now we are going to import all the required modules for this lab. We will start with Az.Accounts. This should be the first one to be imported as all other modules are dependent on this module. We will then repeat the steps for all other modules.
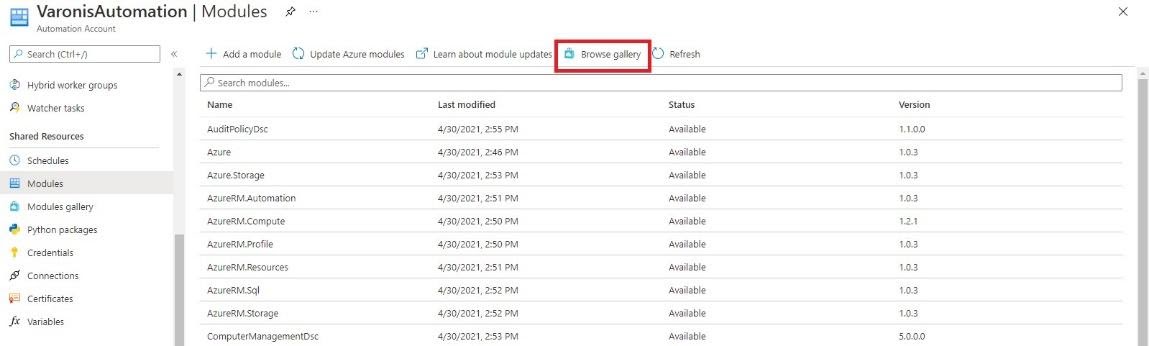
- Click on the Modules under Shared Resources from the left menu
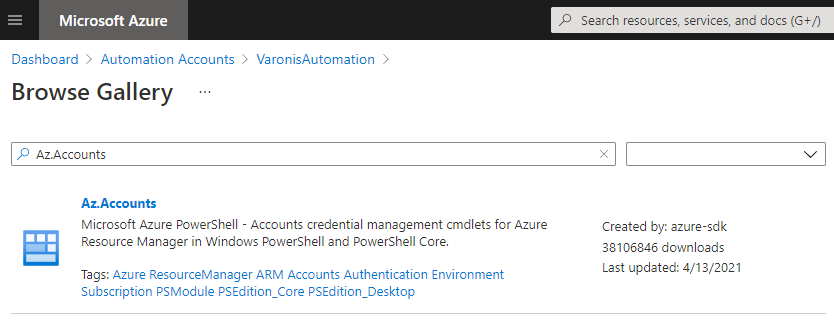
- From the Modules page, click on the Browse Gallery button

- On the Browse Gallery page, search for Az.Accounts

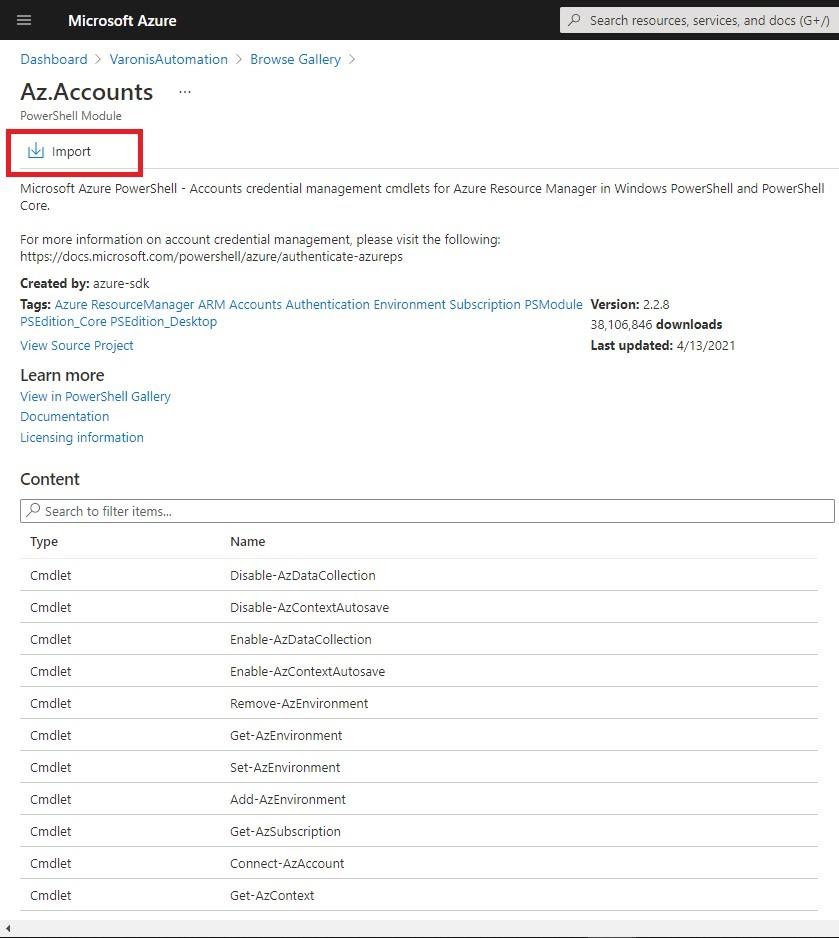
- Once the module appears, click on the module and finally click on Import to import the module

- This module will take some time to get imported and configured for use. After it has been imported, begin importing other modules
- Follow steps c through d to import other modules:
- Az.Automation,
- Az.Compute,
- Az.Network,
- Az.Resource,
- Az.Storage and
- ImportExcel
Create PowerShell Runbooks
We will now create the PowerShell runbooks. There are two runbooks that we will create. The first runbook will initiate the process by listening to the events on the Storage Account. It will read the uploaded excel file and extracts the information one row at a time and passes them as parameters to the second runbook. The second runbook will do the heavy lifting job of deploying the virtual machines and attaching the network security group to the NICs.
Follow the below steps to configure the runbooks.
Create PowerShell Runbooks
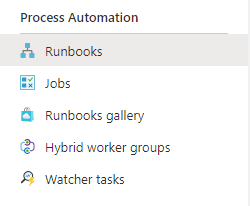
- From the left menu, click on the Runbooks under Process Automation

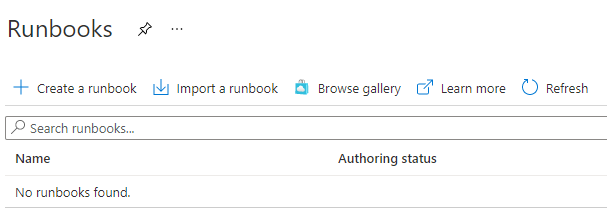
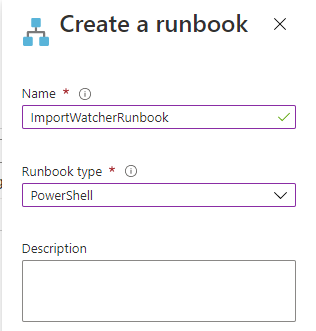
- On the Runbooks page, click on Create a runbook

- On the Create a runbook popup that opens, enter the name as ‘ImportWatcherRunbook’ and then select the Runbook type as PowerShell

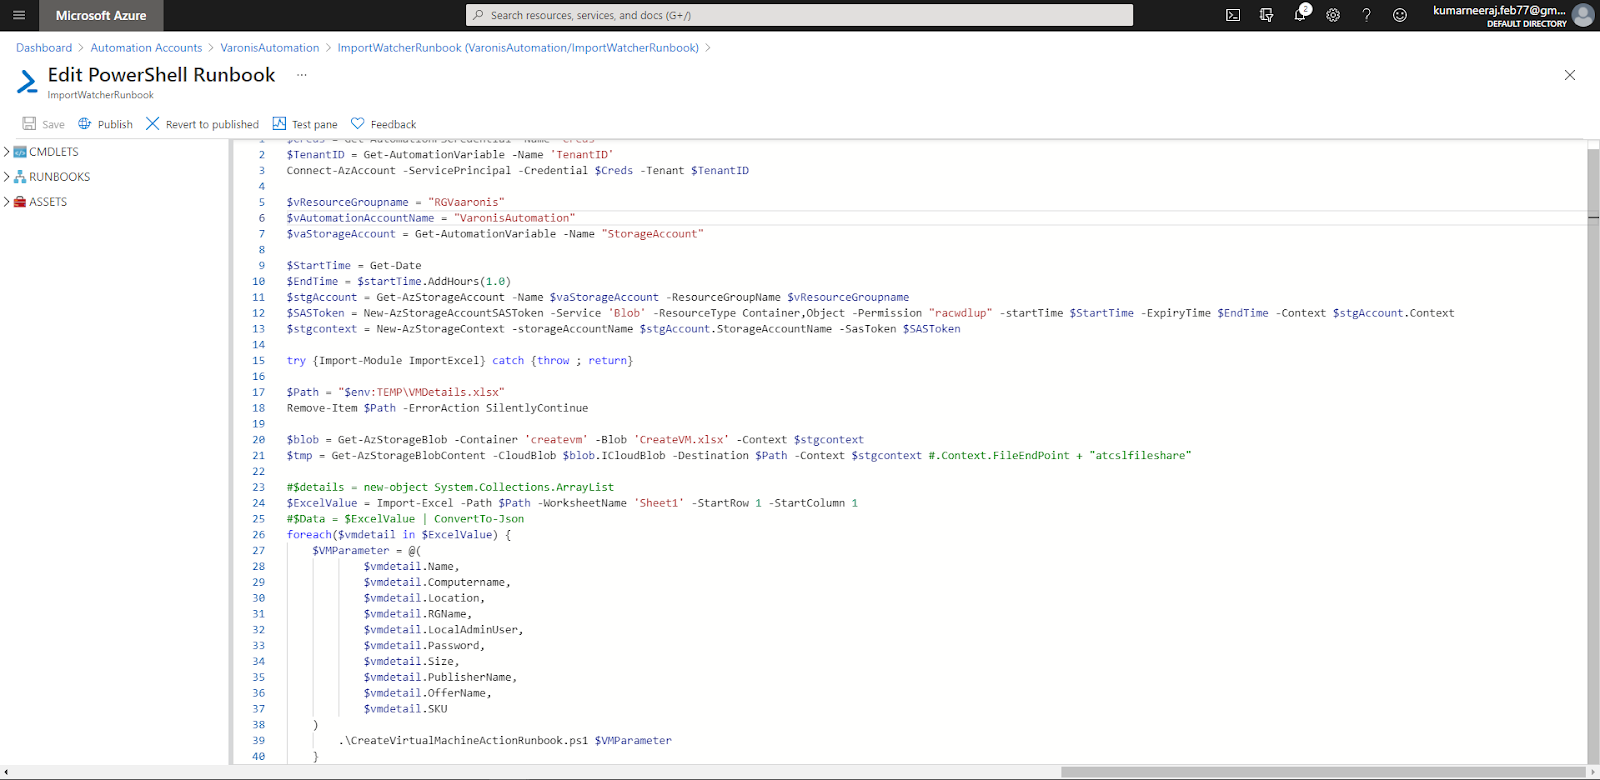
- You will be directed to Edit PowerShell Runbook page.
- On another browser window go back to gist.github.com/neerajks77 and copy the code for “InitiateWatcherProcess.ps1”
- Return back to the Edit PowerShell Runbook window and paste the code
- Make sure to update the ‘$vResourceGroupName’ and ‘vAutomationAccountName’ as per your configuration

- After pasting the code, click on save and then Publish. This will publish your first runbook.
- We will follow the steps a through g above to create the second runbook with the name ‘CreateVirtualMachineActionRunbook’. For the same, copy the PowerShell code from the gist under “CreateVirtualMachineActionRunbook.ps1” and past it in the runbook. Save and publish the runbook
Assign permission to the service principal at the subscription level
After the runbooks have been created, we need to assign permissions to the service principal created earlier. For this lab, we will assign the service principal, contributor level access. In real-world scenarios, permissions need to be given judiciously so that it limits the user actions to perform only desired tasks as per their roles.
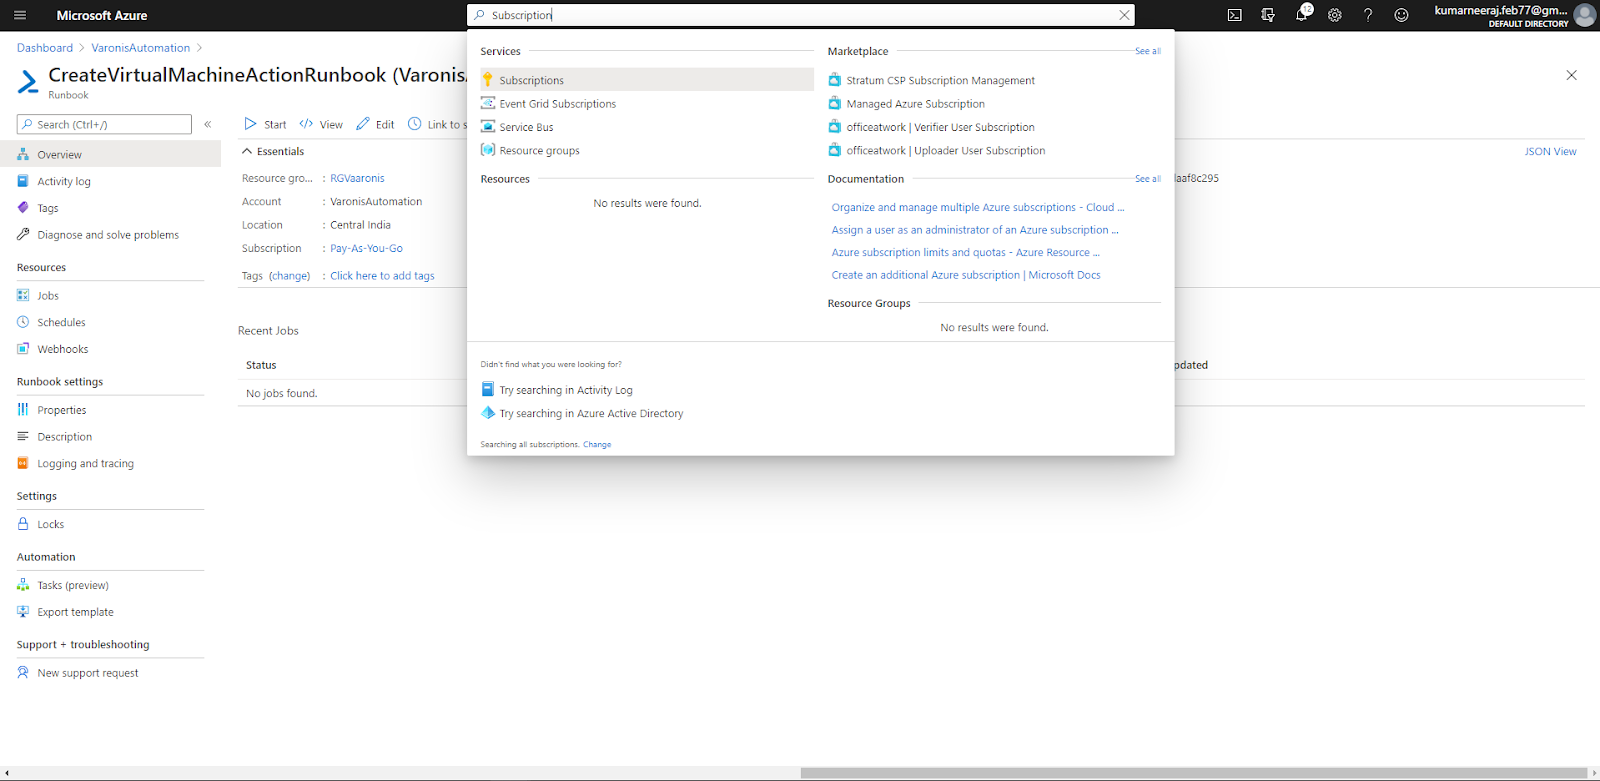
- On the search bar, type subscription and click on the first option

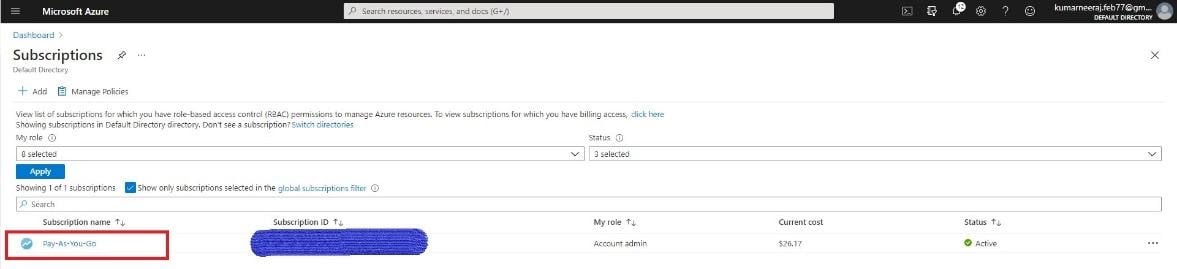
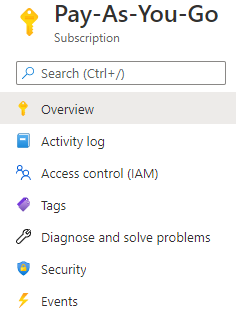
- On the subscriptions page, click on your subscription where all the resources have been created

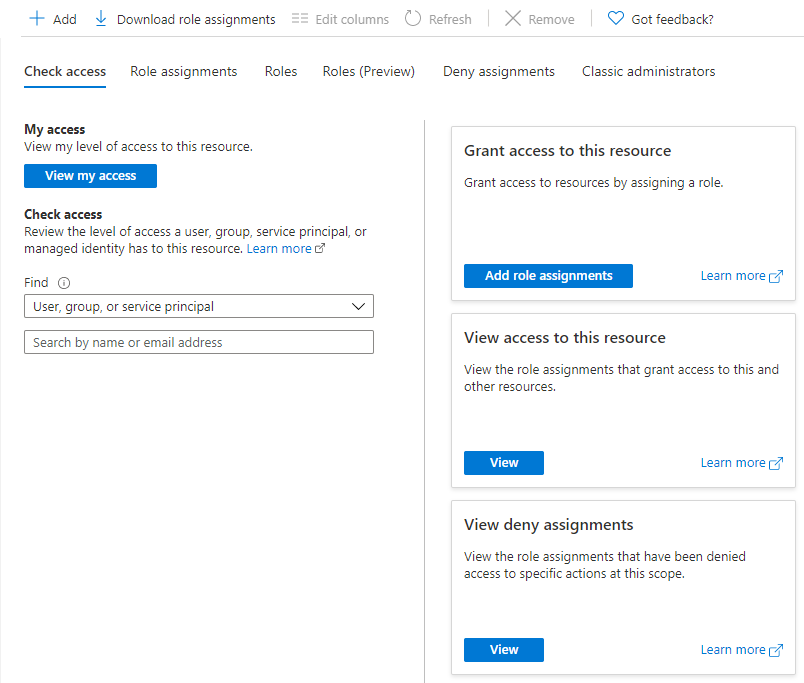
- On the subscriptions page, click on Access Control (IAM) from the left menu

- On the Access Control page, click on Add, to add the service principal to a contributor role

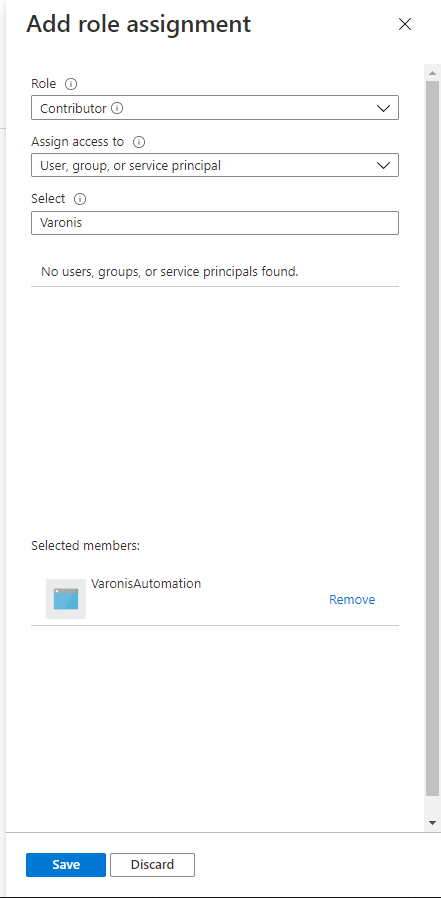
- From the Add role assignment popup, select Role as Contributor, leave Assign access to its default, and for Select, type Varonis. VaronisAutomation id will appear and will be selected.
- Once done click on Save

Create and Configure Event Grid
Now we need to create Event Grid for the Storage account so that the events are published every time there is a new file uploaded to the storage account.
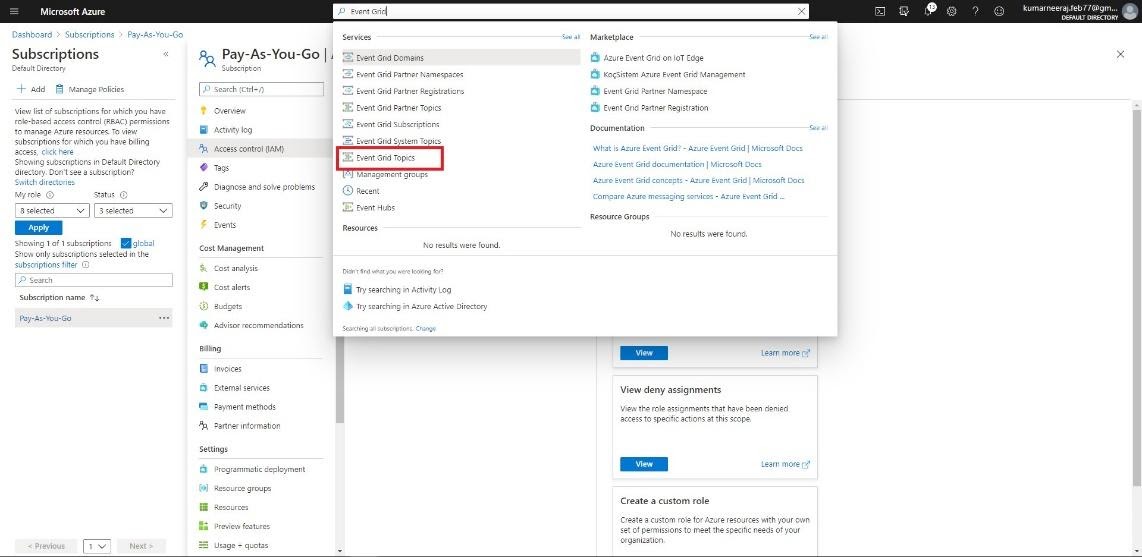
- We will type Event Grid in the search bar and click on Event Grid Topics

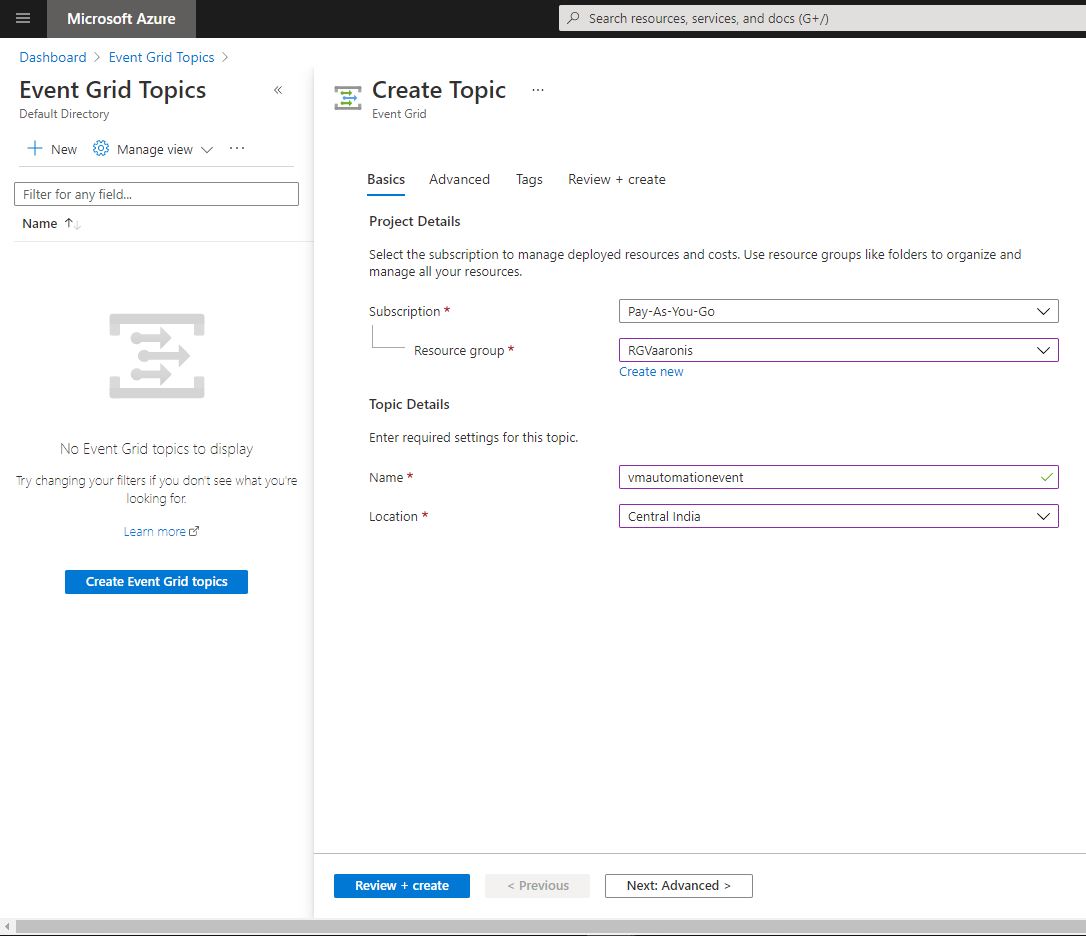
- On the Event Grid Topics page, click on New
- On the Create Topic Page, select the resource group, provide the name for the topic, and choose the region. No other options need to be changed
- Once done, click on Review + create button and after validation, click on Create


Create Webhook for listening to the events in Storage Account
After the topic has been created, we need to create a webhook on the ‘ImportWatcherRunbook’, as this runbook will listen to the file upload events from the storage account to initiate the VM creation process.
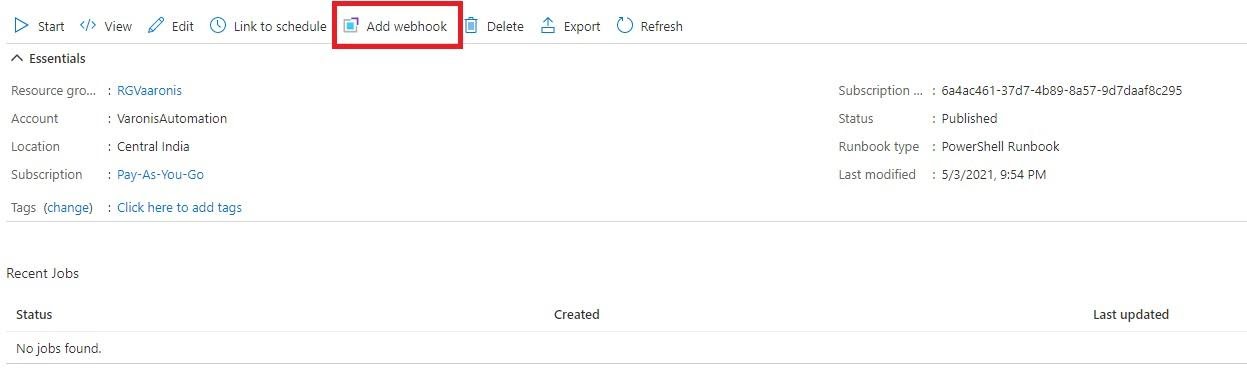
- On the Azure Automation account, click on Runbooks under Process Automation
- Then click on the ImportWatcherRunbook

- On the ImportWatcherRunbook page, click on ‘Add Webhook’

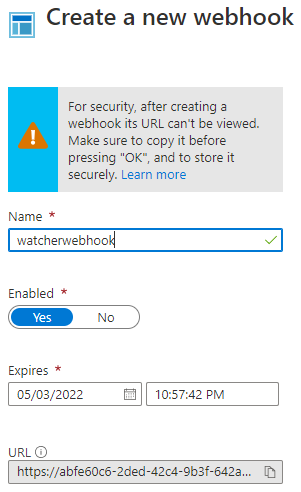
- Once on the Add Webhook page, click on Create a new Webhook
- On the Create a new webhook page, give a name for the webhook. Leave all other values to their defaults.
- Copy and paste the URL at the bottom to the notepad. This is a mandatory step as you will lose access to this URL after you navigate away from this page. Otherwise, you will have to create a new webhook.
- Once done, click on the OK button

- After you are back on the Add Webhook page, click on the Create button
Create Subscription to the Events over the Webhook
Now that the Webhook has been created, it is time to create the Event Subscription. This is the last step in the configuration of the automation process.
- Navigate back to the Automation Account
- From the left menu, scroll down to the Related Resources and click on the Event grid

- On the Event grid page, click on Event Subscription to create a new subscription
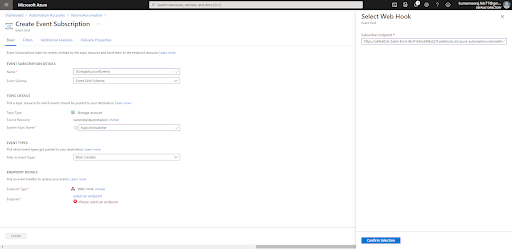
- On the Event Subscription page, give a name to the subscription
- For the topic, select Storage Accounts
- Select subscription and the resource group
- For the Resource, select the topic that was created in the previous section
- For System Topic Name, enter any name. I have given the name as ‘topicsforwatcher’
- For the Event Types, choose ‘Blob Created’
- For Endpoint Type under Endpoint Details, select Webhook from the dropdown and then click on the link ‘Select an endpoint’
- In the Select WebHook popup, paste the endpoint URL in the Subscriber Endpoint text box that was copied earlier

- After all the details have been provided, click on Confirm Selection button and finally click on Create

Now that all the steps for configuring the Automation have been completed, it is time to test the system. We will go to the storage account and upload the excel file named ‘CreateVM.xlsx’ inside the ‘createvm’ container.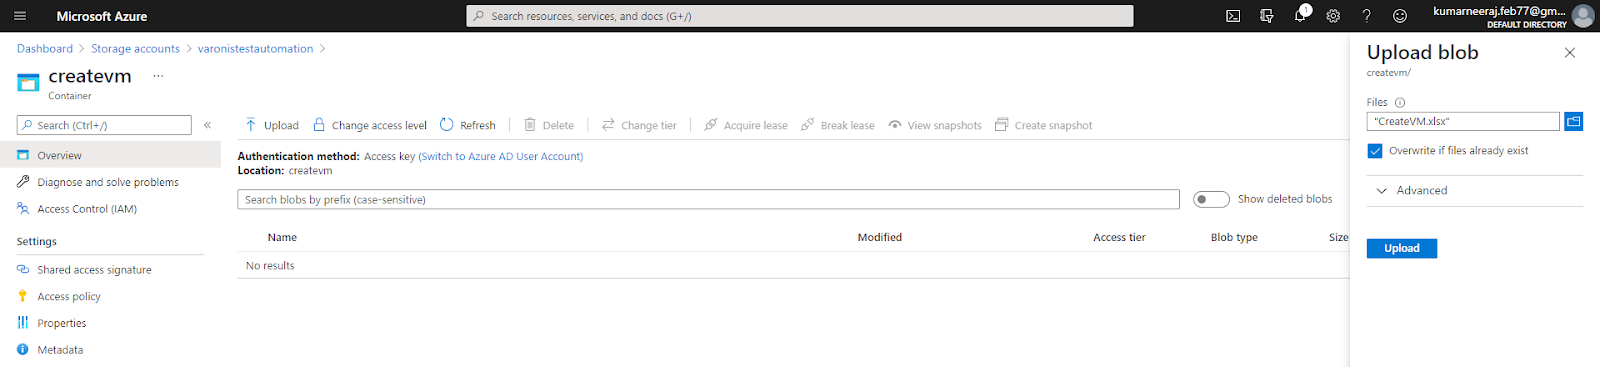
After the file has been uploaded, we will go back to the ‘InitiateWatcherRunbook’ within the automation account and we can see that the runbook starts automatically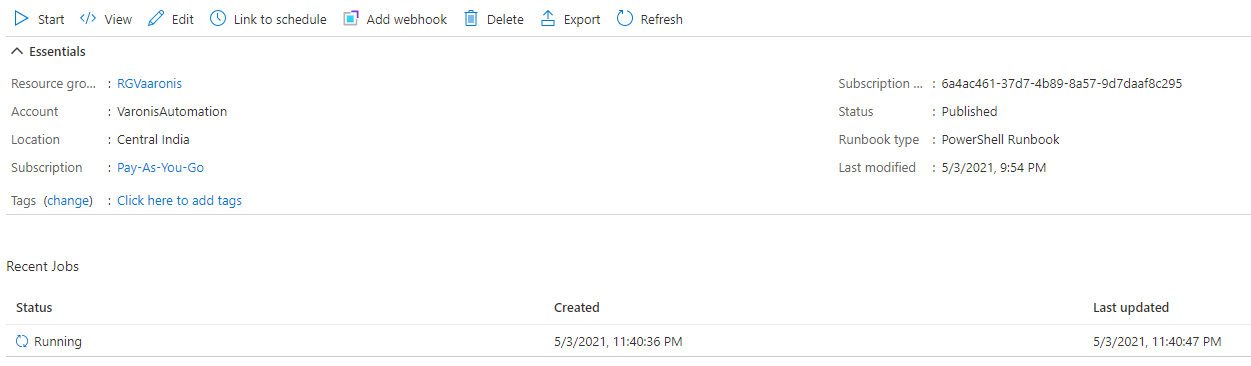
If we click on the Status, we can see further details. Under the value, we can see that the operation was triggered by the Webhook.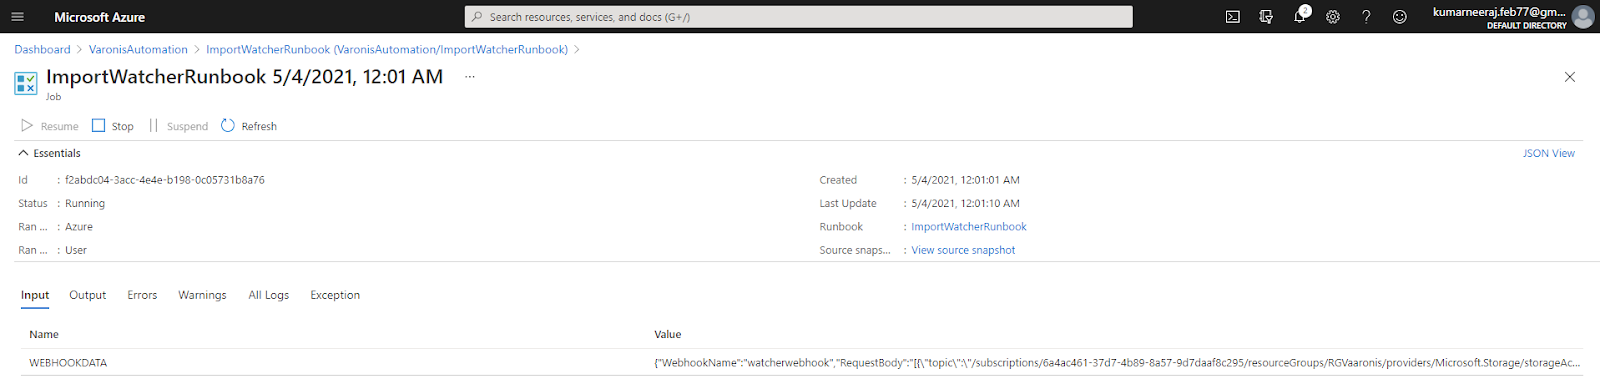
After the operation is completed, we can further examine the outputs by clicking on the Output tab
Finally, we can go to Virtual Machines and see that the two virtual machines have been deployed successfully.
Summary
Azure Automation is a cloud-based automation and configuration service that allows you to automate the management and IT operations and orchestrate the actions across Azure, non-Azure, and on-premises environments. It helps the IT teams and service desk teams to focus more on the productive work and getting things done, rather than focusing on how the work is to be completed, thereby adding more value to the business. This also helps the organizations in their endeavor to reduce their operational expenses.


