
Are you interested in learning about the tool that helps to automate and manage the complete software development lifecycle? Well, Azure DevOps is the answer for you, but before we dive deeper into understanding what Azure DevOps is and how it helps the teams during product development and release, let’s first try to build our understanding on DevOps.
DevOps is a combination of both development (Dev) and operations (Ops) practices that bring in people, processes, and technology together to continuously provide value to the organizations in their endeavor to make their business processes faster and more efficient. DevOps allows the software development teams to plan smarter, collaborate better, and ship the final product in shorter durations for a faster time to market with a set of modern services.
DevOps enables different teams like development, IT operations, quality assurance, as well as security teams to collaborate together for the production of more robust and reliable products. Organizations building a DevOps culture gain the ability to quickly and efficiently respond to customer needs. There is a wide range of DevOps tools available in the market today with almost similar sets of abilities. These include Jenkins, Git, Gitlabs, Github, Bitbuckets, etc. They provide certain additional functionalities such as version control, code repository, etc. along with DevOps capabilities, but they lack end-to-end abilities to manage the software development lifecycle. This is where Azure DevOps comes into the picture.
What is Azure DevOps?
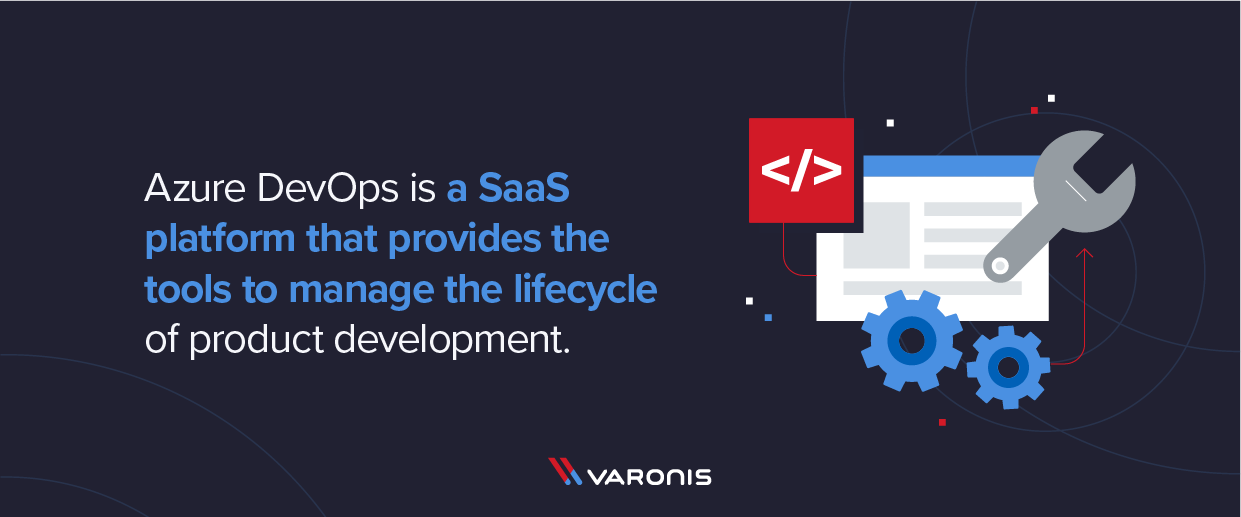
Azure DevOps was launched in October 2018. It’s a Software as a Service platform that comprises a complete set of tools that not just provides the DevOps capabilities, but also provides the abilities using which the complete lifecycle of the product development can be managed.
Get the Free Pentesting Active
Directory Environments E-Book
One of the best parts about Azure DevOps is its flexibility as it can also integrate with other tools in the market for shared management of the process flow and orchestrates the complete DevOps toolchain. This helps in leveraging existing tools already being used within the organization. There are three main reasons why Azure DevOps has an upper hand when compared to other existing tools in the market. They are:
- Flexible – Azure DevOps flexibility in a way that each of the services of Azure DevOps can be used independently and integrate it with the existing tools within the organization that is being currently used, thereby, making adaptability easier.
- Platform Independent – Although developed by Microsoft, Azure DevOps does not focus on only Microsoft-built platforms and language. It has been designed to work with any platform (this includes Linux, Windows, and macOS) and language (this includes .Net, Java, PHP, Python, C, C++, iOS, Android, and NodeJS).
- Cloud Independent – Azure DevOps’ Continuous Integration and Delivery model is supported not just for Azure, but also extends to Amazon Web Services (AWS) and Google Cloud Platform (GCP).
Benefits of Azure DevOps
Apart from the capabilities mentioned in the previous section, there are three main benefits of using Azure DevOps when compared to other tools with similar offerings:
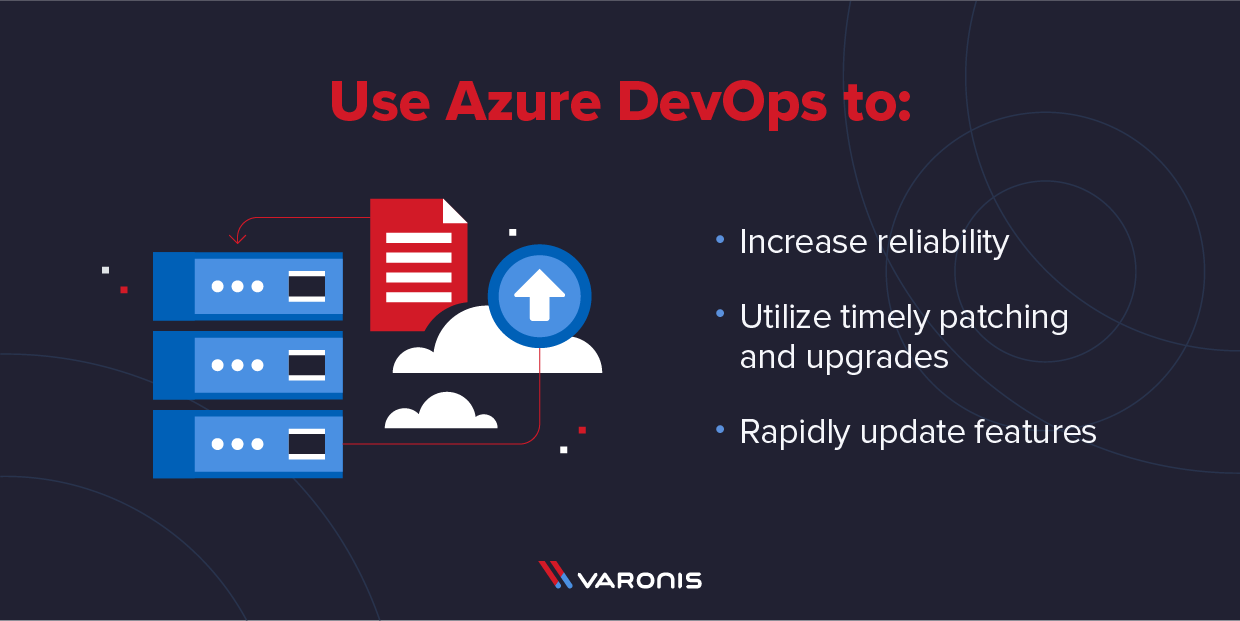
- Reliability – Azure DevOps is a SaaS offering, which is globally available and promises 99.9% uptime SLA, which makes it a reliable DevOps tool. It also provides easy scalability and 24×7 support.
- Timely Patching and Upgrades – As Azure DevOps is a SaaS offering, patching and upgrades are being taken care of by Microsoft, thereby taking off the overhead of the IT teams and making it much easier to use.
- Quick Feature Upgrades – The roadmap for Azure DevOps has already been published by Microsoft and the new features are released rapidly, in a short span of time (usually 3 weeks).
Azure DevOps Features
As already mentioned, Azure DevOps provides the ability for end-to-end management of the product development lifecycle, it comprises the below services.
- Azure Boards – is a set of Agile tools that supports planning and complete tracking of the project development progress, defects raised, as well as other issues, i.e., complete project management can be done using Azure Boards. At the backend it has a native support for Scrum and Kanban for Agile. It provides dashboards with integrated reporting that are customizable and have the ability to scale as per business demands.
- Azure Pipelines – being a DevOps tool, it definitely provides the Continuous Integration and Continuous Delivery (CI/CD), also known as CICD pipelines to support the build and release of the application from development to production. We will see this in action in the demo in the following sections.
- Azure Repos – is a set of version control tools that can be used to manage codes and their different versions by the development team. It, therefore, helps in tracking the changes made in the code over the period of time with different versions. When the changes are made to the code, DevOps tool takes the snapshots of the files being checked-in so that these changes can be tracked. These snapshots are saved permanently. Additionally, it helps coordination and collaboration between teams working on the same project. Azure Repos provides two types of version control. They are:
- Git: Distributed version control
- Team Foundation Version Control: Centralized version control
- Azure Artifacts – allows the teams to easily package the dependencies and other artifacts required for the application deployment and its functionality, thus making it easier to publish and consume the application. There can be different kinds of artifacts such as – Build Artifacts, Maven, Npm, Nuget, PyPI, Universal Packages, and Symbols
- Azure Test Plans – are a set of rich and powerful tools to test your application that includes manual/exploratory testing and continuous testing. They are easy to use, and browser-based test management solution providing all the capabilities required for different testing methodologies
In essence, DevOps is a set of practices that influences all the phases of the application development lifecycle that includes planning, development, delivery, and operations and each phase relies on the other phases.
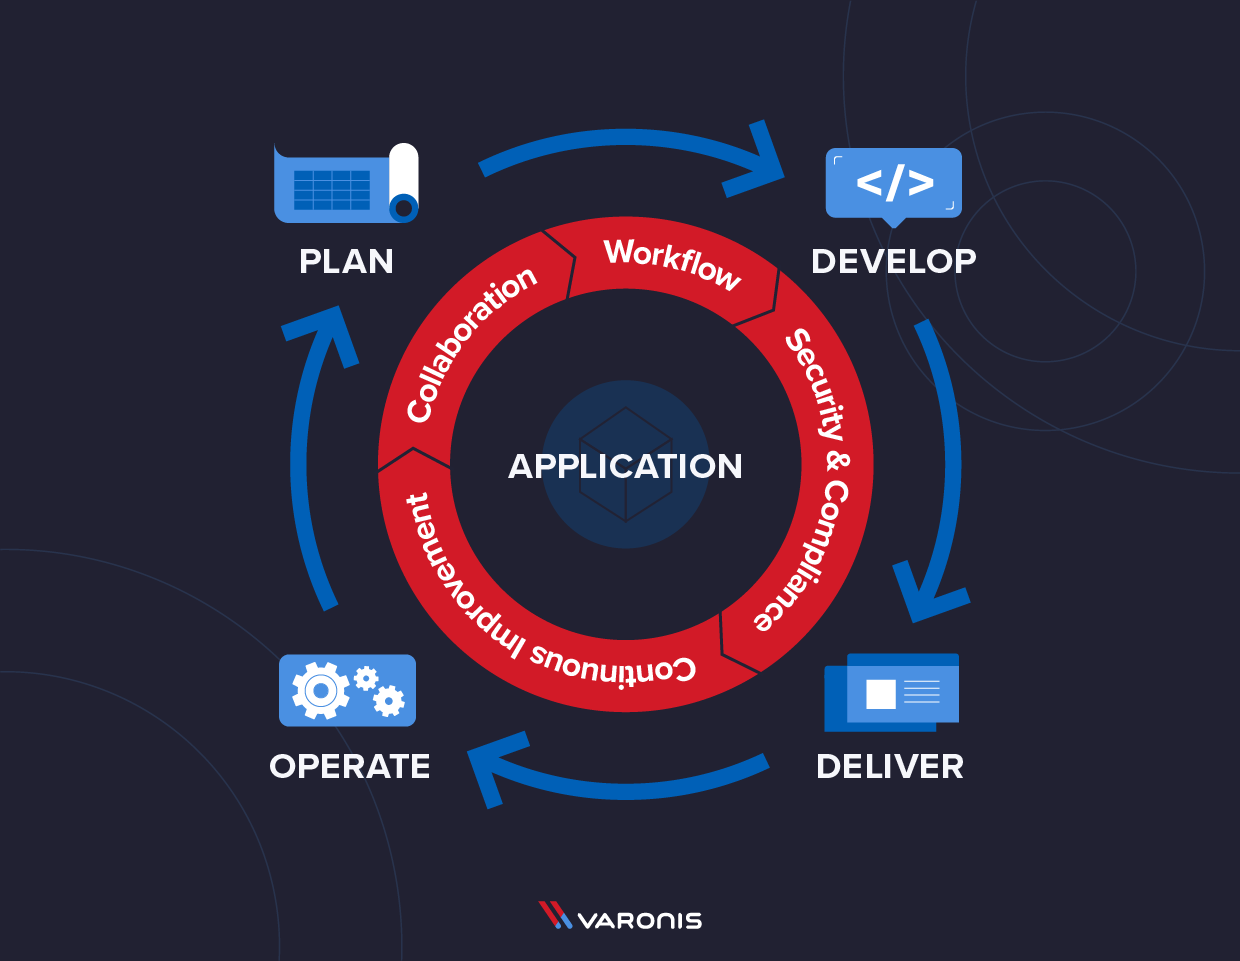
DevOps helps in reducing time between committing a change to the system and pushing the change into the production after passing different stages, while still ensuring high quality. These practices are – Continuous Integration and Continuous Delivery (CI/CD), Version control, Agile Software Development, Infrastructure as Code, Configuration Management, and Continuous Monitoring.
Create and Configuring CI and CD Pipelines with Azure DevOps
We had discussed the core features of Azure DevOps. One of those features is Azure Pipelines. It aims at continuous Integration and Continuous Delivery to persistently build and test the code and finally ship a high-performing, high-quality product. These pipelines can be defined either from the user interface or by using YAML syntax.
Continuous Integration produces deployable code, infrastructure and other artifacts to be deployed, whereas Continuous Delivery helps in deploying the integrated and built code into different delivery stages as new versions of the product.
In the following section, we will try to configure a CICD pipeline using YAML. The pipeline is defined in a YAML file called azure-pipelines.yml.
We will follow the below steps to configure the CICD pipeline for which we will be using the .Net Core code from the following repository:
https://github.com/MicrosoftDocs/pipelines-dotnet-core
- Create Organization
- Create a new Project
- Create the .Net Core Pipeline
- Managing Pipeline using Azure CLI
- Run a Pipeline
- Update Pipeline
- Show Pipeline
- Update Project Details
- Add/Update Project Teams
- Checking and Granting Permissions
Create Organization
- Sign in to your Azure DevOps using the URL – devops.azure.com

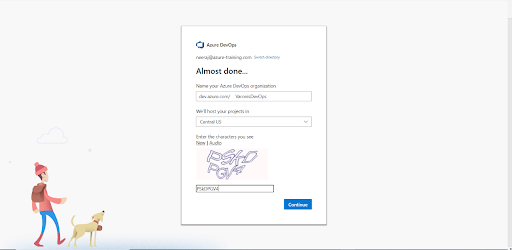
- Click on the New Organization link and create your organization and navigate to your project. Click on Continue when prompted for Terms and Conditions
- In the screen that appears, fill in the name of the organization, location, and the captcha challenge. Then click on Continue.


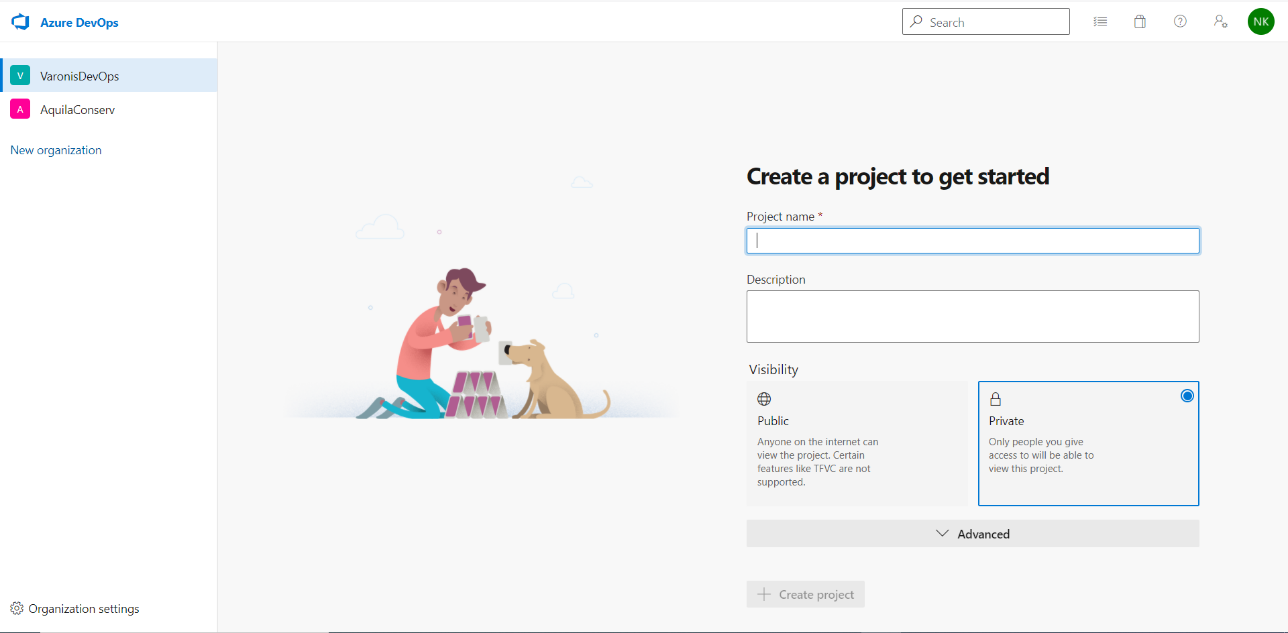
Create a new Project
- After the organization has been created, you will also receive an email confirmation of the same and will be redirected to the page where you can create a new project.

- Create the project as shown in the screenshot below. Enter project name, choose the visibility, and then from the advanced tab choose Git from version control and Scrum for the work item process
- Click on Create Project
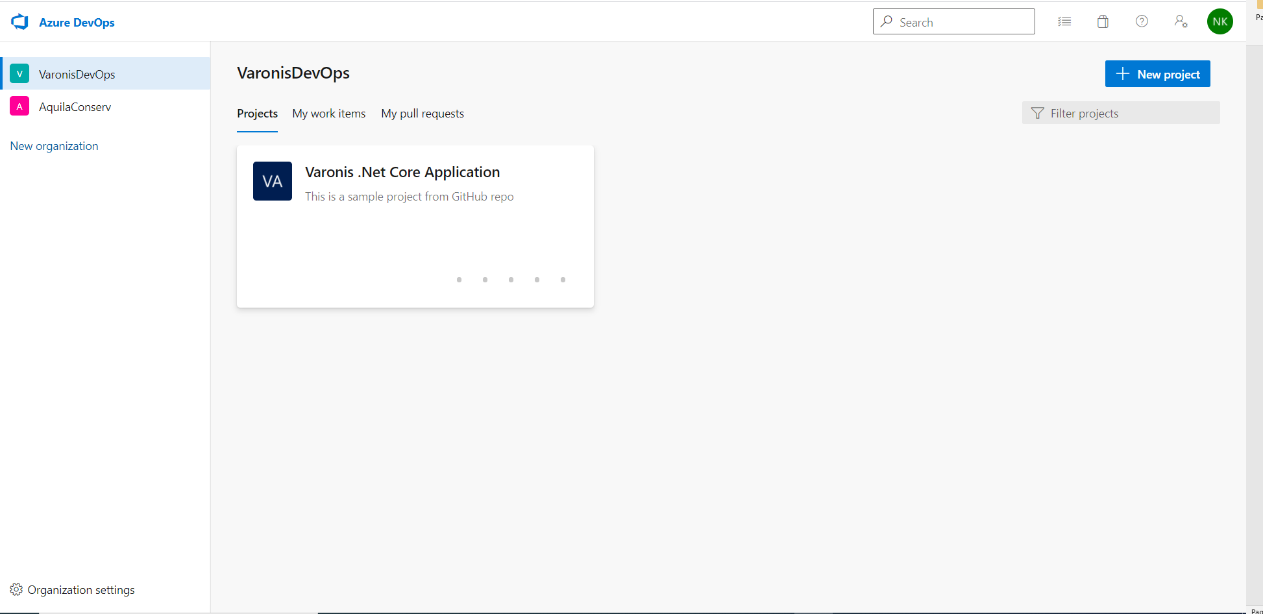
- You will then be redirected to the organization dashboard showcasing the new project.

Create the .Net Core Pipeline using YAML File
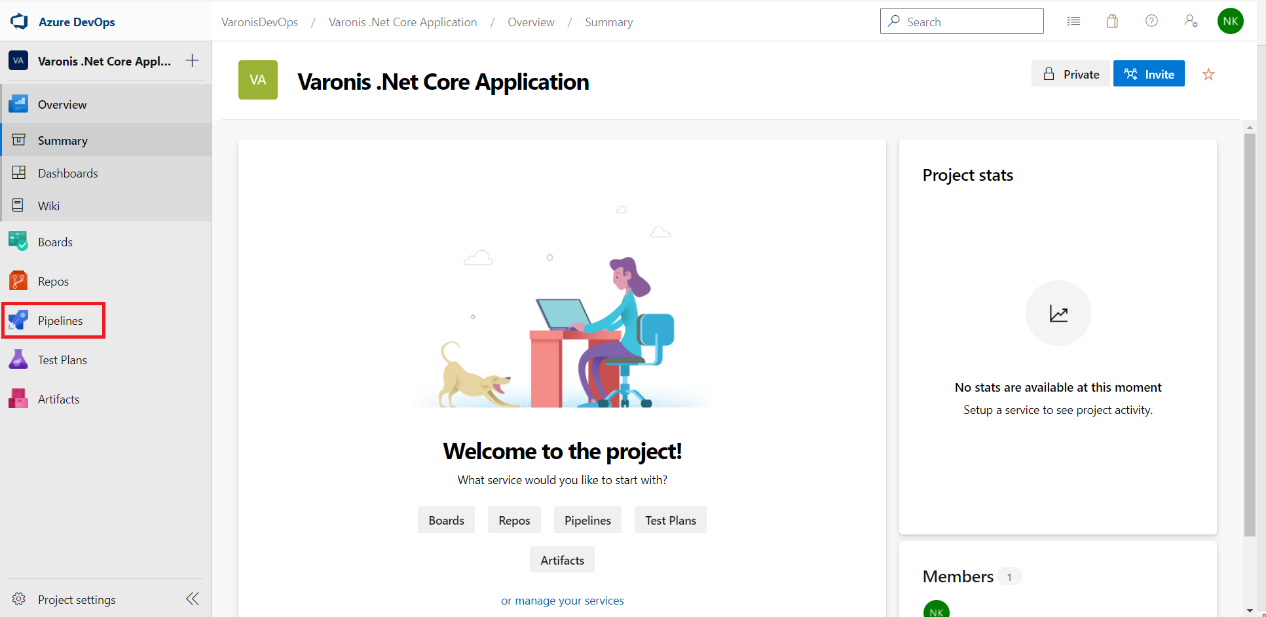
- Click on the project name from the dashboard
- In the screen that appears, go to Pipelines, and then select New Pipeline.

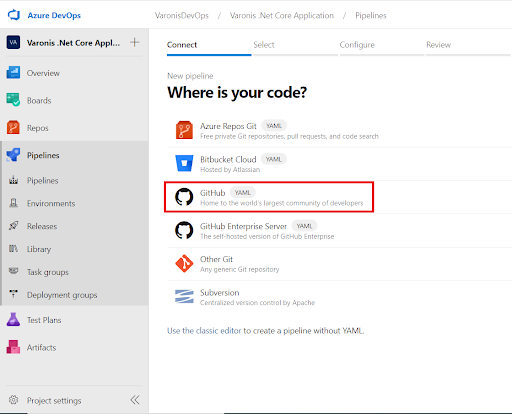
- Before proceeding further, fork the repo (https://github.com/MicrosoftDocs/pipelines-dotnet-core) from GitHub
- Go through the steps of the wizard by first choosing GitHub as your source code location.

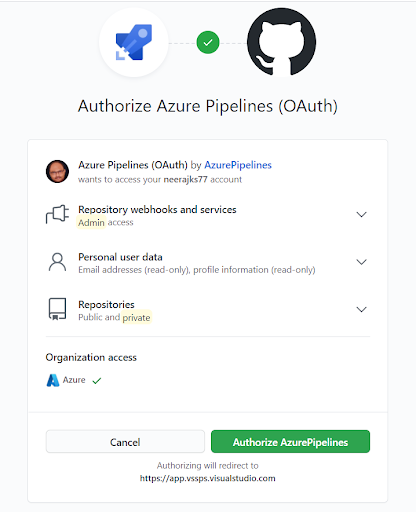
- You will be prompted to authorize the access of Azure Pipelines to your GitHub repository. You may be redirected to GitHub to sign in. If so, enter your GitHub credentials.

- Click on Authorize AzurePipelines
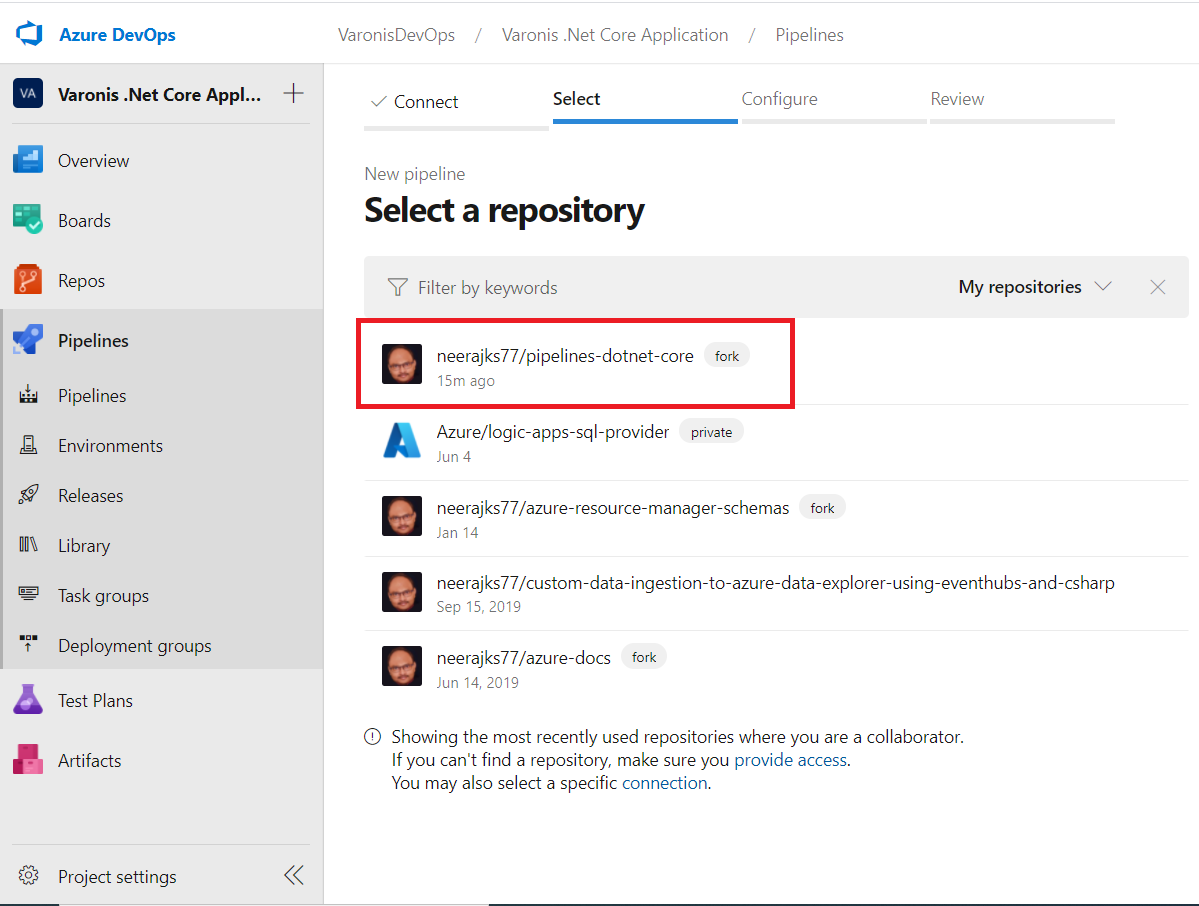
- You will see the name of the repository you had forked in the previous steps

- Select your repository when the list of repositories appears.
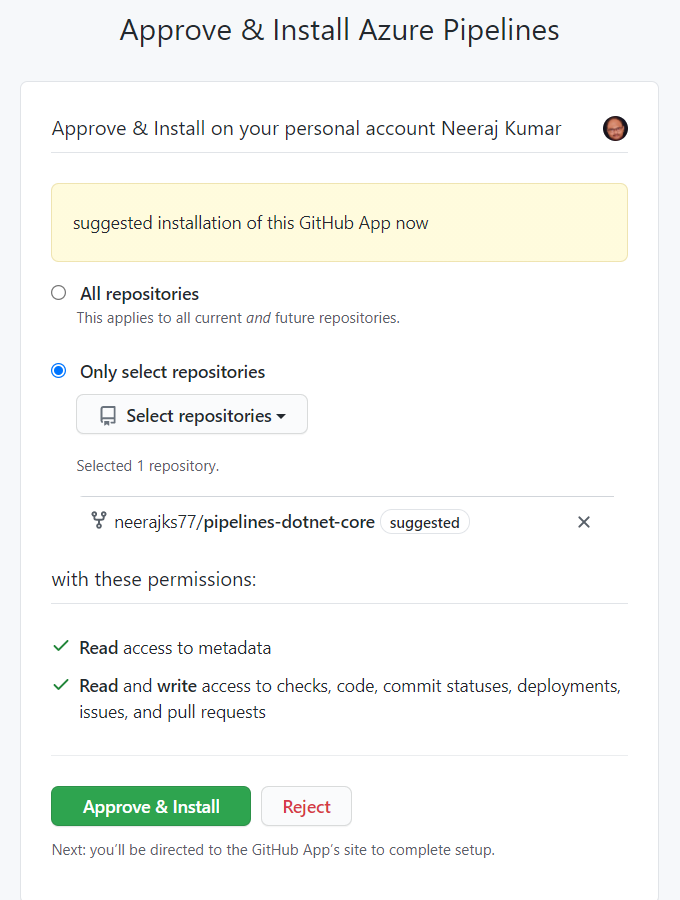
- You may be redirected to GitHub and prompted to install the Azure Pipelines app. If so, choose Approve & install.

- When the Configure tab appears, select ASP.NET Core
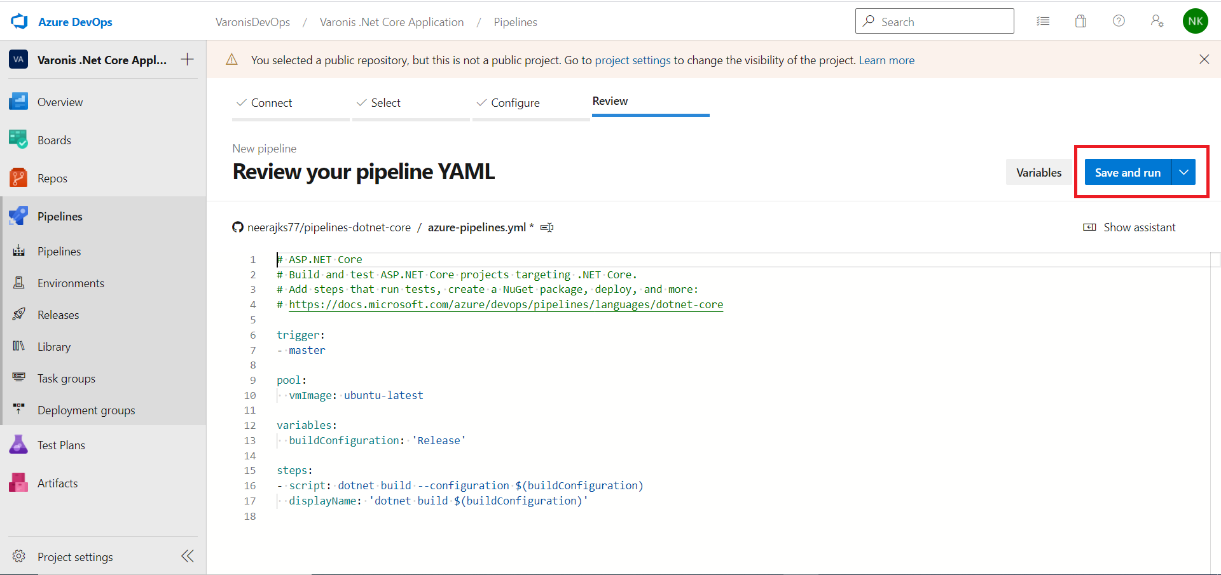
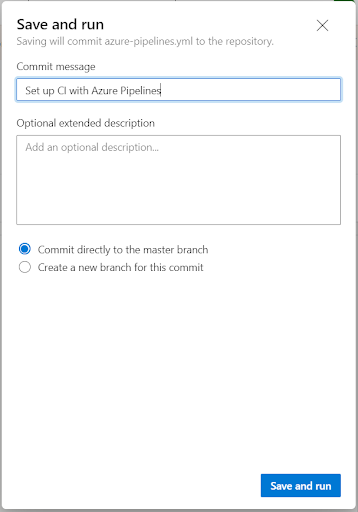
- Now that your pipeline appears as a YAML file, you can take a look and once done click on Save and Run

- A popup appears, where you can enter your message before you save the pipeline. After entering the message, click on Save and Run again. For now you can commit to the master branch

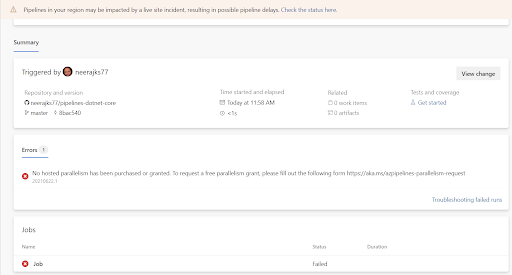
- The basic pipeline is now ready to be used to build and run the code. You will see the below screen after the pipeline has been deployed.

- You might receive the below error stating “No hosted parallelism has been purchased or granted. To request a free parallelism grant, please fill out the following form https://aka.ms/azpipelines-parallelism-request”


This is because Microsoft has changed the policy to allow the free tier of a hosted agent pool for public and private projects of newly created DevOps organizations. They have done it by citing the reason that many are abusing this feature by sending a huge amount of traffic on these hosted agents pools.
In order to rectify the issue and resolve the error, open the link as provided in the error message and provide the details asked in the form to get approval from Microsoft. The sample form is shown below
You can read more about this error by clicking on this link – https://devblogs.microsoft.com/devops/change-in-azure-pipelines-grant-for-private-projects/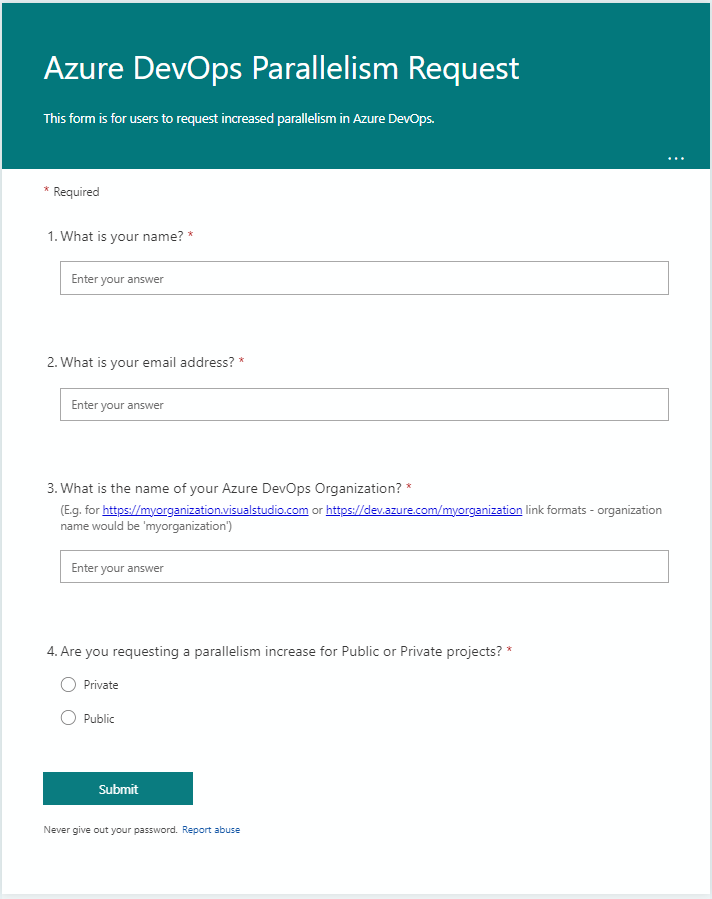
Once the approval has been granted by Microsoft, the administrator will receive an email confirmation for the same. You can then retry running the build pipeline again. After the build has been queued and started you will see the below screen.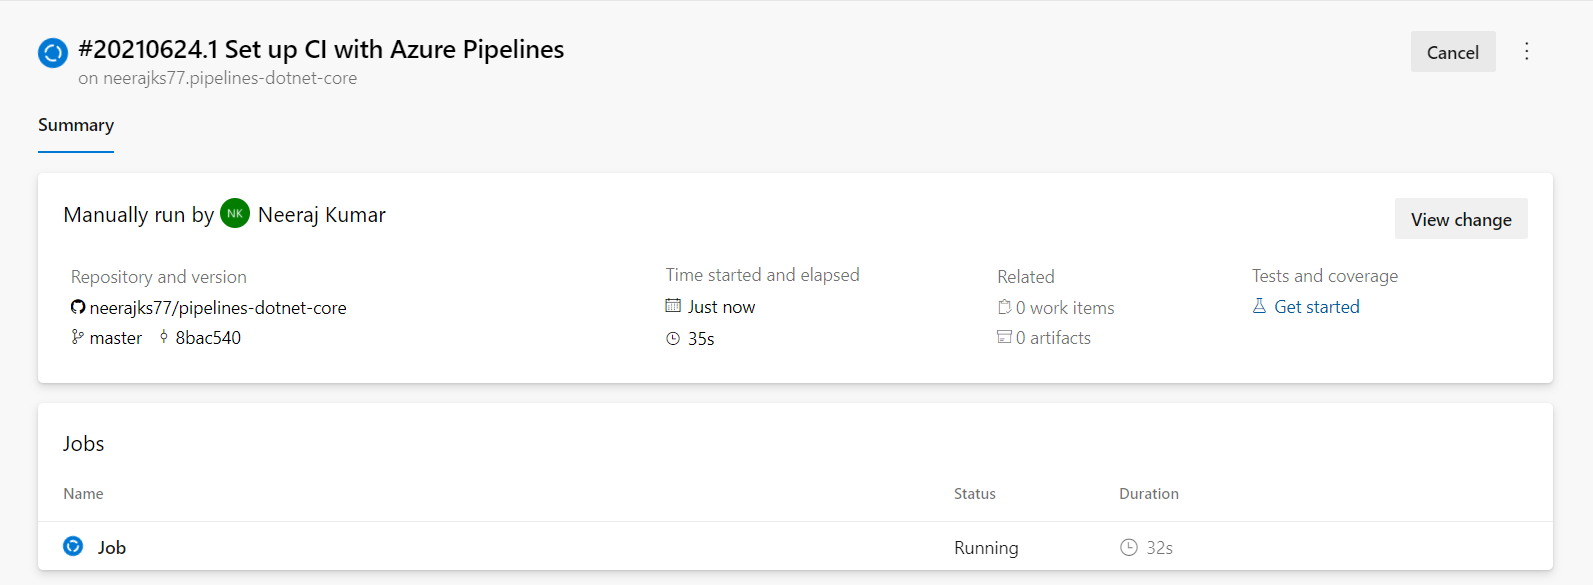
Post completion of the job, you will see a success or a failure message as shown below. The administrator will also receive an email confirmation on the build success or failure.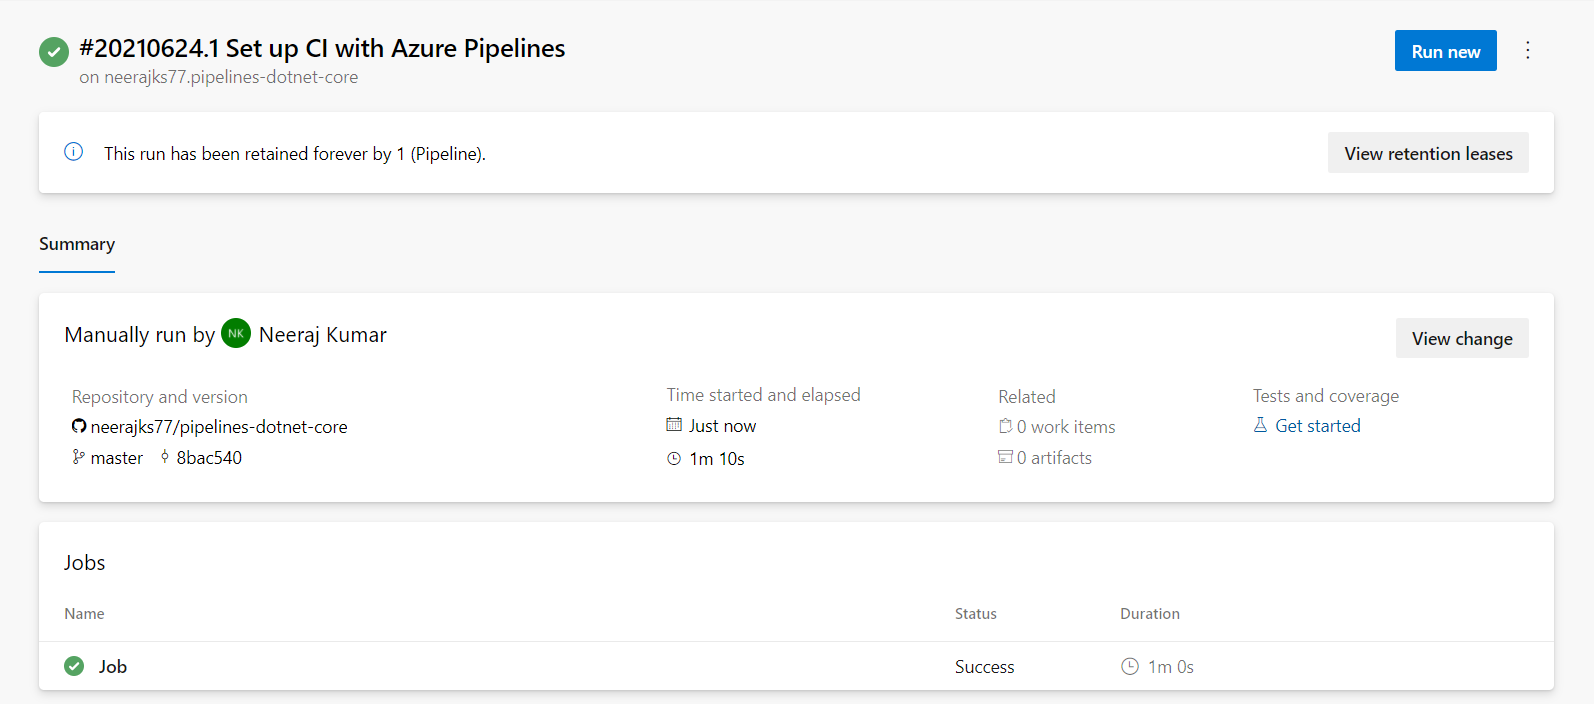
Managing Pipeline using Azure CLI
Azure Pipelines can be managed using Azure CLI as well. For the same, you will have to use the ‘az pipelines’ command.
- Run the pipeline – To run the existing pipeline, use the ‘az pipelines run’ command.
az pipelines run –name neerajks77.pipelines-dotnet-core –branch master –output table
- Update an existing pipeline – In order to update an existing pipeline, use the ‘az pipelines update’ command
az pipelines update –name neerajks77.pipelines-dotnet-core –description “rename this pipeline” –new-name varonis.pipelines-dotnet-core –output table
- Show the details of the existing pipeline – To show the details of the existing pipeline, use the ‘az pipelines show’ command
az pipelines show –name neerajks77.pipelines-dotnet-core –output table
Update Project Details
There may be times when you would want to update the project details, which includes the Name, Description, Process, and even the visibility. For the same, follow the below steps.
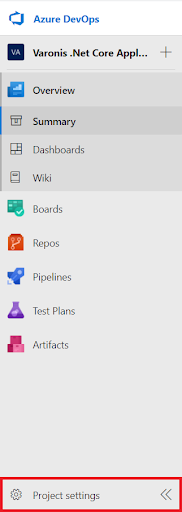
- Click on Project Settings on the bottom left corner of the left side menu.

- You will be redirected to the overview page of the Project Setting. Here you can manage the Project Details, Teams, Permissions, and other settings related to the Projects. This includes – Boards, Pipelines, Repos, Artifacts, and Tests.
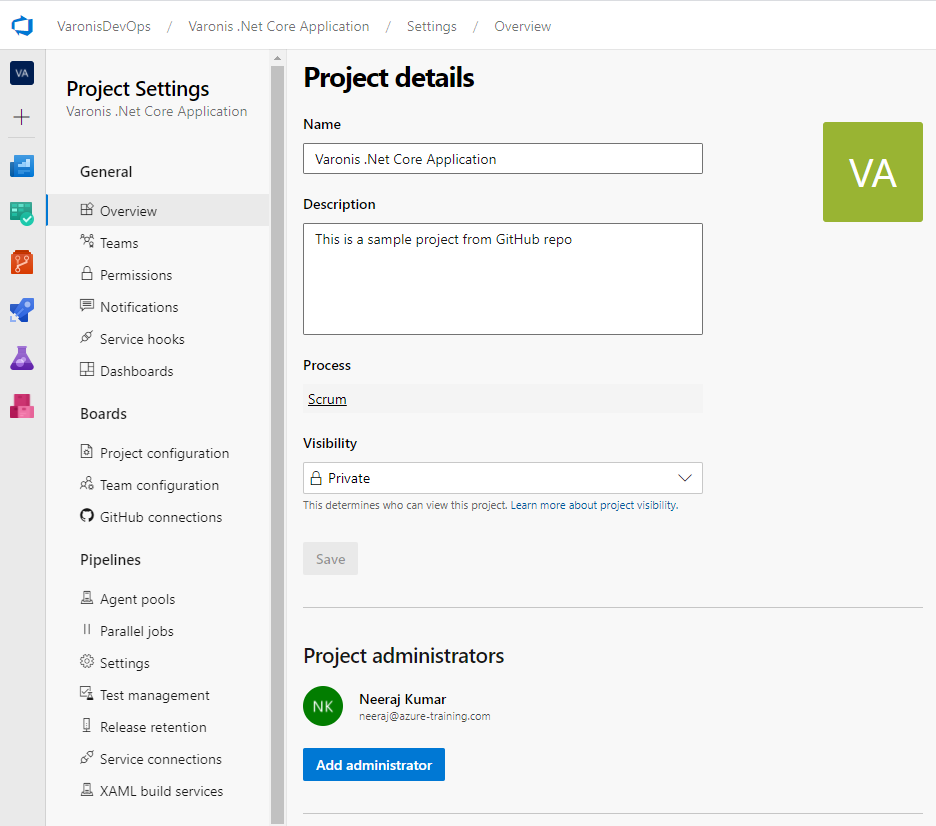
- In order to change the project details, click to open the Overview page. Here you can change the Name, Description, and the Visibility of the project. The Process cannot be changed.

- To add more Administrators to your project, click on the Add Administrators button under Project Administrators.

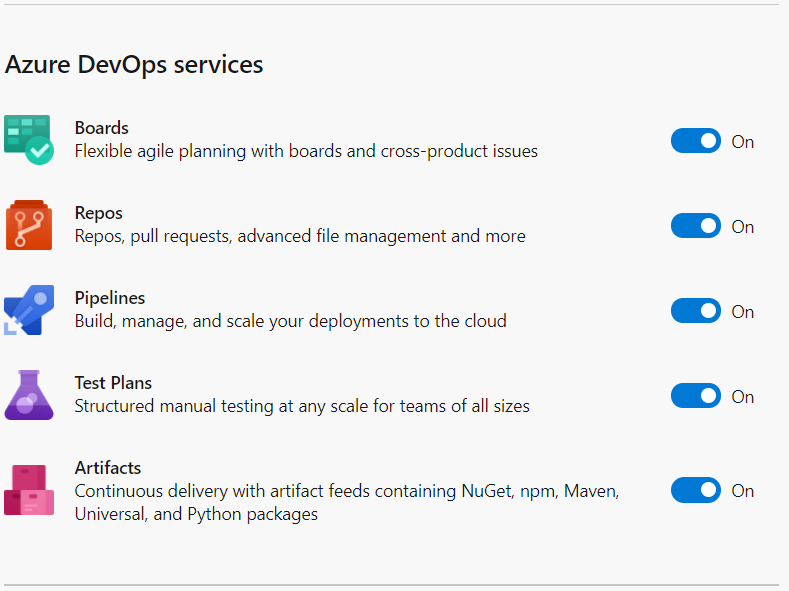
- In case you wish to enable or disable the Azure DevOps Services like – Boards, Repos, Pipelines, Test Plans, or Artifacts, scroll to the bottom of the Overview page of the Project Settings and shift the slider alongside the services to enable or disable them.
Add/Update Project Teams
There may be instances when you would like to add a new team or add members to the existing team. Follow the process as outlined below.
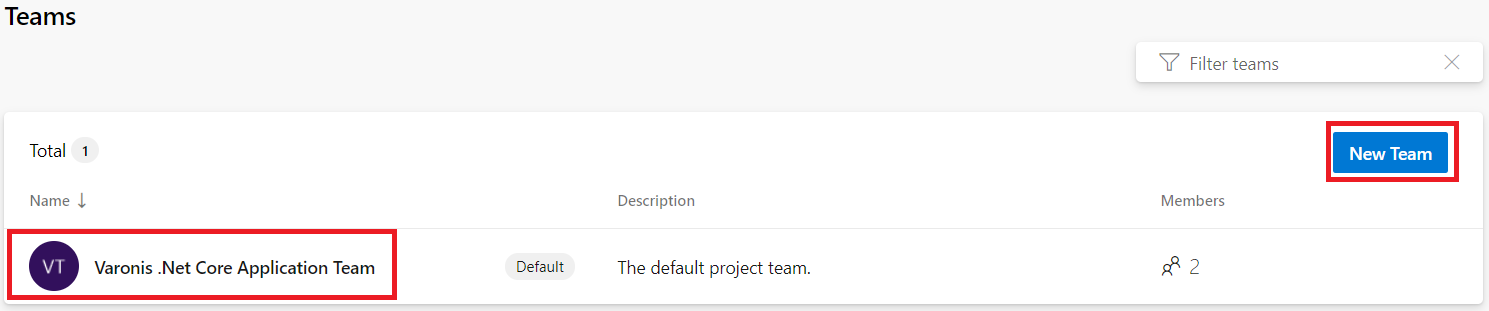
- Click on the Teams link under General settings. This will open the list of existing teams under the project.
- Click on the New Team button to add the new team
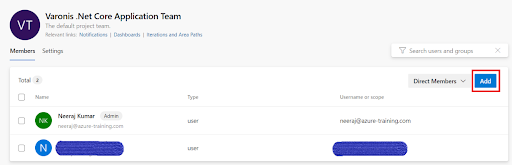
- For adding team members to the existing team, click on the name of the team

- From the screen that appears, click on the Add button to add a new team member

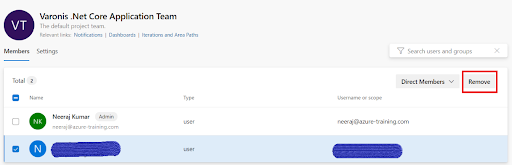
- In order to remove a team member from the team, select a user and then click on the Remove button

Checking and Granting Permissions
In order to check and grant permissions to the users, Follow the below steps.
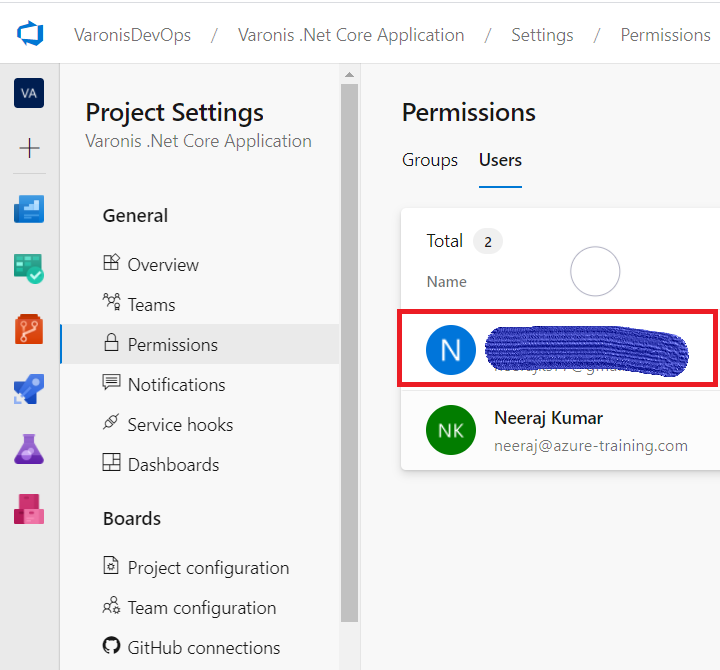
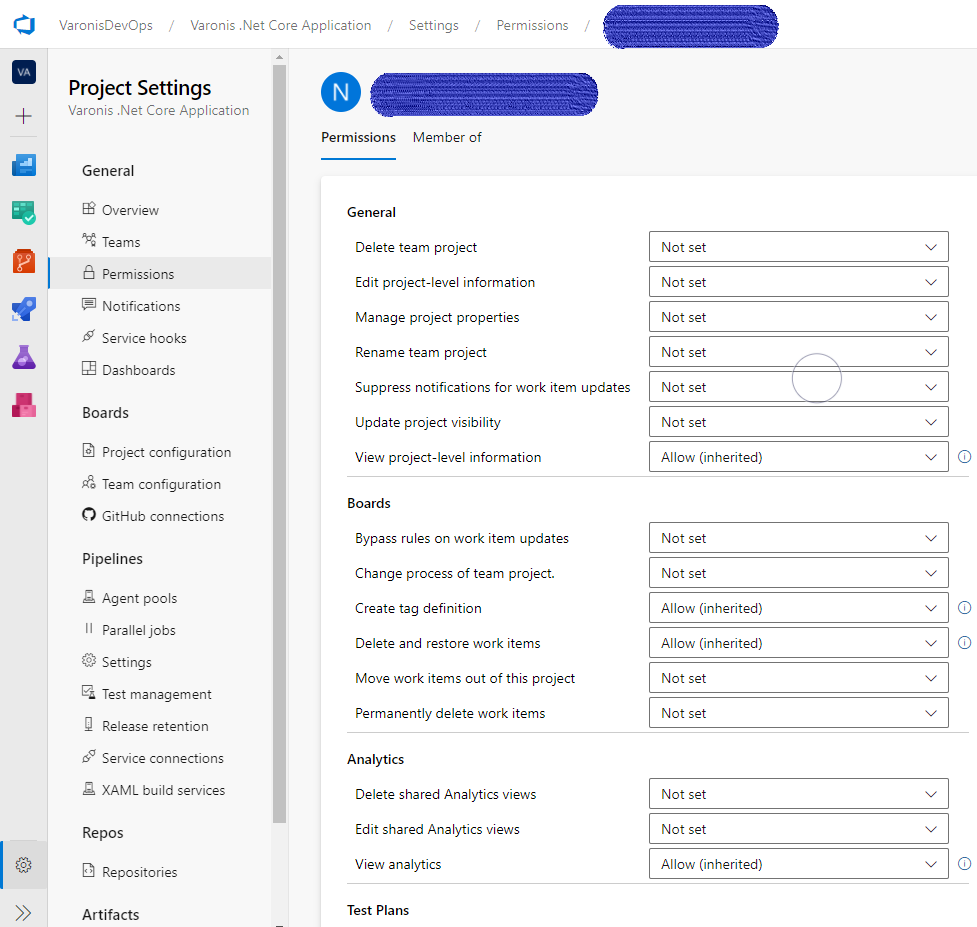
- Click on the Permissions link from the left hand menu under General and then click on users
- From the list of users, click on the name of the users for which you wish to add/update permissions.

- From the screen that appears, you can grant or revoke permissions for each individual functional items under each Azure DevOps services

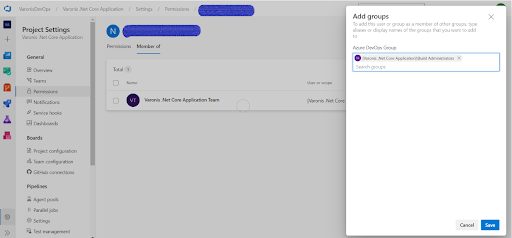
- You can also check and add the membership of the user by clicking on the Member of tab and then clicking on the Add button

Summary
Azure DevOps with its set of tools helps in building the culture that brings together the application development teams, project managers, and other contributors like quality assurance, and operation teams to plan their work and collaborate together on application development. It enables these teams to coordinate and collaborate in order to produce high-quality, and reliable products. With DevOps, teams gain the ability to respond to customer needs quickly. It is, therefore, advisable for the organizations to adopt the DevOps culture at the earliest for delivering high-quality products with reduced time to market.