
Are you tired of clicking around the Azure portal creating virtual machines, storage accounts, and app services? Do you need a reliable method of creating the same environment multiple times? It sounds like you need to write some ARM templates!
ARM stands for Azure Resource Manager, which is Microsoft’s deployment and management service for Azure. You use the ARM management layer for creating, updating, and deleting Azure resources. In this article, you will learn more about ARM templates, the core components of writing a template, and how to deploy that template using PowerShell.
What are ARM Templates?
ARM templates are a form of infrastructure as code, a concept where you define the infrastructure you need to be deployed. You no longer need to click around the portal creating virtual machines or writing scripts to deploy a storage account. Instead, the template defines the resources, and the Azure ARM management layer is responsible for creating the infrastructure.
Get the Free PowerShell and Active Directory Essentials Video Course
This concept is called declarative syntax. Declarative syntax is where you state what resources you want to create without writing the sequence of commands to make it. For example, you can easily create a script using the Azure CLI or Azure PowerShell to create a virtual machine. However, you have to include lots of logic and error checking to handle any scenario.
Creating a declarative template defines the environment’s end state, and Azure takes the template as input and creates the environment for you. The ARM management layer will create a new resource if it doesn’t exist or modify an existing resource if the template is different.
Microsoft has introduced a new infrastructure as code language called Azure Bicep. Read more about getting started with Bicep in the article Azure Bicep: Getting Started and How-To Guide.
Benefits of Using ARM Templates
Using ARM templates in managing your Azure environment has many benefits. As already mentioned, using declarative syntax removes the requirement of writing complicated deployment scripts to handle multiple deployment scenarios.
ARM templates also provide repeatable results and are idempotent, meaning you can write and deploy the same template many times to get the same result. You can take the same template you used for the development infrastructure and use it to deploy the production environment. Using the same template ensures the resources and settings are the same.
The Azure Resource Manager also takes care of the order of operations for deployment. As a result, ARM deploys dependent resources in the correct order and, when possible, deploys in parallel for faster deployments. You can also extend the templates with deployments script written in PowerShell or Bash for a complete end-to-end environment setup.
ARM Template Basics
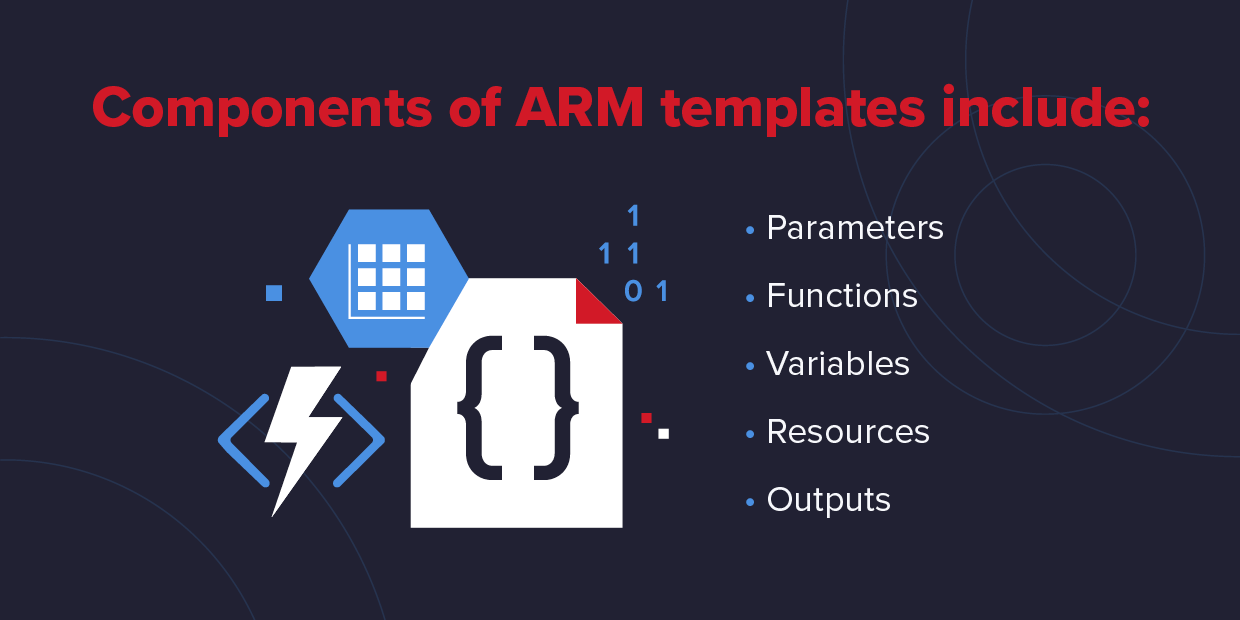
Now that you have an overview of ARM templates, it is time for you to learn the basics of writing your first template. Templates use a JavaScript Object Notation (JSON) syntax that also includes advanced capabilities. Here is a blank ARM template:
{

    "$schema": "https://schema.management.azure.com/schemas/2019-04-01/deploymentTemplate.json#",

    "contentVersion": "1.0.0.0",

    "parameters": {},

    "functions": [],

    "variables": {},

    "resources": [],

    "outputs": {}

}
Parameters
Parameters allow you to pass different values to the ARM template for use during the deployment. Some common examples include names of resources or which Azure region to host them. Parameters enable your templates to be more dynamic and used across different environments.
At a minimum, parameters require a name and a type. Parameter types include strings, arrays, objects, integers, booleans, or a secure string, like a password. Optionally, the parameter also contains a description of how to use the parameter. You can include default values, so you don’t need to provide one at runtime, and you can configure a set of allowed values. Allowed values limit what a person can use for a parameter value. This configuration is helpful if you want to limit what SKUs or locations a person can deploy resources.
The following example showcases different parameter implementations. The VMName parameter allows any string to be used for the virtual machine name. The VMAdmin parameter also allows any value and has a default value, so the person using the template doesn’t always have to provide it.
The VMAdminPassword is a secure string, meaning Azure will not store its value in the deployment history. Finally, VMSize is also a string but only allows specific SKUs for the virtual machine.
"parameters": {

    "VMName": {

        "type": "string",

        "metadata": {

            "description": "The name of the virtual machine."

        }

    },


    "VMAdmin": {

        "type": "string",

        "metadata": {

            "description": "Name of the local virtual machine administrator account."

        },

        "defaultValue": "local_admin"

    },


    "VMAdminPassword": {

        "type": "securestring",

        "metadata": {

            "description": "Password for the local virtual machine administrator account."

        }

    },


    "VMSize": {

        "type": "string",

        "metadata": {

            "description": "Virtual Machine SKU Size"

        },

        "allowedValues": [

            "Standard_D2_v4",

            "Standard_D4_v4",

            "Standard_D8_v4",

            "Standard_D16_v4"

        ]

    }

}
To provide parameter values, you can pass values inline when creating a resource deployment. You’ll see an example of this later in the article.
Another option is creating a parameters file that contains the values. The parameters file also uses JSON syntax. Parameters files also have advanced capabilities such as connecting to Azure Key Vault to extract sensitive information, such as passwords, SSH keys, or certificates.
While not required, ARM template parameter files typically follow a naming convention of including parameters in the template name. For example, if you had an ARM template called virtualMachine.json, the parameter filename would be virtualMachine.parameters.json. If you are reusing a template to deploy different environments, include the environment name in the parameters file. Example file names include virtualMachine.parameters-dev.json or virtualMachine.parameters-prod.json.
Here is an example file named virtualMachine.parameters.json with values for the parameters defined earlier in this section. Note that the VMAdmin parameter is technically optional since it has a default value. If you did not include it in this file, the template uses the defined default value.
{

    "$schema": "https://schema.management.azure.com/schemas/2019-04-01/deploymentParameters.json#",

    "contentVersion": "1.0.0.0",

    "parameters": {

        "VMName": {

            "value": "webapp01"

        },

        "VMAdmin": {

            "value": "svr_admin"

        },

        "VMAdminPassword": {

            "value": "N0t@Rea!P@ss0wrd"

        },

        "VMSize": {

            "value": "Standard_D4_v4"

        }

    }

}
Functions
The next section in the ARM template is functions. Functions allow you to create complicated expressions that you don’t want to repeat throughout the template. ARM template functions are a lot of functions in other programming languages. You call them when you need to run them, and you can pass information to them and expect a return value.
For example, say you need to create unique names for resources. Instead of copying and pasting the same code to generate the unique name, you create a function that makes the unique name. For example, here is a function called uniqueName with a parameter named prefix that returns a unique name using the resource group ID.
Note the namespace value. This value can be anything you want. Functions require a different namespace value to avoid naming conflicts with regular template functions.
"functions": [

  {

    "namespace": "varonis",

    "members": {

      "uniqueName": {

        "parameters": [

          {

            "name": "prefix",

            "type": "string"

          }

        ],

        "output": {

          "type": "string",

          "value": "[concat(toLower(parameters('prefix')), uniqueString(resourceGroup().id))]"

        }

      }

    }

  }

]
Here is an example of calling the uniqueName function passing prodwebapp as the value for the prefix parameter. Instead of passing the string, you can also give a template parameter or variable value.
"name": "[varonis.uniqueName('prodwebapp')]"
Variables
Variables are not much different in ARM templates than you find in other programming languages. Variables contain values that are used repeatedly throughout the template. Like functions, you can use variables to create complicated expressions, so you don’t have to repeat them in the template.
Like parameters, variables have the same data types, such as strings, objects, and integers. You define variables using the colon as the assignment operator. For example, instead of passing the Azure region as a parameter, you can define it as a variable, like this:
"variables": {

    "location": "westus2"

}
To reference a variable later, using the variable() function with the variable name, like this:
"location": "[variables('location')]"
Resources
Finally, arguably the essential part of the ARM template: resources. The resources section defines what Azure resources to deploy with the template. Resources can be anything as small as a network security group all the way to virtual machines, storage accounts, or Azure Functions.
Most resources have a set of common properties. Here is a template of a resource definition with explanations of each part.
"name": “<resource name>”,

"type": "Microsoft.<resource provider>/<resource type>",

"apiVersion": "<api version>",

"tags": {

    "key": "value"

},

"location": "<location>",

"dependsOn": [ ],

"properties": { }
- Name: Name for the resource. This value can be set from a parameter, variable, or set manually.
- Type: The type of resource to deploy. The <resource provider> refers to the high-level family of resources to deploy. Examples include Microsoft.Compute, Microsoft.Storage, and Microsoft.Network. The <resource type> maps out more precisely the resource to deploy. For example, Microsoft.Compute contains resources related to compute infrastructure such as virtual machines, disks, and availability sets. The resource provider and resource type are separated by a forward slash ( / ).
- ApiVersion: The API version determines what properties are available to configure on the resource. As Azure grows, Microsoft often adds new features or settings to resources. The API version combined with the resource type determines what you can configure. The API version is formatted as YYYY-MM-DD.
- Tags: You can tag your resources just like when you create them in the Azure portal. Tags allow organizing resources and are made up of a key-value pair. For example, you can have a tag showing the resource’s environment, such as development or production.
- Location: Location is the Azure region to deploy the resource. You typically deploy resources to the same resource group when you create a deployment (you’ll see a demo of this later). To automatically set the location to the same location as the resource group, use the resourceGroup() function and the location property, like this:
“location”: "[resourceGroup().location]"
- DependsOn: Unlike other infrastructure as code languages like Terraform, ARM templates require that you manually create resource dependencies. Dependencies determine the order Azure should deploy the resources. For example, if an ARM template is deploying a virtual network and a virtual machine, the virtual network must exist first before creating the virtual machine.
- Properties: The properties section contains configuration information for the deployed resource. For example, virtual networks have properties like their address space and subnets. Storage accounts have their access tier and minimum allowed TLS version.
Outputs
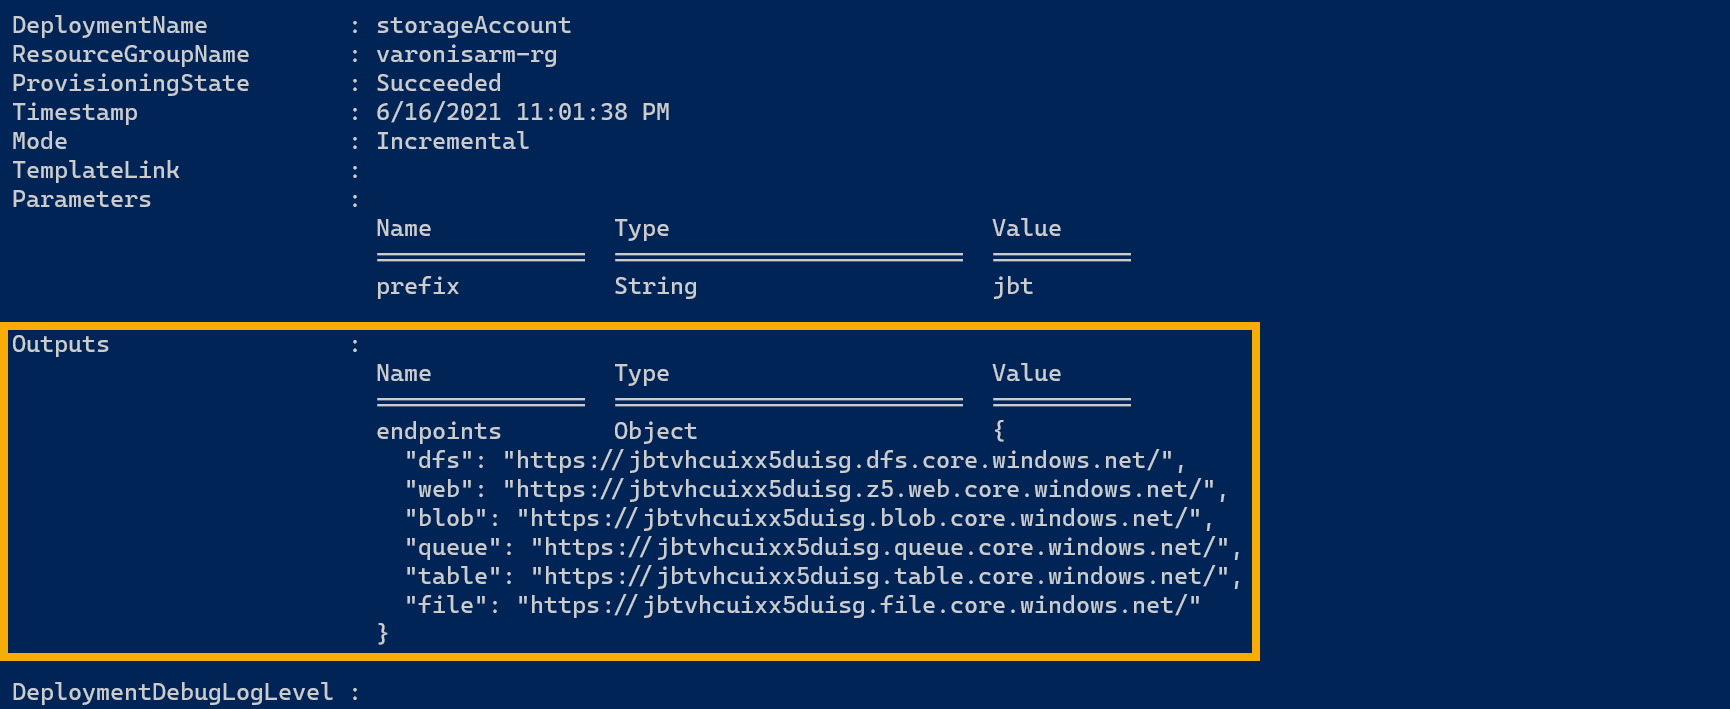
The outputs section defines values and information returned from the deployment. Outputs are helpful for data that Azure dynamically generates during the deployment, like a public IP address.
Here is an example of an output section displaying the connection endpoints for a newly created storage account. The ARM template generates a storage account name in the stgAccountName variable.
"outputs": {

    "endpoints": {

        "type": "object",

        "value": "[reference(variables('stgAcctName')).primaryEndpoints]"

    }

}
Here is the output of the deployment with the primary endpoints listed when deploying the ARM template using PowerShell
How to Deploy ARM Templates using PowerShell
While there are a few ways to deploy Azure resources using ARM templates, this tutorial focuses on using PowerShell to deploy a storage account. To follow along with this tutorial, you will need:
- PowerShell version 5.1 or higher. This tutorial uses version 7.1.3.
- The Azure (Az) PowerShell module. This tutorial uses version 6.0.0.
- An Azure administrator account with sufficient permissions to create resources, such as Owner or Contributor.
Learn how to connect to other Microsoft cloud services in How to Connect to Office 365 PowerShell: Azure AD Modules.
1. Connect to Azure
To use the commands from the Az PowerShell module, you first need to connect to Azure with an authenticated account. Use the Connect-AzAccount command, and PowerShell will open an Internet browser to complete the authentication.
2. Create a Resource Group
Next, create a resource group that will hold the ARM template resources. Use the New-AzResourceGroup command and give the resource group a name and Azure region. Save the command result to a variable named $rg so you can reference the resource group later. The resource group name here is “armdemo-rg” and the location is set to “WestUs2”.
$rg = New-AzResourceGroup -Name armdemo-rg -Location WestUs2
3. Create an ARM Template
You will need an ARM template with a storage account defined to create the resource. Here is a basic ARM template using a single parameter called StorageAccountName to set the name of the storage account. Save this to a file called storageAccount.json.
{

    "$schema": "https://schema.management.azure.com/schemas/2019-04-01/deploymentTemplate.json#",

    "contentVersion": "1.0.0.0",

    "parameters": {

        "StorageAccountName": {

            "type": "string"

        }

    },

    "functions": [],

    "variables": {},

    "resources": [

        {

            "name": "[parameters('StorageAccountName')]",

            "type": "Microsoft.Storage/storageAccounts",

            "apiVersion": "2021-01-01",

            "tags": {},

            "location": "[resourceGroup().location]",

            "kind": "StorageV2",

            "sku": {

                "name": "Standard_LRS",

                "tier": "Standard"

            },

            "properties": {}

        }

    ],

    "outputs": {}

}
Alternatively, you can download this ARM template from this GitHub repository.
4. Deploy the ARM Template
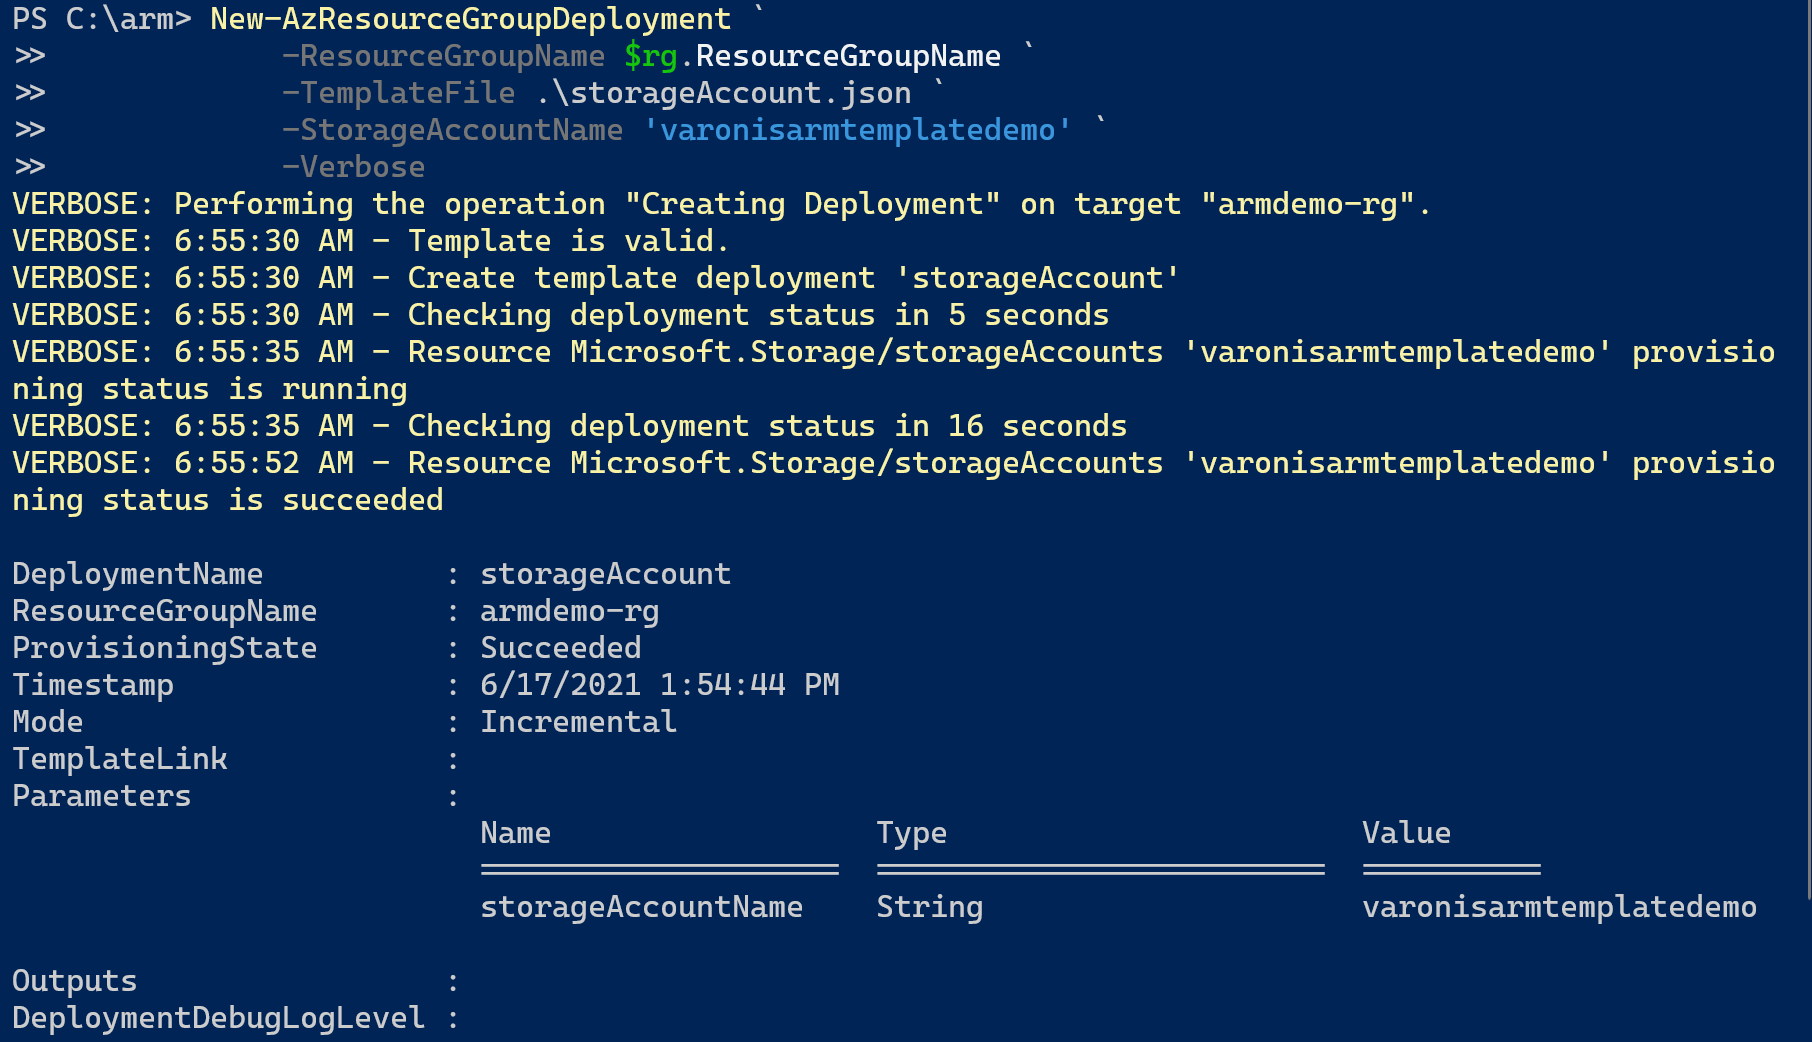
With the ARM template ready, you can now deploy the storage account to your Azure environment. First, use the New-AzResourceGroupDeployment and specify the resource group to deploy to ($rg.ResourceGroupName) and the storageAccount.json template file path. To view the resource group deployment progress, add the -Verbose parameter.
Since the ARM template uses a parameter, you can specify the value like any other PowerShell parameter. Add the -StorageAccountName parameter to the command and enter a valid storage account name. The storage account name must be globally unique across Azure, all lowercase numbers and letters. The storage account name here is varonisarmtemplatedemo.
New-AzResourceGroupDeployment `
-ResourceGroupName $rg.ResourceGroupName `
-TemplateFile .\storageAccount.json `
-StorageAccountName ‘varonisarmtemplatedemo’ `
-Verbose
5. Deploy Using a Parameters File (Optional)
While you can specify ARM template parameters in line with the PowerShell deployment command, this method can be tedious if there are many parameters. So instead, you can use a parameter file to specify the value.
Create a new file named storageAccount.parameters.json in the same directory as the ARM template with this content. Replace the storage account name with one of your own. This tutorial uses the name varonisarmtemplatedemo2.
{

    "$schema": "https://schema.management.azure.com/schemas/2019-04-01/deploymentTemplate.json#",

    "contentVersion": "1.0.0.0",

    "parameters": {

        "StorageAccountName": {

            "type": "string"

        }

    },

    "functions": [],

    "variables": {},

    "resources": [

        {

            "name": "[parameters('StorageAccountName')]",

            "type": "Microsoft.Storage/storageAccounts",

            "apiVersion": "2021-01-01",

            "tags": {},

            "location": "[resourceGroup().location]",

            "kind": "StorageV2",

            "sku": {

                "name": "Standard_LRS",

                "tier": "Standard"

            },

            "properties": {}

        }

    ],

    "outputs": {}

}
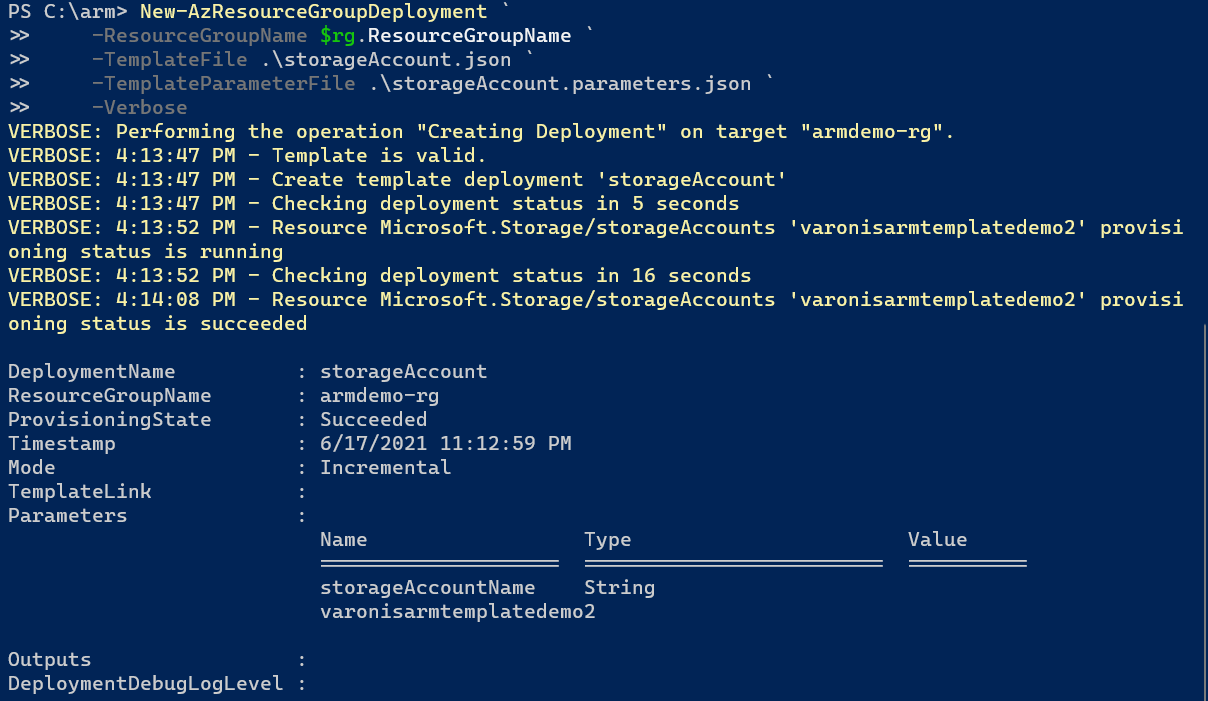
Use the same command in Step 4 and add the -TemplateParameterFile parameter with a value of the new parameter file.
New-AzResourceGroupDeployment `
-ResourceGroupName $rg.ResourceGroupName `
-TemplateFile .\storageAccount.json `
-TemplateParameterFile .\storageAccount.parameters.json `
-Verbose
ARM Deployment Modes
ARM template deployments have two different modes: incremental and complete. The difference between these modes is how the Resource Manager service handles existing resources that are not defined in the template.
For both modes, the Resource Manager service tries to create all the template resources. If the resource already exists and matches the resource defined in the template, the Azure resource is left unchanged. If you went back and ran the commands from the previous section again, Azure would not perform any operations.
If you change one or more property values in a resource, Azure updates the resource with the new value. For example, in the storage account example, you could change the storage SKU from Standard_LRS to Standard_GRS, and Azure will update the resource.
Deploying Using Incremental Mode
For ARM template deployments, the default mode is incremental. This mode means Azure deploys the resources in the template and leaves other resources not specified in the template alone. The previous tutorial demonstrates how this works. You deployed one storage account using the template and then another storage account with a different name in the same resource group.
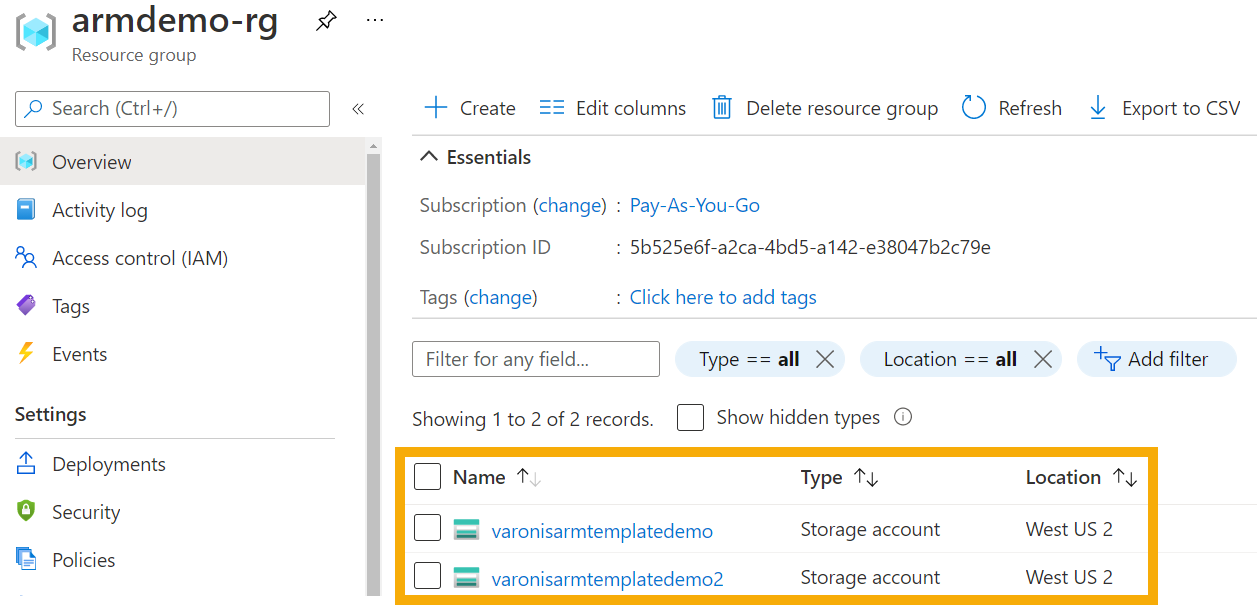
To summarize, the incremental mode deploys (or updates) resources in the resource group but leaves any existing resources alone. While the incremental mode is implicit by default, you can use -Mode Incremental in the previous commands to explicitly specify the deployment mode.
Deploying Using Complete Mode
Complete mode has completely different and potentially destructive behavior. When using complete mode, the Resource Manager service will delete any resources from the resource group specified in the ARM template.
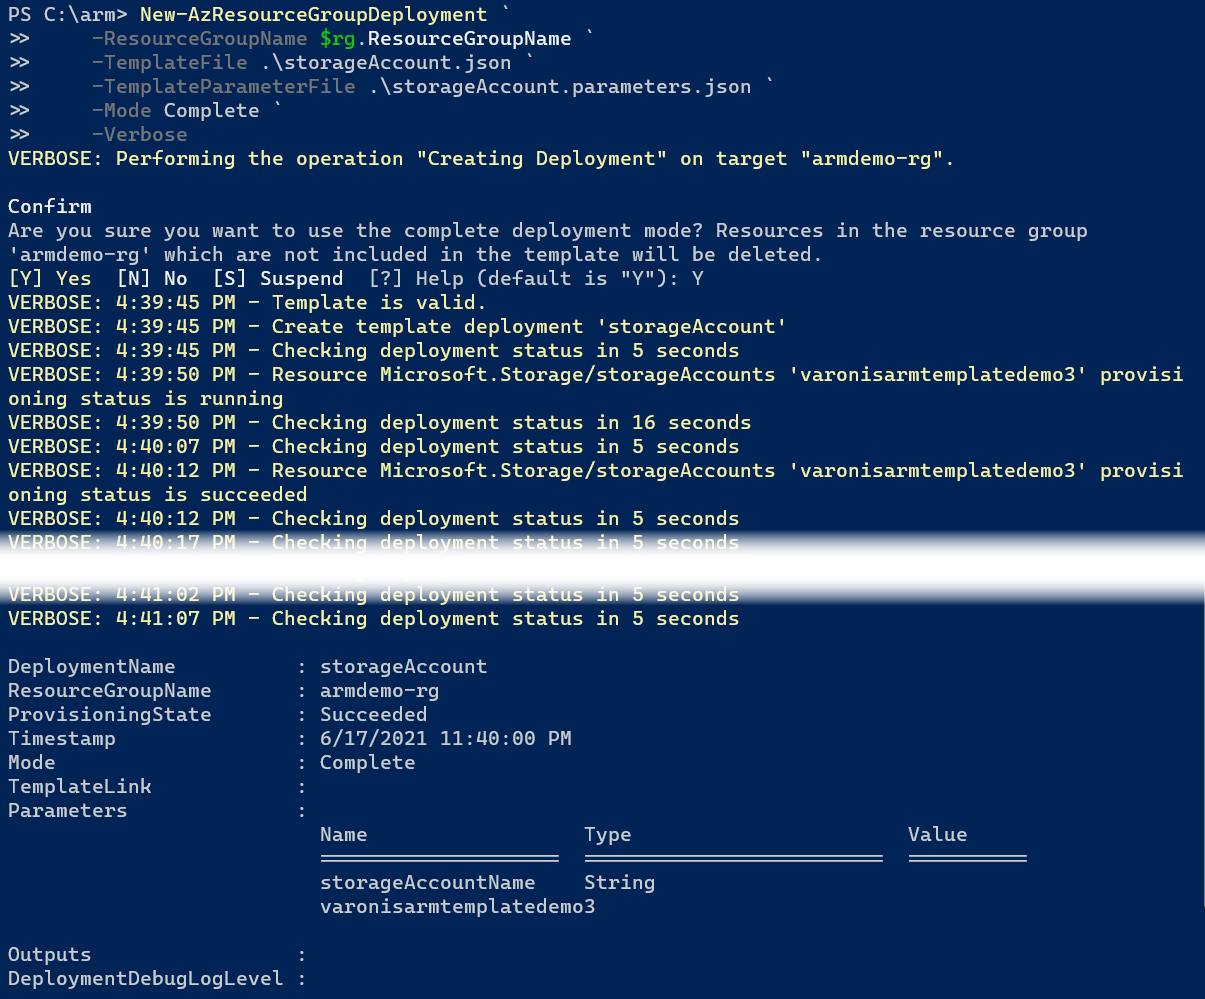
Let’s take a look at an example. First, modify the storage account name in the parameters file from Step 5 with a new name, like varonisarmtemplatedemo3. Then, rerun the deployment command and add -Mode Complete.
New-AzResourceGroupDeployment `
-ResourceGroupName $rg.ResourceGroupName `
-TemplateFile .\storageAccount.json `
-TemplateParameterFile .\storageAccount.parameters.json `
-Mode Complete `
-Verbose
Azure will prompt if you are sure you want to continue with a complete deployment mode as the Resource Manager service could delete resources. Enter Y to continue with the deployment.
Once the deployment completes, check the resource group in the Azure portal. You should now just see the one storage account from the last deployment. This result is because the Resource Manager deleted the other storage accounts as they were not defined in the ARM template.

In summary, complete mode is destructive if you do not define all the resources in the ARM template. Therefore, be sure to review the PowerShell warning when deploying with complete mode and ensure all resources that you want to keep are defined in the ARM template.
ARM Template Best Practices
As you dive deeper into developing ARM templates, there are a few best practices to keep in mind.
You should limit the size of the template to 4 MB. This limit applies to the template after Resource Manager expands the template with iterative resource deployments and values for variables and parameters. You are also limited to:
- 256 parameters
- 256 variables
- 800 resources (including copy count)
- 64 output values
- 24,576 characters in a template expression
For parameters, consider minimizing the number of parameters and instead use variables or literal values for properties that don’t need to be specified at deployment. Use parameters for settings that change based on the environment, such as SKU, size, or capacity. Always provide metadata for the parameter, and use default values to make deployments easier. Default values also provide an example for people using your template.
Create variables when a value is used more than once in the template. If you create a resource property from a complicated expression, consider using a variable to make the rest of the template easier to read.
Always hard-code the template and resource API version, and use the latest API version when creating a new template. When the template works as expected, continue using the same API version so you don’t have to worry about breaking changes in later versions.
ARM Template Resources
Microsoft Learn provides modules to learn more about ARM templates, including developing and deploying more complex environments. Check out their learning path Deploy and manage resources in Azure by using JSON ARM templates for modules that dive deeper into developing ARM templates.
Microsoft’s Visual Studio Code (VS Code) includes extensions to aid in writing ARM templates. Check out this quickstart tutorial on writing ARM templates. In addition, there are many Microsoft and third-party extensions that make writing ARM templates much faster.
ARM Templates FAQ
What is Azure Resource Manager (ARM)?
ARM stands for Azure Resource Manager, which is Microsoft’s deployment and management service for Azure. You use the ARM management layer for creating, updating, and deleting Azure resources.
What are ARM templates?
ARM templates are a form of infrastructure as code, a concept where you define the infrastructure that needs to be deployed. ARM templates use declarative syntax, meaning you define the resources for Azure to deploy without specifying how the resources are created.
What are some ARM template benefits?
ARM templates allow you to define and quickly create resources in Azure. Since you define the resources as code, you can quickly deploy multiple development, testing, and production environments.
Closing
Defining Azure infrastructure using code provides many benefits, such as reusability and standardization. You can use ARM templates not only for the initial deployment of resources but also as ongoing management. By defining your infrastructure as code, you can then introduce other automation, such as using Azure DevOps or GitHub Actions to deploy infrastructure changes automatically.